DIY key holders are an excellent accessory to decorate your entrance hall. Usually, when we get home, we never know where to leave our keys, and we end up throwing them everywhere. DIY key holders are a practical craft and full of potential when it comes to design.
It is one of the easiest crafts to make and sell as you can not easily find key holders in beautiful designs, and generally, they are pretty missing from the market. People always look for ways to decorate the small empty entry hall, but they only find big furniture and ugly hangers that are not practical and useful.
One of the best ideas is creating wooden DIY key holders with hooks and hanging them on the entrance wall. Try carving wood or making some beautiful designs. You will be surprised with the feeling that they will offer in the space.
However, DIY key holders are not only for personal use. Open an online shop, create a business page on websites like Etsy, eBay or Amazon and upload your crafts. People enjoy buying quality, handmade decoration staff, and they are ready to spend plenty of money on a handmade product. Let alone that key holders are endangered.
Below, you will find some outstanding DIY key holder ideas so you will never lose your keys again.
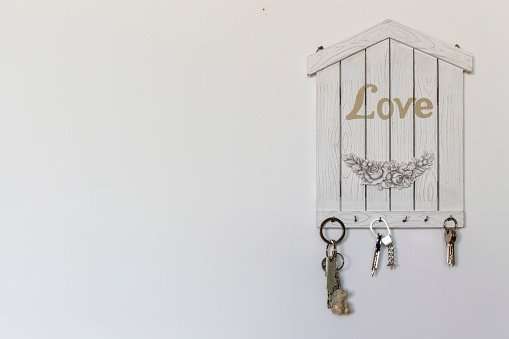
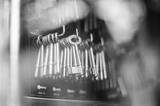
DIY Rustic Wooden Key Holder
Οne of the best DIY key holders to make as a beginner is the Rustic wooden key holder. It is about a practical craft that creates a specific space for your keys, chains, glasses, and other small items.
You can even add a little envelope holder on the top of the wood.
What you’ll need
- Two rustic wood pieces (one for the mainboard and the other for the small shelf piece)
- Wood stain in a color of your preference
- Heavy-duty construction adhesive and clamps
- Paintbrushes
- Some hangers
- Wood spray
- Drill
- Small pot
Guide to follow
Step 1
Start by cutting your wood in the desired size. Adjust the dimensions as it is necessary for your own home and family. Do not go for a small key holder if you are four people in the house. Then stain the wood pieces with your wood stainer. You can also attach the back D-ring hanger.
Step 2
Attach the small piece of wood in order to create the small shelf on the key holder. Apply some glue and keep it stable with the clamps. If you are going to create a small key holder, the glue will be enough; however, if you are making a bigger one, it’s better to nail some small nails.
Step 3
Once the glue is dried out, screw the hooks. If you want to make it more beautiful, try to attach the flower pot clip. Remember to spray the hooks with the same color as the rustic wood.
Step 4
For decoration, you can add a flower pot and give a natural look to your new craft. Although, if you want more space, leave the pot empty. For the pot’s color, spray it with a lighter color to give it a more modern touch. When it is dry, slip it in the clip.

You can also use the hooks for other staff, not only your keys. Add some pens or your glasses to the pot. That rustic wooden key holder will give a different look on your doorstep. Are you ready to impress your guest?
People look to buy wooden key holders, but they are missing from the market. Create your website, add a normal price, and it will definitely sell like crazy.
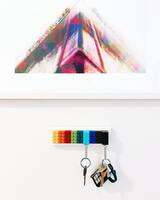
DIY Mail Key Holder
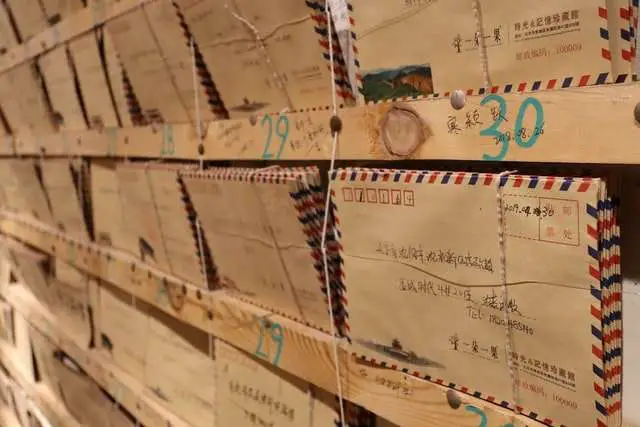
A mail keyholder is a key to the organization in your entrance hall, let alone it adds a nice decorative touch. If you are an organization monster, this keyholder will be your savior and help everything have its own place.
One of the most significant issues in our houses is that we never know where to place our envelopes and keys. The DIY mail key holder will free your hands.
What you’ll need
- Wooden frame
- Ribbon
- Hooks
- Wood painter
- Brush
Guide to follow
Step 1
Take the wooden frame and attach the hooks to the four corners of the frame.
Step 2
Open the frame and nail the ribbons on X-shapes. I’ll recommend going for 3 or 4 Xs. You need as much space as possible.
Step 3
Change the plexiglass and add a wooden back. Then paint your back in a natural color.
Step 4
Paint the wooden frame. Try to pair it with the rest of your furniture or go for something light and eyecatching.
If you want to make it more fun add a banting banner with twine. You can hang more keys on this twine or even create smaller crafts, like mini hearts or start, just for decoration.
The mail key holder can be sold as a valentine’s gift or even as a regular keyholder. It’s time to organize your mailing and bills and never again lose a document.
Charcoal Wall Hanging Key Holder
The charcoal wall hanging key holder is everything you need to give a creative look to your space. It may seem weird, but you’ll be surprised with the results when you finish the project. What is the best way to leave some notes on your loved ones while you leave home for work?
What you’ll need
- A big piece of wood to create the board
- A smaller piece of wood for the shelf
- Chalkboard Paint
- Three screws
- One small key rail
- Picture hanging wire
- Chalks in multiple colors
- Brushes
- Wirecutter
- Drill
- Tape
Guide to follow
Step 1
Paint each side of the woods with chalkboard paint by using your brushes, and let it dry for one day.
Step 2
Count 3 inches from the bottom of the big wood and attach the smaller wooden shelf with three screws. (Make sure it is steady, as you’ll use it for placing much staff).
Step 3
Remove the protective plastic covers from the key rail, and then attach the rail right to the bottom of your charcoal board.
Step 4
It’s time for the D-rings. Drill the D-rings on the back of the wooden charcoal wall hanging, 3 1/2″ from the top and 1 3/4″ from the side. . For your convenience, first you need to stabilize the D-rings with tape and then use the drill.
Step 5
Hang some wire from the D-rings and secure it with some tape. Cut the rest of the wire. Now add all your decoration on your shelf; you can go for a pot or some small statues.
Tip: Wait for at least 24 hours before you write on the charcoal board.
If you want to sell this key holder, you can even sell it as an actual DIY project. Sell the parts with the instructions and give the families a new game to play with. It is an easy DIY project that even kids can complete. For security, instead of a drill, you can try to glue each part.
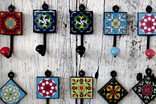
Farmhouse Style Key Holder
When you have a big family, a key holder is definitely required. This DIY key holder project comes from the simple rustic farmhouses that families use to be more than four people. It is an easy project that requires no space and expensive materials.
What you will need
- A frame (the size depends on what you want to write in the middle)
- Chipboard letters
- A piece of burlap (buy twice the size of the frame to avoid mistakes).
- Spray paint
- Hooks
- Glue gun
- Measure
- Stapler suitable for wood
Guide to follow
Step 1
Spray the chipboard letters and the frame with a color of your preference. Once again, go with the same colors as the rest of the house in order to create a harmonious look in your entrance hall.
Step 2
Take the insert of the frame and cut the same size onto thicker cardboard. This step is required because the chipboard letters are heavy.
Step 3
Place the cardboard piece down and cut around the burlap, leaving a good 2-3 inches around each edge.
Step 4
Lay it down and then staple it around one long edge. Staple really close to the edge, so you don’t see the staples from the front. Remember to pull it tightly as you don’t want to end up with a baggy front.
Step 5
Pull again and staple the short edges. Then add some tape on the burlap edges in order to save them from fraying.
Step 6
Place the burlap piece inside the frame and start arranging the letters. Attach the letter with hot glue on the burlap and let it dry.
Step 7
Attach as many hooks as you want, and your farmhouse key holder is ready!
Don’t think it is an old-fashioned keyholder; it looks fantastic and creates a great warm, homey feeling in the entrance. It is easy and quick, and you can sell it as a quality rustic piece of art. People love to buy things reminiscent of their childhood.
If you try to create any of the above ideas, you will make unusual DIY keyholders that will decorate the entrance hall and help on the organization of the small things like your keys and letters.
DIY keyholders are also suitable for selling, as they are pretty cheap to make and profitable to sell. People love to buy small wooden furniture for decoration!
If you love reading this article, do not forget to check out our earlier article, “Easy DIY Furniture Projects.”