
Do Labradors need dog beds? Contrary to how soft and squishy they may seem, yes, they too need a bed for sleeping comfortably. But dog beds are so expensive. Is there any way one can make their own dog bed? Yes, and that’s exactly what I’m here for. Making your do it yourself dog bed for Labrador is not as hard as many people think. You can make one by repurposing old furniture. So there’s no need to spend hundreds on a fancy dog bed.
How do you make a dog bed for your Labrador? Here are a few good ideas to help you get started.
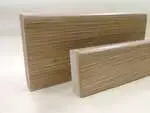
Plywood Do It Yourself Dog Bed for Labrador:

The first dog bed design is made of plywood. All you need is a single piece of plywood and some basic carpentry skills. Although this design is a bit harder than the others, the result is worth it. When finished, this bed will double as an end table or a coffee table.
Step 1: Determine the Size
First things first, you must determine the size of the bed and the table. Most end tables have a height of about 24″. In contrast; most coffee tables are about 18″ -21″ tall. Use these measurements to design the plywood dog bed. In my case, I’m designing the table to 22″ in height.
Step 2: Cut the Plywood
The next step is to cut the plywood according to the heigh. Take a sheet of plywood and, using your tape measure, measure about 22″. Then, with a pencil, mark it off. Now, wear your safety goggles and any other safety equipment and start your circular saw. Cut straight through the line you marked and keep the cut as straight as possible.
Step 3: Saw Off the Panels

Now you want to cut off the side, top, and bottom panels and the back panel. In the case of a 22″-tall Do It Yourself dog bed for Labrador, you’ll need to cut two 18″ x22″ pieces.
For the top and bottom panels, two 20″ x22″ panels will work well. The dimensions will change with the size of your table. If you don’t know the right size, stick to the 22″ size that I’ve chosen.
As for the back panel, you’ll need a single 16.5″ x20.5″ panel. For sizes other than 22″, cut the back panel 11/2″ shorter than the other panels in height and length.
Step 4: Cut Out Circles
Pick up each side panel and use your straightedge or tape measure to mark off the center of the panel. Now, take your compass and place the needle on the center of the panel. Start drawing a circle.
To cut the circle perfectly, it’s best to use a jigsaw and a drill. Using your drill with a ¾” drill bit, drill a hole in the center of the circle. Now, take your jigsaw and place it in the drilled hole. Saw straight out from the hole to the circumference of the circle. Then, cut along the radius. Do this for just the two side panels.
Once done, sand the circles from the inside to get a smooth surface.
Step 5: Attach the Panels
First, you need to attach the side and back panels. Insert a ¼” drill bit into your drill and drill out pilot holes. The holes should be 3/8″ in from both the lower and upper back corners of the side panels.
These holes will act as guides for the screws. Apply wood glue along the edges of the back panel. Attach the back and side panels using trim screws and the pilot holes you just drilled.
For the top and bottom panels, you’ll need to do the same. Except, in this case, the pilot holes will be created 3/8″ from the four corners of the panels.
Now, attach the top and bottom panels with the help of trim screws and the pilot holes.
Step 6: Attach the Base
Finally, you need to attach the base/legs. Cut a 2.5″ strip from the remaining plywood and cut it into four equal pieces of 17″ each. Attach these pieces to the bottom of the do it yourself dog bed for Labrador. Place them 2.5″ away from the edges.
Step 7: Finish Off with Stain and Pillow
As the last step, you can fill any pilot holes with wood putty. Make use of light sanding and apply a suitable stain to the wood. As soon as the stain dries, apply some sealer.
Add in your lab’s favorite pillow, and voila! A plywood dog bed ready for afternoon naps!
No-Sew Dog Bed:
If you’re the type that doesn’t like to sew, then you’re not alone. We also understand the struggle. That’s why we sought out a no-sew dog bed. And wouldn’t you know it? We found just the right choice!

Step 1: Cut the Fleece
What you need for this no-sew do It yourself dog bed for Labrador are two pieces of fleece. The style and color are completely up to you.
Lay a piece of fleece flat on your workstation, and then place the other piece on top of it. Then, you’ll need to cut the fleece to the required length and shape.
Take into account your dog’s size and the size of your current dog bed. Be sure to keep a 5-inch clearance from the sides when measuring, as that’s where you’ll be cutting the fringes. Next, cut out a 5″ x5″ square from the corners.
Step 2: Cut Fringes in The Fleece
The next step is to cut fringes in the fleece. Pick an edge of the fleece material (with one piece on top of the other like before) and start cutting strips into it. The strips can be of any thickness, but between 1.5″ and 2.5″ is the best.
Cut the fringes into the material’s edges so that they are 5″ in length. Do the same for all the other sides.
Step 3: Tie the Fringes
Once that’s done, it’s time to tie the fringes. The fringes are what will prevent the stuffing that we’ll add later from coming out.
Tie them however you want. Braid them before you tie. Do a double knot. But in most cases, it’s best to tie them as close to the base of the fringe as possible. Be sure not to go overboard and tighten the fringes too much. Overly tight fringes will lead to a shrunken bunched-up bed.
Repeat this for just three sides of the dog bed.
Step 4: Stuff the Bed
Before you do the fourth side, start adding the stuffing. We use polyfill as it’s cheap and you can find it easily anywhere.
After stuffing the bed, finally tie the fringes on the fourth side, and you’re done!
Repurposed Drawer Dog Bed:
If you’ve got a couple of old drawers lying around, you can easily convert them into a dog bed. We like the idea since these beds recycle old drawers, and you get to customize them however you like.
The first thing you must do is find a drawer. In my experience, the drawer should be wide and long enough to be comfortable for your dog.
Your next step is to paint the drawer. Now, you can use the default paint job as it is. But if you have an old drawer, it’s likely going to need repainting. Lastly, you’ll need to place a pillow inside the drawer.
Recycled Tire Dog Bed:
If you don’t have an extra drawer, then don’t worry. You can always recycle an old tire. This idea particularly interests me since it makes use of what most people would simply consider junk.
Before you can do anything with the tire, you must first clean it. You can clean most tires with just a simple soapy solution.
Once you’ve cleaned the tire, set it out in the yard under the open sun to naturally dry. Now it’s time to paint the tire. And the last step is to add the pillow.
Memory Foam Topper Dog Bed:

I can tell you for sure that my dog will never sleep on my hardwood floor. That’s why this memory foam topper dog bed is a quick fix to a major inconvenience.
Before we begin, you must gather the right materials. The most obvious thing you’ll need for this is a 1″ thick memory foam topper. Besides that, you’ll need at least 2 yards of outdoor fabric.
Once you’ve gathered your materials, you should now start sewing the fabric onto the topper. Turn the outdoor fabric inside out and cut it to the correct size to cover the whole mattress topper. Sew three sides of the bed and leave one side unsewn. Now, sew on a zipper on the side that you left out.
Finally, it’s time to stuff your memory foam topper inside this pillowcase and let your pet have their afternoon nap.
Recycled Tv Console:
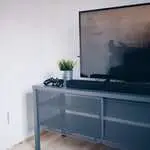
How many of you own those old-timey TV consoles that came in wooden TV stands? If you still have one, you could recycle it into a do it yourself dog bed for Labrador.
Before you do anything with the console, you’ll obviously need to take the TV out. Despite being the first step, it’s the hardest.
Removing the TV tube is a piece of cake. The real challenge comes with removing the rest of the TV. Most TVs are held together by multiple screws and bolts that you must remove manually. But the good news is that once that’s done, the process only gets easier.
Painting the console is the best part. You can be as creative as you want. Although, the way we did it was that we used a solid color and let the intricate antique designs do the talking. Finally, you can add a cushion or a mattress topper for your dog’s comfort.
Recycled Milk Crate Dog Bed:
This is another do it yourself dog bed for Labrador that recycles old material. In this case, you’ll be using a milk crate. Yes, we know. Gone are the times when we used to get milk in crates. But if you happen to have this antique marvel with you, this is a great way to use it.
And the best part is that it requires minimal work. If your crate has permanent milk bottle fittings, then you’ll need to remove them using a saw. Other than that, you just need to paint it and add in a comfy cushion.
FAQs:
Do Labs Like Dog Beds?
Yes. While it may not seem like it, dogs need beds much as humans do. The cold hard floor will only dig into their bones and make them uncomfortable.
What Type of Bed Is Best for Labrador?
Although you’re at liberty to design a bed of your choice, the best kind of bed for Labradors is the raised kind. Raised beds allow Labradors to cool off easily on a hot summer day. And they are suitable for both inside and outside use.
Besides that, any type of bed will work for Labradors, so long as it’s comfy and provides enough room to walk in and out. Avoid beds that have roofs as they may restrict your pet. But if you’re placing the bed near an open window with lots of sunlight, a roof and canopy are good ideas.
What Size Dog Bed Does a Labrador Need?
If you ask any Labrador owner, they’ll tell you that 36″ is the perfect lab dog bed diameter. However, this is only for a fully grown 32-36 kg Labrador. The size will change depending on how old your lab is and how much it weighs.
The best way to guesstimate this is to find your pet when it’s sleeping and make a rough measurement of its body. Then, add a few inches from either side, preferably a foot or two, and design the bed accordingly.
What Is the Best Material to Make a Dog Bed Out of?
For the frame of the dog bed, you can use any material, but wood is the best as it’s cheap and easy to cut. It’s best to apply a layer of protective coating to keep the wood safe when your dog wets the bed.
For the cushion, any fabric and filling work fine. But it’s recommended to use waterproof and weatherproof fabric. This is so that your pet’s saliva does not stain the bed.
Some people opt for memory foam and other orthopedic foams for their labs. While it does make the bed more comfortable, not everyone can afford it.
Conclusion
Making a do it yourself dog bed for Labrador is easier than people think. The simplest dog bed is just a pillow on the floor. But there are many ways you can stylize the bed and recycle old materials.
To recap, we looked at a few different ideas for dog beds, including one that recycled an old tire and a TV console! We also looked at a repurposed drawer dog bed that adds a subtle cozy vibe to your living room.
So what are you waiting for? Get started on your very first do it yourself Labrador dog bed!