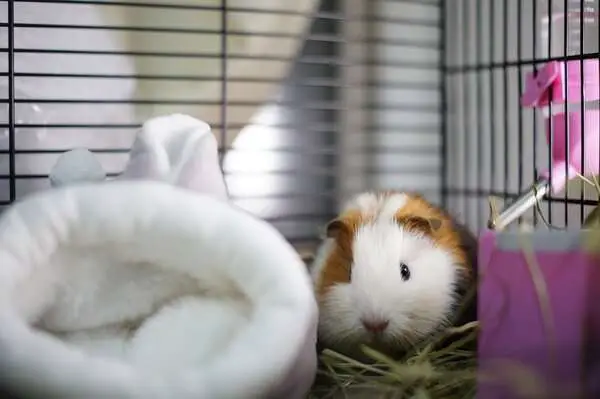
Have you ever thought of building your own do it yourself guinea pig cage? You might be tired of your endless search for that perfect cage for your little friend.
But, unfortunately, the options available on the market might be too small if you want to keep more than one animal. And, of course, they don’t come cheap by any means.
Therefore, creating your own do it yourself guinea pig cage would be a better option. You will always have the option of customizing it to fit your space and needs. This article will share some brilliant ideas to construct your own do it yourself guinea pig cage. And the best part is that most of them do not require expert DIY skills.
So, scroll down and enlighten yourself with some high-level creativity to show your love for your little buddy.
How To Build Your Own Do It Yourself Guinea Pig Cage?
Most people will look for the best option available in a pet store when it comes to a guinea pig cage, and you might not be any different, right? So, going down this route is understandable.
You don’t need to be all crafty and spend a good part of your day building such a cage, especially if you have a busy schedule. But as we mentioned earlier, finding that perfect cage is next to impossible.
They also don’t come cheap. However, going for the DIY route doesn’t need to be time-consuming. If you can take out a few hours of your time, it will be beneficial for you to save your money and, of course, customize the cage as you need.
We will share with you a complete step-by-step guide first using C&C because that is the best option in terms of handling, and you don’t need to have expert-level skills for this project. Then, later on, we will share some other ideas for you to work on.
Making a Do It Yourself Guinea Pig Cage Using C&C (Cubes & Coroplast)
Materials required
Here is a list of all the materials you will need for this C&C do it yourself guinea pig cages.
- One sheet coroplast (a corrugated plastic sheet used to make signs).
- One box of grid cube squares (features plastic connectors used to make storage containers).
- A pack of mid-large zip ties.
- Duct tape.
- Box cutter.
- Pencil.
- A pair of scissors.
- Measuring tape or large ruler.
Step 1 – Measuring it out

So, how big do you need yours do it yourself guinea pig cage to be? You will find 2 x 3 cubes to be the smallest, and they are ideal for a single guinea pig. For two boars, you can go for 2×4 cubes. These cubes will be slightly more than a foot.
Next, you have to decide how tall the sides need to be? Next, you can go for a 6-inch tall side suitable for most guinea pigs. Finally, you can measure out a rectangle that you will place at the bottom.
You can do this by laying out two rows of four cubes side by side and measuring their width and length. The base size will vary based on what size you need your cage to be. Now, measure the distance from each side.
Step 2 – Cutting it carefully
Just like cardboard, there are two layers in coroplast. There are pockets of air between these two layers. If you cut through the top layer, you can bend it to a 90-degree angle.
Therefore, you can use this feature to get those sealed corners. You have to cut half where you will be folding the sheet to make the corners as if you are making an open box with a base.
Step 3 – Fold and tape
After cutting your coroplast, you have to bend the sides and assemble the base. Fold those edges to create the sides working on one side at a time. They will be pretty comfortable as you cut the sides in half.
On the corner, bend that longer side to form a 90-degree angle and overlap the end laying against its adjacent side. Now tape both these sides together.
Step 4 – Connecting the grids
After finishing the base, it’s time for you to assemble the sides that go around the cage’s perimeter. You can use zip ties to connect the top, center, and bottom grids.
It is better to connect each side separately. You can connect two sides with four grids connected across and two sides with two grids connected. Clip those long ends of zip ties using your scissors.
Now assemble your sides separately, and you can assemble them all at once to create a rectangle.
Step 5 – Combining cube squares using coroplast
Now, you only have to attach the sides of the grid squares, forming a rectangle shape fitting outside the coroplast. Then, combine the edges loosely, one at a time, by using zip ties at each corner.
Make sure that you don’t tie any corner too tight. Otherwise, you won’t be able to connect your sides on the cage’s opposite end. And voila, you are done! So, take a step back and cherish your new do it yourself guinea pig cage.
Do it yourself Guinea Pig Playhouse
The most concerning thing about these guinea pig playhouses is that they are pretty big. If you have more than one piggy, you will need even bigger space to have these playhouses, so you cannot place them indoors. Instead, you have to put them outside on your lawn.
But remember that taking care of your piggies is essential. If you tend to spend most of your time outside or outdoors, it’s better to keep them out. It is important because they need your care and attention.
Apart from that, you need to keep your guinea pigs safe outside from any predators and extreme temperatures. So, if you can manage all that, it’s time to work on this outdoor project for your beloved little friends.
Supplies needed
- 1×6 wood planks for the structure and bottom of the cage.
- T1-11 for sides of the cage and 4x4s for holding it up.
- 2×4 pressure treated planks for the bottom front that will be buried partially.
- 2×2 plank for the top front.
- 2x4s for bottom-level doors.
- Coroplast for bottom liner.
- Hardware cloth can be 2 feet wide or 4 feet wide based on the width area.
- Shovel.
- Nails and screws.
- Fabric for an awning.
- Sander.
- Staple gun (heavy-duty).
- Hinges for those bottom-level doors and the lids.
- Hooks for the lids and the doors to close them.
- An outdoor thermometer.
- Glue gun.
- Jigsaw.
Step 1 – Create the hutch
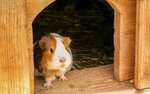
You can use 1×6 wood planks for the floors of the cage. Put the base together you can begin with the side pieces. One side needs to be higher to create a sloped roof. This way, any rainwater or snow will fly off the roof without damaging the wood.
Use another 1×6 plank connecting the sides and place another board in the front. You can use those T1-11 planks for the sides. Finally, cut some plywood to fit the lid or roof. We will talk about the roof in just a bit.
Use a piece of plywood for the back to prevent any gaps between the hutch. At this point, you can decide where you can place it on your lawn. You can determine if you want to put it right next to a wall or your chicken coop.
Prime and paint the exterior. You can use white or any other color based on your preferences and leave the interior without paint if you don’t have time for that.
Once the paint is dried, use your jigsaw to create a window for the hutch. If you live in a colder climate, you can keep the windows minimal to keep the playhouse’s interior warm. Create more windows if you live in a hotter climate.
Make sure to predator-proof the window and add a small piece of 0.25-inch hardware cloth. Attach the wire from the outside using your staple gun. Create a hole in the bottom to add a ramp at the bottom level. And sand around the ramp opening and vacuum to finish it up.
Step 2 – Cut that corrugated liner
You can use a corrugated liner to make it an easier job for you to clean your cage. It will also create a barrier between your piggies and any wood they would love to chew on. It is because you have painted your wood, and you don’t want your piggies to ingest it.
Next, you can shape it according to the instructions listed in the step-by-step guide above. And you might have to shove it in a bit to fit in the plank box you made. Finally, cut an opening at the bottom for the ramp.
Step 3 – Finish it up
Now you can add as many details as you want. Use those planks and cut them to size to create doors and lids. You can also add your 4×4 supports to keep the hutch off the ground. You can use a PVC pipe for the ramp and cut it from one side. Glue it to the bottom of the top tier and let it go down the base if your hutch
Some Other Do it yourself guinea pig Cage ideas

Here are some other fund ideas that you can use to build a cage house to play with your guinea pig.
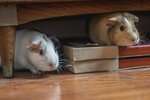
Do it yourself guinea pig cage with storage base
You can create your own do it yourself guinea pig cage with special storage under the base. And the best part is that you can get your kids to help you with this project. This project will make sure that you can conveniently clean your little buddy’s cage at any time without making a mess. But you will need some intermediate DIY skills for this one.
Do it yourself guinea pig hutch
In this project, you can place a hutch for your tiny friend outside on your lawn on the fresh gas. And when the weather turns cold, you can bring the hutch in as it is made of a lightweight lumbar. You can also add a meshed roof with a hinged lid for uncleared airflow and light.
Do it yourself guinea pig shed
Convert your old play shed into a small peaceful place for your guinea pigs to have fun. A shed is not a must for this project, and you can modify it outdoors and indoors. You can go for a single run or two based on the size you desire.
Do it yourself C&C guinea pig cage with tiers
You can make your double or even triple-tiered cage for your guinea pig. This project is best suited for more than one guinea pig.
Do it yourself guinea pig grand hotel
You can make a grand hotel or a more elaborate house for your guinea pigs in this project. But you will need to have more time on your hands to go for this project. This grand hotel for your guinea pigs will be a suitable option for you to palace outside under a shade where they can access the grass in your lawn.
Do it yourself guinea pig mansion
This project will enable you to make a do it yourself guinea pig cage using a dollhouse and other supplies. If you don’t have any woodworking experience, this project will perfectly fit you.
Do it yourself guinea pig cage for pampered piggies
With this project, you can make a large cage with three levels and a front gate. This cage doesn’t have a base, so attaching a piece of vinyl flooring is best to keep your floors safe and for convenient cleanup.
Cool do it yourself guinea pig house
In this project, you can make a cool-looking house that is fun for you to create and for your piggies to live in. When you are done with your project, it will look like a dollhouse, and you can get as creative as you want.
FAQs
What kind of wood should I use to make a do it yourself guinea pig cage?
Lumber is the ideal choice for this purpose. You can find various lumber from your local home improvement store. You can go for aspen, basswood, linden, kiln-dried white pine, or poplar to make you do it yourself guinea pig cage.
How much does it cost to make your own do it yourself guinea pig cage?
While there are different projects that you can work on and add more details, which will result in additional costs. You can conveniently make a do it yourself guinea pig page for less than USD 50. If you already have the tools required to work on such a project.
How much space do five guinea pigs require?
5ive of these piggies will need a cage that should be approximately 16 feet long. But if you have space for more, you can build an 18.5 feet long cage for better accommodation.
Can my guinea pigs have sticks in their cage from outside?
Yes, any untreated wood is fine for them to have. But make sure that they don’t have cedar or pine because these woods have strong odors that might cause lung damage. Cardboard, paper towel, and toilet paper are also fine but get rid of any adhesive as much as possible.
Conclusion
A do it yourself guinea pig cage is not that difficult to make on your own. You need a little bit of DIY skills to add more details. Some projects don’t need DIY skills, and beginners can comfortably handle them.
Guinea pig cages don’t come cheap if you plan to go for a ready-made one from the market. However, with these DIY projects, you can certainly save some money and have a work of art that you can show off to your friends.