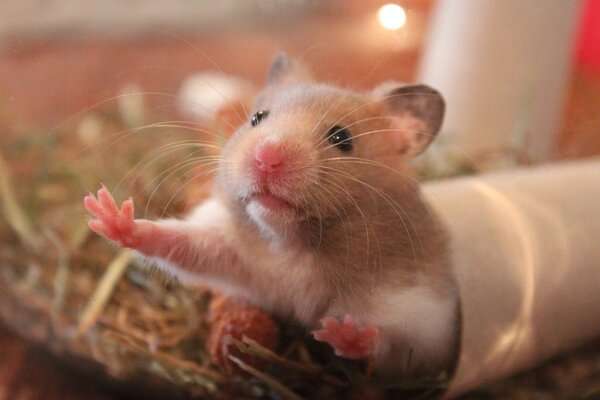
You might be thinking, why make a do it yourself hamster house cardboard? Hamsters are lovely little critters that many of us like to keep. But do they want to be kept by us too?
For instance, hamsters can travel up to eight miles out in the wild to find food and water. So now, you can imagine how they would feel being kept in a cage.
Even if these little hamsters do not understand freedom, they still love us as their owners. But they still get pretty bored because they need activity. Therefore, you can create something for them to play around and this is where a do it yourself hamster house cardboard comes in.
In this post, we will show you how to make this do it yourself hamster house cardboard and some others to make a hamster play area using different materials.
How to Make a Do It Yourself Hamster House Cardboard?

You want your pet to be as comfortable as possible in its new home, no? And you might have noticed that your hamsters are chewing on everything all the time. It is something they do when they are bored as their last resort.
You can provide your little buddy with a new pastime so it can stop chewing all day. Make a do it yourself hamster house cardboard for your hamster to have a fun activity area to keep it happy. How about a cardboard treehouse?
The best thing is that to make this do it yourself hamster house cardboard, you do not need to be an expert DIYer, and only your basic knowledge will work. But you will need a couple of days to complete this entire project.
Required resources
It will cost you nothing. You will not need anything other than what you already have in your home. Paper towel/toilet paper tubes.
- Glue
- Scissors
- Small tea boxes
- Pen/pencil to work
- Ruler/measuring tape
- Flour
Instructions
The idea here is to make access tunnels using those tissue tubes and stations using those cardboard tea boxes.
Step 1
Begin by making glue by using one cup syrup and two cups of flour. If you want to thin the glue, you can add small quantities of water when needed.
Step 2
Cut the newspapers in small strips and immerse these strips into the glue that you made.
Step 3
Now take your cardboard boxes and make a marking on both with the bottom of those tissue tubes. And then cut a hole on these markings with the help of scissors.
Step 4
When you are done cutting holes, insert the tissue tubes in these holes. Now close the joints using newspaper strips and let the glue dry.
Step 5
Once the glue is all dried up, arranging those stations isn’t so that each has at least one access tunnel going into it.
Step 6
Make another hole within this station to see one tube coming from underneath and the other from the side.
Step 7
You can make semi-circular cuts right near the base of each vertical tube. It will make the space for the hamster to move around conveniently.
Step 8
It is time to arrange these stations within your hamster’s cage. Ensure that some of these stations need climbing, and some just need passing in and out.
Step 9
Make windows in some of these stations that allow your hamster buddy to pop out its head to have a look around.
Step 10
Do not worry that your little buddy will start chewing on the maze house. It is because you have used non-toxic glue, and it will not harm your pet.
Step 11
Now, it is time to make a small burrowing station with the help of a show box that has a lid on it. You can cut holes at each end of this box. It is going to be sufficiently large to allow easy passage of our friend.
Step 12
You can fill this station with hamster litter and make sure that you clean this box weekly or as often as it needs to.
Hamster Play Area Ideas
So, what can you use to make your hamster play area? You can use a range of different things for this purpose, and here are a few inspirations for you to get started:
The slide
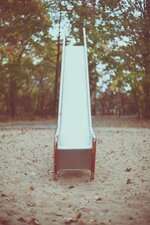
How can there be a playground that has no slide in it?
- You can begin by taking two whole sticks, and four you can split in half using pincers.
- Take those two long sticks and place them parallel in front of you.
- Build a ladder using hot glue to form ladders using alternate pieces of wood.
- Now, take six whole sticks and divide them into equal parts. Use them to form a rectangle and hold all the sides together with one another.
- You have the ladder and part to slide and slip. Just allow it to dry before you can place it in the play area of your little friend.
Using a plastic container
You can take any plastic container and use it as a temporary cage, especially when cleaning the original one. Therefore, you can conveniently buy yourself some time to clean out the real habitat of your hamster without boring it.
You can provide it with a playground to spend some time while you are doing the cleaning job. Also, these plastic boxes need to come with handles, so you can conveniently move the box with your hamster inside it using these handles.
- You can cover the bottom of this box with wooden shavings
- Place a couple of attractions for your hamster friend. You can place a wooden bridge, or a straw birdhouse, a couple of pieces of spare tubes, or a little gnawing radish toy.
- Next, connect a water bottle holder that you can make out of clay.
- Add a bathtub made of larger stones and pebbles, and your hamster will be more than happy to spend time in its new playground.
Play area out in the open
As it will be out in the open and not inside the cage, ensure the area is safe for your hamster. Therefore, you need to find an ideal place to make this open play area.
With the open space, you will have the opportunity to conveniently clean it and remove the items and place them back in. You replace all the attractions inside this area. Make sure to leave some area for your hamster to move around those attractions, or it will lose interest.
The tunnel

It is time to introduce a small tunnel within the playground.
- You can benign by taking those tissue tubes and vinyl glue with half a cup of warm water.
- Form a mixture of vinyl glue and warm water and, using a brush, fill the tissue tube’s inside. It will ensure that your hamsters do not chew on the cardboard sides. And you can sanitize these tubes pretty quickly too.
- Now use fake moss and cover the side that will be more visible in the play area, leaving the area without the moss and glue that is not exposed. And your attraction is ready.
Make swing with sticks
It might be a slightly more complicated project for you to handle. But you can swing using sticks.
- You can remove the knots using a cutter and make them smooth so your hamster does not end up hurting itself.
- Also, make sure that these sticks are dry to prevent them from developing any mold.
- These sticks need to be 6 to 7 centimeters long.
- Now, take a rope and glue it on the sides. Next, use 10 centimeters of a string with the sticks. This way, you will make the base of the swing.
- Now you can use hot glue and form 3 squares.
- Then join them to form a bridge that will act as the supporting structure of your swing.
- You can join two squares on the sides and one right on top to put everything together.
- Just tie the square above the structure using a tiring, and your swing is ready.
What If the Hamster is Not Playing in the Playground?
But what if it doesn’t feel like playing in the play area? Now, let us talk about that fateful moment. It is time to tell your little friend to play in the play area that you have just constructed for it. But you see that it is not playing with any of the attractions you have developed for it.
Do not let the anger and regret consume you at this point. You can eventually make your little friend play in the play area that you have created for it.
- Remember how you got your hamster to get acquainted with you in the beginning.
- Think of the time when you were afraid of it and couldn’t take it into your hands.
Stay focussed on following these steps to help it get along in the play area you have created. First, you can take some sunflower seeds or other things that your little friend loves. Then, you can put it right in front of the first attraction.
Allow your hamster to become more familiar with the attraction. You can leave this food there for a few days in front of that attraction. Then, pamper your little friend with it and get it to start working with the attraction.
Just avoid leaving it alone when it is playing. If something bad happens, it is not going to be fun again. If you have some other chores to deal with, you can use a plexiglass box and build this play area inside it.
But a cage is a better option because it will have all the fundamentals like the bowls, the drinker, and that wheel with some spaces to rest.
FAQs
Is cardboard safe for hamsters?
Many hamsters eat cardboard, and that is pretty much okay. It is a regular hamster behavior of your little friend to eat cardboard in its cage. They chew on it and make nests using it. Most hamsters enjoy chewing on cardboard regardless of their breed.
Can I use a plastic box for my hamster?
Yes, you can create your own affordable hamster cage using a plastic box or a bin. You will only need a few supplies and some tools to complete the entire project. If you construct a proper habitat for your hamster and provide adequate amounts of food and water with appropriate bedding, you can create a healthy environment for your little buddy.
My hamster chews a lot; what can I do to prevent it from escaping?
You need to make sure that your hamster cage has a tight lid on it. Also, make sure that your hamster is not able to chew it easily. You can take care of this as your hamster can use these vertical stations for getting away.
Where should I keep my hamster treats?
Ensure that you place your hamster pet treats up in towers. These treats can be apple slices and baby carrots. You can also fill any of those upright stations with a seed-based diet for your hamster. It will enable your friend to climb up to get to it.
What do I need to be careful about when building do it yourself hamster house cardboard?
All the tissue tubes you are gluing should be dried adequately to ensure that they do not lose contact. To get better results, let the glue dry overnight or even longer if it is needed.
Keep in mind to take care of these stations and prevent them from chewing or becoming wet. As soon as you see any sign of damage or wear, just take it out of your hamster cage and replace it.
Just keep checking on your hamster, and you will notice that your little effort to make your hamster happy will really work out. Just keep these stations clean and see if they need replacement.
Final Word
Making do it yourself hamster house cardboard is straightforward. You can use various materials to make its play area.
But it is a fun way to keep your little friend happy and prevent them from getting bored. Of course, you have to make sure that you use non-toxic glue in all your such projects, so nothing is harmful to your hamster if it decides to gnaw on something.
Just give it some time to get acquainted with the attraction you have built, and it will eventually start having fun in your new play area.