A radon mitigation system helps to decrease radon fixations in the indoor demeanor of a structure. You can use a few strategies to bring down radon levels in your home.
Homes with water control systems, such as sump pumps, French channels, or an exterior loop of buried water-collection pipe, can be effectively mitigated by connecting the active soil depressurization system to the existing water control system.
We will share some necessary steps to handle this issue on your own and some general tips that you need to adhere to get through the project successfully.
So, read on to find everything about do it yourself radon mitigation.
What is Radon and What Causes It in the Houses?
Radon is a radioactive gas that naturally occurs. It comes with a natural breakdown of uranium, radium, or thorium within water, rock, and soil. From there, it mixes within the air you breathe.
This naturally occurring gas moves up right from the ground into the air and directly into your home. In most cases, it will travel through those cracks and crevices, and other holes in your foundation.
This gas is inert, odorless, tasteless, and colorless. Numerous studies have found it is one of the leading causes of lung cancer as it comes directly from the earth.
Radon can be dangerous if you smoke or used to smoke previously. If you burn coal, wood, or any other substance that adds some particles to the air, your chances of radon poisoning are higher.
Therefore, testing your house for radon is a must and highly recommended by the Centers for Disease Control and Prevention (CDCP).
Radon Reduction Techniques
There are a few methods you can use to ensure radon reduction, and these are as follows:
● Natural ventilation
With the help of natural ventilation, you are replacing indoor air that has radon in it with the outside air, and it neutralizes the pressure. You can do so by opening your windows.
The best part is, you won’t have to go through any installation costs because houses come with windows, and you can naturally ventilate them.
You will have to take care of extreme weather conditions because you can’t let your windows open all the time if it’s raining, snowing, or scorching heat.
● Forced ventilation
You can also go for forced ventilation with the help of an air conditioning HVAC system in your home. If you don’t have these systems installed in your home, it is great to have them as they don’t cost much either these days, fitting various budgets.
● Heat recovery ventilation
This technique features a heat recovery ventilator or a heat exchanger. It uses heat within the air that is benignly exhausted to warm up the incoming air.
This entire heat exchange process is reversed during the warm weather, and the air being exhausted is used for cooling down the incoming air.
It will save around 50 to 80 percent of coolness or warmth in any other ventilation system. The installation of this device in your HVAC system will cost you a few more bucks as well.
● Covering the exposed earth
Another technique is to cover the exposed earth that is there inside your basements, cold rooms, drain areas, storage areas, as well as sums. And don’t forget about those crawl areas too.
Some skillful do-it-yourselfers or professionals must perform this. If you are looking to cover small areas, it’s not going to cost you much. But using new slabs will significantly increase your costs.
● Sealing those cracks or openings
Doing this will make sure that this dangerous gas doesn’t have much flow inside your house. You can hire professional assistance for this, but that can be relatively costly. However, you can do-it-yourself, but you need to be highly skilled at such tasks. So, if you have prior experience, then doing it yourself will significantly lower the cost.
● Other techniques
There are some other techniques as well. These include the likes of drain tile suction, sub-slab suction. Block-wall ventilation and house pressurization. But all these methods are strictly professional, and you should not try them on your own. These techniques require experts, and you should leave it to them.
Do it yourself Radon Mitigation – Step-by-Step
So, how do you lower radon in your house? We will solve this problem in this section and elaborate in brief detail with our step-by-step guide.
Step 1 – Get the initial reading

The first step you need to take is to find the radon levels in your home. And for that, you will have to take the radon reading using a radon detector kit. Different types of radon detectors are available on the market, and you can choose one based on your budget.
But the ideal kit is the one that you can use for a long time to come. So, focus on quality rather than price. Short-term detector kits are going to be used only once, and then they are useless.
You need to check the radon levels before the installation, during the installation, and after the entire procedure. So, you need to invest in a long-term detector.
Step 2 – Determine the age of your house

Knowing how old your home is going to help you in planning for the entire mitigation system installation. If your house is more than 50 years old, the concrete slab in the foundation is not ideal for radon mitigation.
The perfect fill here is porous, and it will let the gas breathe. You will be able to suck the gas out easily. An old filling will be dense and have wet rocks or earth, and sucking gas through that will be difficult.
Step 3 – Determine the structure and soil
You will also need to determine the nature of the soil underneath your house and the structure of your house. If there are sections of your home right after their initial construction, you will have to do it yourself radon mitigation from different areas of your home. There might be air pockets underneath, and you will have to deal with them separately.
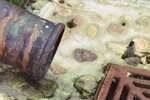
Apart from that, the current drainage system in your house needs to be examined as well. If you have a French drainage system or a drain tile, you will have to drill through your foundation slab.
You will also have to check the soil composition on which your house is built. You might have to call the builder of your home and ask about the type of soil.
If you can’t do that, you can drill a hole and see it for yourself. It needs to be like gravel and is suitable for airflow. Earth or wet sand is not going to ensure good airflow. So, you will have to drill a hole of at least a couple of feet so the pipe can pull out a sufficient amount of air from beneath.
Step 4 – Planning for the pipe
For this, you need to go for a PVC pipe, and it needs to be three to four inches in diameter. So, you will have to drill a home that can accommodate such a pipe. Just make sure you don’t run the pipe from your living areas because it will not look good.
The basement is an excellent option to consider, or you can go for the garage. The closet is another good option for this. Just make sure the pipe runs inside the house to keep condensation in control and allow the system to last longer.
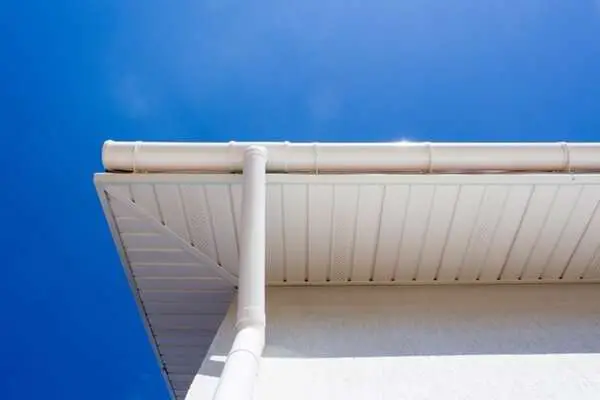
The pipe has to come out of the roof at a particular point that is at least ten feet away from any of those windows horizontally. This pipe will expel radon, and it shouldn’t be too close to the window if it gets back into the house. It must also extend more than one foot above the surface of the roof.
Step 5 – Placement of the fan
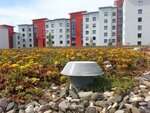
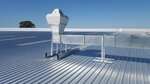
The fan needs to be outside the living area of the house. A good place is your attic or your garage. This fan will protect you from any leaks as it can result in the pooling of the gas inside your home. This is precisely why you need to keep a check on the radon levels. Your fan in an outtake hole will guide you about the accurate size of PVC pipe you need.
Step 6 – Drilling the holes
You have to look for a proper location within your foundation for drilling. The best spot here is to choose near a wall as you can bracket your pipe conveniently to it. Go for a bigger hole than your PVC pipe diameter.
Now drill a hole using your jackhammer and keep drilling through it until you find the fill present below. You will have to take the necessary steps if this fill is dense. You will need a roto driller for creating an initial ground hole right underneath the foundation hole.
Step 7 – Laying the pipe and sealing the holes
The next step is to lay your PVC pipe from your roof to your basement. Make sure the entire system is sealed correctly. You will also have to attach the fan to the piping structure. You can insulate the pipe of your house at different temperatures in varying areas.
Now, it’s time to seal the holes using hydraulic cement and caulk and seal the foundation and the roof. You can use some backer rod to fill the space between the PVC pipe and the foundation hole and then apply some hydraulic cement.
Step 8 – Testing your system
In the end, it’s time to test the system that you have just installed and check for any errors. Turn on the system’s fan, and at another small hole within the foundation, place a burning piece of paper. The smoke that it will release should be sucked into the hole.
And this will tell you that your system is working aptly. In the end, you can fit a manometer right on the piping in your basement. And this will tell you whether the system is creating enough pressure for sucking up the air from the ground.
FAQ
What are the possible symptoms of radon in my home?
The most probable symptoms of radon present in your home are shortness of breath or a random cough that goes worse with time. You will also feel congestion or pain in your chest. Apart from that, you will notice trouble while swallowing or hoarseness. If you smoke and know that you have been exposed to high radon levels, you need to quit smoking immediately before symptoms worsen.
Where is this radon most frequently found?
Radon gas is naturally occurring from the natural breakdown of thorium, radium, and uranium. Radon is mostly present in igneous soil and rock. Well, water is another common source of radon.
What homes are most susceptible to radon gas?
All homes are susceptible to this gas, and these include new and old homes, drafty homes, houses with or without basements, and insulated homes. The construction material for building the house also contributes a lot towards radon levels.
Are short-term radon detectors any good?
It’s not a matter of the quality of radon detection that these devices do. Short-term radon detectors can only be used once. You will need a long-term sensor so you can check the radon levels before, during, and after the installation of your do it yourself radon mitigation system. Hence, it is better to go for a long-term detector as it will deliver more value.
Conclusion
Radon is a dangerous radioactive gas, and it needs to be removed from your home’s indoor air. You need to install a do it yourself radon mitigation system to tackle the issue and keep your family safe from its hazards.
Going for a do it yourself radon mitigation solution will save a lot on your installation costs. But you will need enough skills and expertise to handle the project on your own. If you can’t, you ought to go for professional assistance.