Plant décor is rapidly becoming a huge trend, with thousands of homeowners and aspiring indoor gardeners transforming their living spaces into a personalized jungle filled. Unfortunately, many homeowners, especially urban dwellers living in tiny apartments, don’t usually have the space or conditions to accommodate multiple plant pots and vases.
However, does this mean they should give up on the green touch they’ve always wanted to add to their living spaces?
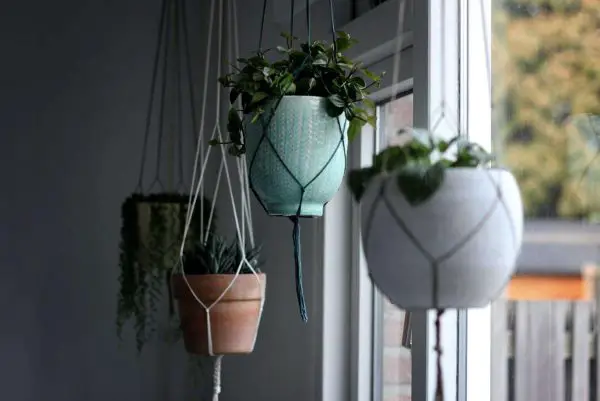
We certainly don’t think so. Instead, we believe they should look for a smart alternative to classical pots and the traditional way to place plants in their homes, such as a rope plant hanger. This simple yet effective solution is aesthetically pleasing and helps reduce clutter and overcome space restrictions by allowing gardeners to elevate their favorite plants and hooking them to their ceilings.
If you’re looking to do the same and add some charm, warmth, and style to your cramped-up living space, keep reading our detailed guide on how to make a DIY hanging planter with a simple rope and hang your favorite houseplants with ease.
What Is a Hanging Planter?
A hanging planter is a suspended container mainly used for growing indoor plants vertically in cramped up living space by suspending them from ceilings and other surfaces using chains, nets, and ropes. The containers used to hold the plants can be anything, from traditional clay pots to baskets, plastic bottles, and ceramic vases.
Benefits of a Hanging Planter
In case you’re still on the fence regarding whether or not a DIY hanging planter is worth your time and investment, here are the three main benefits they offer:
Improved Curb Appeal
Whether you’re looking to sell your property or a cost-effective way to spruce it up, hanging planters can improve your home’s curb appeal and potentially turn it into an urban jungle, adding a sense of mystique to your overall ambiance. As mentioned above, it’s a smart alternative to traditional pots and vases that take a lot of horizontal space.
Enhanced Air Quality
By strategically placing hanging planters near windows and other openings, you can filter out pollutants and dirt particles naturally and improve the overall air quality of your home. Green indoor plants can also help lower the temperature and control the humidity of your indoor environment.
Fewer Pests
Another great advantage of opting for hanging planters is isolation. Traditional pots and garden soil can hold many unpleasant surprises, such as bugs, snails, and other crawling insects. By keeping your indoor plants suspended, you can prevent creepy crawlers, at least those at ground level, from lurking into your pots and wreaking havoc on your herbs and ornamentals.
Indoor Plants to Grow in Rope Hanging Planters
Before you can transform your living space into a vertical green paradise, you need to decide what type of indoor plant you want to grow in your planters according to your style requirements, function, sunlight conditions, and your planter’s location.
For instance, if you’re hanging the planter near a sunny spot, you should opt for plants that thrive in full sun, such as:
- Jade plant
- Aloe Vera
- Croton
- Cacti
- Snake Plant
- Money Tree, etc.
Similarly, if you’re looking to fix your DIY hanging planter in your kitchen, bathroom, or any living space with little or no sunlight access, here are some indoor plants that thrive in the shade:
- Fern
- Bleeding Heart
- Foxglove
- Pothos
- Devil’s Ivy
- Pansies
- Chinese Evergreen
- ZZ Plant, etc.
Of course, there are hundreds of other options you can opt for, depending on your location. We recommend researching online or heading to the nearest nursery to choose the best options according to their care requirements and your style preferences.
How to Make a Rope Plant Hanger
Now that you know what a hanging planter is, its main benefits, and the type of plants you can grow in one, it’s time for the main event. So, without further ado, here’s how to make a DIY hanging planter with a simple rope:
Tools/Equipment
- Drill and Drill Bit
- Ladder/bench (depending on the ceiling height)
- Scissors
Supplies
- A plant pot (ceramic, plastic, clay, terracotta, etc.)
- Potting soil
- A screw hook
- Acrylic paint (optional)
- Jute rope
- Scotch tape
- A low-maintenance plant
Steps
Paint Your Pot (Optional)
Many indoor gardeners like to customize their pots and vases with their décor. If you’re looking to do the same, all you need is some paint and a paintbrush. However, you should choose the paint according to the potting material. For instance, you can use acrylic paint for terracotta pots. For plastic, you can use spray paint.
Cut the Rope to Size
The first step in making a DIY hanging planter is cutting eight equal pieces of rope, depending on the shape and size of the pot you’ve chosen. Generally speaking, the larger the pot, the more rope you’ll need to make the knots as well as to hang your planter with the hook. For instance, if your ceiling is 12 ft above the ground, your rope’s length should be at least 4-5 ft from the ceiling for convenient access. However, this is not mandatory.
Secure the Rope to the Pot’s Base
Next, turn your plant pot upside down and place a thick knot at its center. Once you’re done, divide the strands into four groups of two. This will turn the rope into a net-like structure dividing the pot into equal quarters. To ensure the rope is secure, wrap the pieces with scotch tape and tie a small knot in each group before turning the pot back upright.
Tie the Pieces Together
Next, hold all of your rope ends in one hand and tie a knot at whatever height you’d like to hang the planter. Make sure each of the ropes is even in length. Once you’re done, remove the tape from the knots and trim off any excess. Now, your DIY hanging planter is ready.
Install a Screw Hook in Your Ceiling
If you have a wooden ceiling, all you need to do is climb up a ladder or bench until you reach the part where you want to insert the screw hook. Hold the screw by the hook and press the tip against the ceiling. Depending on the force you apply, it should screw right in. However, if you have a concrete or cinder ceiling, you’re going to need a drill and drill bit to drill a hole into the location you want the hook. Once you’re done, pull slightly down on the hook to make sure it’s secure and will hold the planter. All that’s left to do from there is hang your DIY hanging planter and pat yourself on the shoulder.
Conclusion
And there you have it – a complete guide to making a DIY hanging planter with a simple rope. With this information, you’re barely an hour away from improving your home décor with your favorite house plants and using your limited space to its maximum potential. So, what are you waiting for? Head to the nearest nursery and hardware store to get everything you need, or simply order them online to get started with this exciting DIY project.