Every savvy gardener or farmer knows that they need high-quality soil to successfully grow their crops and ornamentals. Thus, they invest in expensive gardening equipment and solutions, such as fertilizers, pesticides, and compost. Unfortunately, most of these solutions are temporary and can add up to a high recurring cost. For years, most people have accepted this is a gardening norm, but times are changing. Today, there are many unconventional gardening solutions you can opt for to improve your garden soil’s health, including the use of biochar.
Organic biochar has become a trending buzzword in the sustainable agriculture industry due to its unique environmental benefits. However, this incredible product is relatively new and unfamiliar to even some of the most experienced gardeners and farmers. Regardless, those who know about it and use it claim it may hold the key to reducing greenhouse gases and waste, improving crop and garden yields, and optimizing soil water and nutrient retention.
If you’re intrigued by all of this and looking for a new DIY challenge to improve your garden while saving money, then keep reading as we’ll be sharing a detailed guide on what biochar is, its benefits, and how to make DIY biochar at home.
What is Biochar?
When a dry organic matter like leaves, coconut husks, bones (from food waste), wood, or manure undergoes pyrolysis (or thermal decomposition in high heat, low oxygen environment), it releases different chemicals, gases, and water. Still, it leaves behind its microscopic pockets of carbon which can trap nutrients, bacteria, and moisture – all essential ingredients for building nutrient-rich soil. Unlike compost or conventional fertilizers, biochar does not decompose. Instead, it locks the carbon in the soil, meaning it can last for years and continue to provide near-magical potency in your garden. The biggest example of this is “terra preta†or black earth in the Amazon basin formed thousands of years ago by natives who burned jungle plants, branches, and other materials and combined their remains with manure to boost soil fertility.
Benefits of Biochar for Your Garden
Are you unsure if biochar is the soil amendment solution you need to improve your garden? Here are some of its most notable benefits that contribute to sustainable agriculture:
- Biochar has a negative charge that attracts and holds on to soil nutrients.
- Biochar enhances your soil’s water holding capacity to over 200%, which can help lower your watering frequency as well as the water bill.
- The micro carbon chambers created by biochar are adsorbant, meaning they can hold water, oils, proteins, and other nutrients produced by soil microbes to feed plants.
- Biochar slows down the breakdown of organic matter in the soil, meaning your compost or fertilizer can last much longer.
- Biochar only needs to be used once and can last for decades, depending on your area’s weather conditions.
How to Make Biochar At Home
While there’s nothing wrong with buying biochar from a store or online, making your own can help you reap even more benefits, not just in terms of cost. For instance, you can repurpose your home and garden waste and lower your carbon footprint. So, without further ado, here’s everything you need to know about making DIY biochar at home with simple ingredients: case using ABS laminated plywood to secure your fragile items and equipment:
Tools/Equipment
- Personal protective equipment (heat-resistant gloves, trousers, boots, safety goggles, mask, etc.)
- Water bucket
- Hose
- Small fan
- A drill and drill bit
- A biochar kiln (drum, barbeque grill with a cover, steel can, etc.)
Materials
- Biochar fuel (twigs, sticks, bones, wood, manure, offcuts, etc.)
- Water
Steps
Assemble the Biochar Reactor
This first step in making DIY biochar is to get all the supplies and equipment you need. If you have a barbeque grill with a cover, you’re all set. Alternatively, you can use a steel can or drum. Make sure you drill a few holes on the opposite side of the container since pyrolysis still requires a fair amount of oxygen. If you don’t want to drill holes, you can use a small fan instead. Lastly, fill a bucket with water and keep it nearby to control the fire.
Fill Your Kiln with the Biomass and Light It
Next, fill your metal container with the biochar fuel you plan to use and add some flammable fuel (kerosene, petrol, lighter fuel, etc.) to the mixture. Once the fire is lit, wait for the mass to burn thoroughly before adding more mass on top of it. You can turn on a small fan to speed up the combustion.
Limit the Oxygen Supply
Once you’ve added more biomass to your kiln, start excluding the oxygen by covering it with a lid. If you’re using a barbeque grill, close the grill cover and wait. After 15-20 minutes of burning with little oxygen, the biomass should turn to charcoal.
Cool Down the Charcoal and Crush It
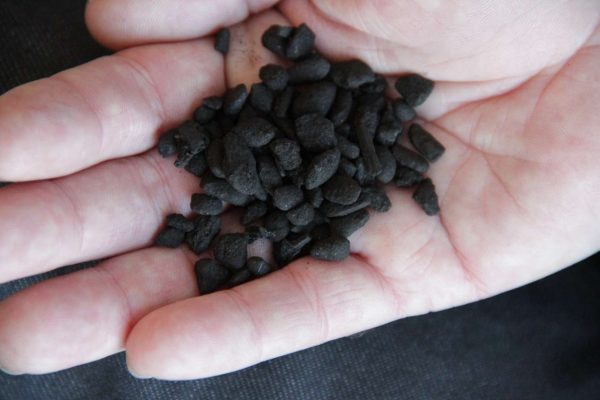
At this point, your charcoal needs to be cooled down. You can either wait for nature to cool it or intervene with a few splashes of water. Remember, you’re not trying to drown the charcoal, so make sure you control how much water you add to the kiln. Once the charcoal has cooled down, you need to crush it while it’s still wet to settle the dust particles. If you have a cement mixer, you can use it to your advantage and make a fine, highly-abrasive biochar powder. If you don’t have one, grab an empty bag and a hammer and fill the bag with as much charcoal as you can and unleash your inner Thor with some hard strikes.
Mix with Fertilizer and Compost
Your DIY biochar is now ready. Now, all that’s left to do is add to your soil. While there’s nothing wrong with adding directly to the soil, you can spice up its effectiveness by mixing it with some compost or fertilizer. This will proactively charge the biochar with microbial life and allow it to do its magic. Once you’re done, add the mixture to your plant pots and open soil.
Conclusion
And there you have it – Everything you need to know about making DIY biochar at home. As mentioned in the beginning, biochar is a relatively new product with limited commercial availability. Therefore, learning how to make it yourself at home using lawn waste can help you reap the many benefits it has to offer. Moreover, you can save hundreds of dollars on store-bought soil amendment products by taking the DIY route. More importantly, you’ll be joining an impressive rank of eco-conscious DIYers doing their part in combating global warming.