
Choosing the Right Paint
Consider the Room’s Function
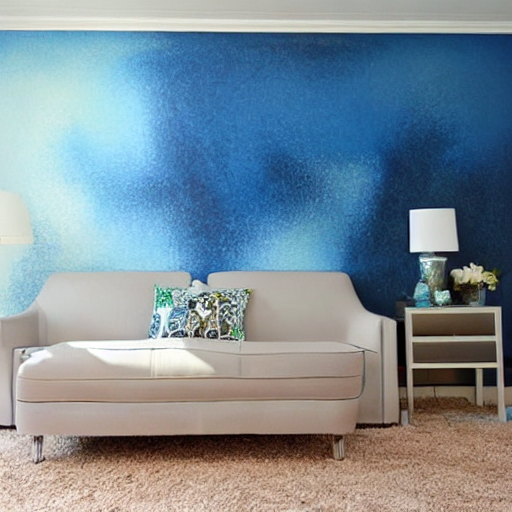
When choosing a paint color for a room, it’s important to consider the function of the space. For example, if you’re painting a bedroom, you may want to choose a calming color such as blue or green to promote relaxation and restful sleep. On the other hand, if you’re painting a home office, you may want to choose a color that promotes productivity and focus, such as a shade of yellow or green. Additionally, if you’re painting a high-traffic area, such as a hallway or entryway, you may choose a durable paint finish that can withstand wear and tear. By considering the room’s function, you can choose a paint color and finish that not only looks great but also enhances the overall functionality of the space.
Determine the Paint Finish
Before you start painting, it’s important to determine the type of finish you want for your walls. The finish you choose will affect the overall look and feel of the room. Several types of paint finishes are available, including matte, eggshell, satin, semi-gloss, and high-gloss. Matte finishes are great for hiding imperfections on walls, while eggshell finishes offer a slight sheen and are easy to clean. Satin finishes are popular for bathrooms and kitchens because they are durable and moisture-resistant. Semi-gloss and high-gloss finishes are ideal for trim and doors because they are highly reflective and easy to clean. Consider the function of the room and the amount of traffic it receives when choosing a paint finish.
Test the Paint Color
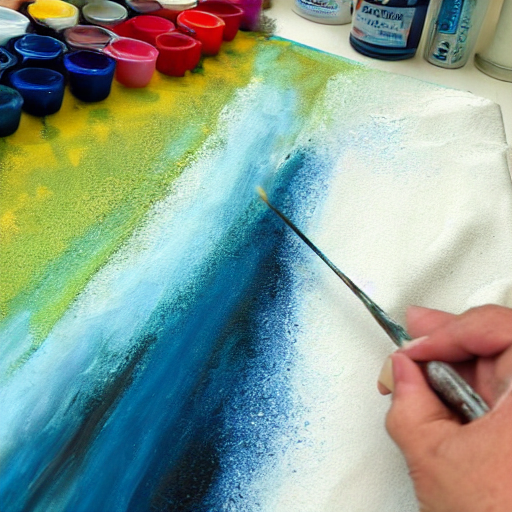
Before you start painting your walls, testing the paint color is important. This will help you ensure that the chosen color is the right one for your space. To do this, purchase a small sample of the paint color you’re considering and apply it to a small area of your wall. Allow it to dry completely and observe how it looks in different lighting conditions throughout the day. This will give you a better idea of how the color will look in your space and help you avoid any potential regrets. Testing the paint color is a simple step that can save you time, money, and frustration in the long run.
Preparing the Surface

Clean the Surface
Before starting any painting project, cleaning the surface thoroughly is crucial. A clean surface ensures the paint adheres well and has a smooth finish. Start by removing any loose paint or debris using a scraper or sandpaper. Next, wash the surface with soap and water to remove any dirt, grease, or grime. For tougher stains, use a water and trisodium phosphate (TSP) solution. Rinse the surface thoroughly and let it dry completely before starting to paint. Remember, a clean surface is the foundation for a flawless finish.
Repair Any Damage
Repair Any Damage:
Before you start painting, repairing any damage to the walls or surfaces you’ll be working on is important. This includes filling holes or cracks with spackle or putty, sanding down rough spots, and cleaning any stains or marks. If you skip this step, your finished paint job will look uneven and unprofessional. Take the time to prepare your surfaces before you start painting properly, and you’ll be rewarded with a flawless finish lasting for years.
Sand the Surface
Sand the Surface:
Before you start painting, preparing the surface by sanding it is important. Sanding helps to remove any bumps, rough spots, or old paint that may be present on the surface. It also helps to create a smooth and even surface for the paint to adhere to. Use fine-grit sandpaper to sand the surface in a circular motion. Be sure to wipe away any dust or debris with a clean cloth before painting. Sanding may seem like an extra step, but it can make a big difference in the final result of your painting project.
Prime the Surface
Before you start painting, it’s important to prime the surface. This step is crucial as it helps the paint adhere better and ensures a smooth and even finish. If you’re painting over a previously painted surface, clean and sand it thoroughly to remove any bumps or imperfections. For new surfaces, such as bare wood or drywall, use a primer specifically designed for those materials. Apply the primer evenly with a brush or roller, covering the entire surface. Allow the primer to dry completely before moving on to the next step. Taking the time to prime your surface properly will make a big difference in the final result of your painting project.
Painting Techniques
Use the Right Tools
Using the right tools is crucial to achieving a flawless finish when painting. A high-quality paintbrush or roller will ensure the paint goes smoothly and evenly without leaving any streaks or bubbles. It’s also important to choose the right brush, roller size, or shape for the job. A smaller brush is ideal for detailed work, while a larger roller covers large areas quickly. Additionally, investing in a good quality paint tray and a drop cloth will help keep your work area clean and tidy and prevent accidental spills or drips. By using the right tools, you’ll achieve a professional-looking finish you can be proud of.
Apply Paint in Thin Coats
When it comes to painting, applying thin coats of paint is always better than thick ones. Not only does it help the paint dry faster, but it also ensures a smoother and more even finish. To achieve this, use a high-quality brush or roller and apply the paint in long, even strokes. Avoid overloading the brush or roller with too much paint, leading to drips and uneven coverage. Instead, lightly dip the brush or roller into the paint and spread it evenly. If you must apply a second coat, wait for the first one to dry completely. By following these simple tips, you can achieve a flawless finish that will make your DIY project look like a professional did it.
Use a Paint Grid
A paint grid is a simple yet effective way to achieve a flawless finish. A paint grid is a rectangular plastic or metal tray that fits inside a paint bucket. It has a series of ridges that help remove excess paint from the brush or roller, ensuring an even distribution of paint on the surface. To use a paint grid, dip the brush or roller into the paint and then run it over the ridges to remove any excess paint. This will prevent drips and ensure a smooth, even coat. Plus, using a paint grid is much less messy than pouring paint into a tray, making it a great option for DIY painters.
Cut in Before Rolling
Cutting in before rolling is an essential step in achieving a flawless finish when painting. This technique uses a brush to paint the edges and corners of the walls, ceiling, or trim before using a roller to cover the larger areas. By doing this, you can create a clean and crisp line between the painted and unpainted surfaces. To achieve the best results, use a high-quality angled brush and take your time to ensure that the paint is applied evenly and smoothly. Once you have cut in, you can use a roller to quickly and efficiently cover the rest of the surface, resulting in a professional-looking finish.
Avoid Lap Marks
Lap marks are a common problem when you paint over a partially dried area. It’s important to maintain a “wet edge” to avoid lap marks while painting. This means you should paint in sections and work quickly to blend each section into the next before it dries. Using the right amount of paint and avoiding overworking the brush or roller is also important. If you end up with lap marks, you can try blending them out by lightly going over the area with a dry brush or roller. However, prevention is key regarding lap marks, so take your time and work carefully to achieve a flawless finish.
Blend Brush Strokes
It’s important to blend brush strokes to achieve a smooth and flawless finish when painting. To do this, apply the paint in long, even strokes. Then, use a dry brush to blend the strokes’ edges lightly. This will help to eliminate any visible brush marks and create a seamless finish. It’s also important to work quickly and avoid overworking the paint, as this can cause it to dry unevenly and create a patchy appearance. Blending brush strokes can help you achieve a professional-looking paint job with a little practice and patience.
Paint in the Right Order
Painting in the right order is crucial to achieving a flawless finish. Start by painting the ceiling first, then move on to the walls and trim. This order ensures that any drips or splatters from the ceiling or walls can be easily covered when painting the trim. Additionally, painting the trim last allows for a more precise and clean finish, as it is easier to cut in around the edges of the walls and ceiling. Remember to let each coat of paint dry completely before moving on to the next, and use a high-quality brush or roller for the best results.
Clean-Up and Maintenance
Clean Brushes and Rollers
Cleaning your brushes and rollers is essential to achieving a flawless finish. After each use, thoroughly rinse your brushes and rollers with warm water and mild soap. Use your fingers to remove any excess paint, and then rinse until the water clears. For stubborn paint, you can use a brush comb or a wire brush to remove it. Once clean, gently shake off any excess water and reshape the bristles or nap the roller. Hang your brushes and rollers to dry in a well-ventilated area, away from direct sunlight or heat sources. Proper cleaning and storage of your painting tools will extend their lifespan and ensure a smooth application for your next project.
Store Paint Properly
Storing paint properly is crucial to ensure its longevity and quality. Always make sure to seal the lid of the paint tightly can to prevent air from entering. Store the can in a cool, dry place, away from direct sunlight and extreme temperatures. If you have leftover paint, transfer it to a smaller container to reduce the amount of air in the can. Label the container with the color and date of purchase for future reference. By following these simple steps, you can ensure that your paint stays fresh and ready to use for your next DIY project.
Touch Up as Needed
After completing your painting project, inspecting the surface for any imperfections or missed spots is important. Don’t hesitate to do so if you notice any areas that need touching up. Use a small brush or roller to carefully apply paint to the affected area, blending it with the surrounding surface as much as possible. It’s always better to touch up as needed rather than leave a flawed finish. It’s much easier to fix small touch-ups than to redo an entire wall section.
