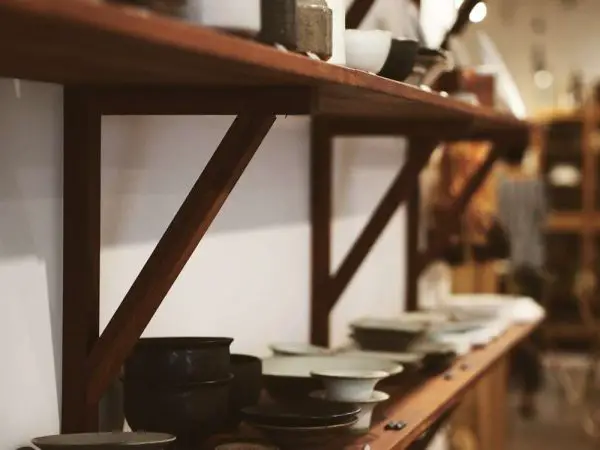
Whether you have leftover wood from a project you were working on, found some 2x4s lying around, or simply want a DIY wood shelf for your kitchen to increase the shelf space, making it is easier than you think. All you will need is some elbow grease, determination, and the right set of tools to make it perfect.
While the choice of wood is important when making a DIY wood shelf, it is more important to have the right set of tools. These wood shelves may perhaps be one of the easiest DIY projects that you work on, but at the same time, very rewarding.
This article will help you make one of the easiest yet equally beautiful wood shelves not just for your kitchen but anywhere around the house.
Making a DIY Wood Shelf For Your Kitchen
Even with a 2×4 plywood, these shelves will have a weight capacity of over 4 tons (8,000 lbs.), at least. So, whether you are making a shelf for edibles, for your silverware, or even the china, rest assured that these shelves can handle it fairly easily. You can even mount a beer barrel on it without giving it a second thought! Just make sure that the barrel is secure when installing it on the shelves.
The primary factors that will impact the overall capacity of your wood shelves include:
- Where you install it
- The type of wood you use
- How deep you drill the bolts holding your shelves.
Installing on concrete walls or your studs is much sturdier than installing them on the drywall, for example. This is because drywall can’t bear as much load as the studs or concrete can. The bolt you use is equally important. We recommend using wall anchor or expansion bolts for best results. These bolts expand inside walls, gripping them tightly to ensure better security.
Whichever wood you use, make sure you finish it properly. You can either oil it or apply varnish for a matt or shiny finish. To protect your shelves against water damage, we recommend varnishing the wood before installing it.
Do It Yourself Wood Shelve for Your Kitchen
Tools You Need
- Angle grinder or another power cutter. You can also ask your local hardware to cut the wood according to your needs.
- Drill machine
- Screwdriver set.
- 60, 80, 120, 240, 400, and 600 grit sandpaper
- Pen or marker
- Measuring tape
- Spirit level
- Stud finder if you are installing the shelves on drywall.
Material You Will Need For a DIY Kitchen Wood Shelf
- Wood planks or sheets, cut to the size you need. We are using 3 1×10 pine boards. The thicker your wood, the more weight it can withstand.
- 18 2 ½ inch hexagonal or screw bolts.
- 18 expansion bolts
- Nine metal shelf brackets. (you can reduce this to 6 if you don’t plan on putting heavy items on the shelves).
- Wood stain, paint (oil-based), or varnish.
We believe that all this shouldn’t cost you more than $100 in total.
Making a DIY Wood Shelf For Kitchen
- Start by preparing the wood planks or sheets. The first thing you need to do is sand them properly. If you have a sander, now would be the best time to pull it out.
- Start by cleaning the surface entirely with 60-girt sandpaper. Be careful not to sand the wood too much. Two passes with a sander should be enough.
- Follow up with 80-grit sandpaper, 120-grit, 240, 400, and 600-grit paper. This should give you a clean, smooth surface. You can go higher for a glossy finish, but your wood may get darker because of it. The varnish will give you that glossy finish you are looking for, so going for higher grit paper now doesn’t make much sense.
- Use the stud-finder to find three studs – or as many as needed for your shelves. Two would be enough if you just want to place decorative items on the shelves, but we went with three, just to be safe.
- Once found, measure the distance between them. Place the metal shelf brackets on the underside of your wood planks corresponding to the stud distance and mark where you need to drill holes.
- Make sure that you are holding the plank level with the help of a spirit level. You may need assistance with this part. Mark the holes you need to drill in your wall/studs.
- Time to drill holes. Make sure you use a bit that is smaller than the bolts you will be using. Use the 2 ½ bolts for your wood planks and the expansion bolts for the studs.
- Now, insert the expansion bolts in the studs and make sure they are secure.
- If you need to make any adjustments to the shelf (plank), now is the time to do so. Use your angle grinder, table saw, or any other cutting tool you have access to.
- Now, stain or varnish your wood for the final stage. Stain the wood with a soft, lint-free cloth or apply varnish for better effect. We used a spray-on varnish, which took about 1-2 hours to dry up completely. Use whichever varnish you choose, and let your shelf sit while you work on the brackets. We varnished two out of three planks because we needed one for measurements and leveling.
- Once ready, mount the metal shelf brackets with the help of expansion bolts. This can be a grind, especially if the hole you drilled isn’t as wide. Make sure the bracket is secure once mounted. Ideally, these brackets are strong enough to hold your weight as well.
- Place the dry plank on the brackets and make sure it is level. Place the spirit level to see if any side needs adjustments. At this point, to make adjustments in the level, you will need to add washers beneath the shelf when installing it. Count how many washers you need underneath each shelf.
- Once the shelves are dry, mount them gently on the brackets to avoid scratching them. Simply place the planks and align the holes you drilled for the bolts with the empty space in the bracket.
- Insert the hexagonal or screw bolts in the wood first.
- Insert as many washers as needed to level the surface.
- Through the wood, insert the bolt through an empty space in the bracket.
- Screw on the nut onto the bolt.
- Use a wrench to hold the bolt in place while you tighten the nut with another or vice versa.
- Repeat the process for all the holes drilled.
And you’re done! You have yourself sturdy and level shelves without having to spend hundreds of dollars on them! As you get comfortable with this DIY wood shelf, you can also use the tools and material mentioned above to make a range of different wood shelf designs.
Let us know what you think of this DIY wood shelf guide or if you have any special requests for us! Happy building!
