
Cutting boards are available in different materials, but nothing beats the quality of hardwood cutting boards. Not only are they long-lasting, but they also make chopping fruits, vegetables, meat, etc., more effortless. Making meals can be a breeze with the right cutting board. But instead of purchasing a ready-made wooden board, you can make DIY cutting boards for your kitchen use.
This article will learn how to make a wooden cutting board using hardwood. But before that, let’s look at all the benefits of using wooden boards.
Benefits of Using Wooden Boards
Using wooden cutting boards offers numerous benefits to those who love spending time in the kitchen. Here are the top benefits of using wooden boards:
Durability
Wood provides a solid surface for cutting vegetables, fruits, and even raw meat. But that’s not all.
They are so popular because of their durability. It can withstand knife strokes and does not wear even with heavy use. By reapplying proper finishes regularly, your cutting board can last for many years to come.
Hassle-Free Maintenance
Hardwood cutting boards offer hassle-free maintenance because they’re so easy to clean. You don’t need to scrub your board for hours to get rid of scraps of wood. Since they’re easily cleaned, these cutting boards don’t accumulate bacteria or other harmful organisms. Most wooden cutting boards are also safe to use in the dishwasher.
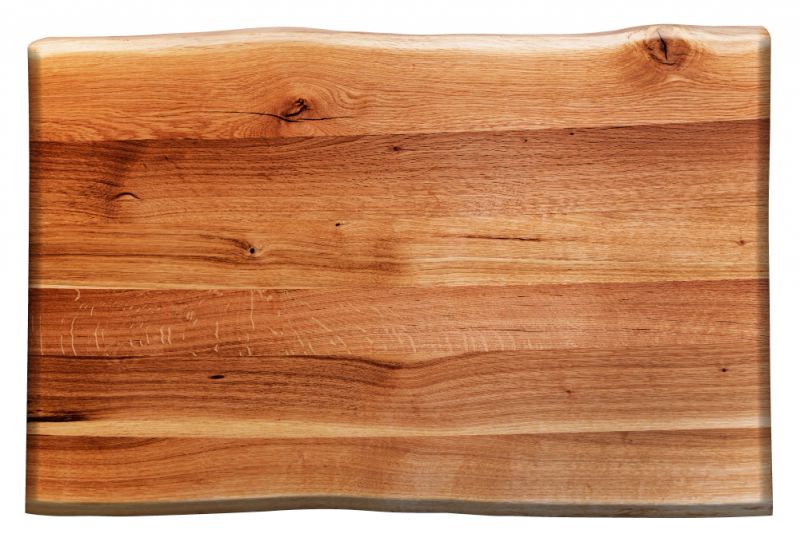
Aesthetics
When you talk about hardwood cutting boards, you can’t overlook their aesthetics. They are simple yet elegant at the same time and add style to your kitchen. You can use it as a display for improving aesthetics and as a cutting board for its inherent functionality.
How to Make DIY Cutting Boards
Making DIY cutting boards is relatively straightforward if you have all the essential supplies. Here is everything you need to know about making cutting boards for the kitchen:
Materials
- ¾ inch densely cut hardwood (1 piece sized 16 x 6-3/4 inches, two pieces sized 16 x 4-3/4 inches, and two pieces sized 16-1/8 x 3 inches)
- Scrap wood
- Parchment paper
- Wood glue
- Two pieces of 3-foot-long pipe clamps
- Four pieces of 12 inched bar clamps
- Orbital sander
- Sanding pads with 80, 120, and 220 grids
- One inched chisel
- Finishing material (food-safe)
Steps
Once you have collected all the supplies, you can start your DIY project by following basic steps. Here’s what you need to do:
Step 1: Assemble the Wood
You don’t want any warping in your wood. To avoid this, purchase your hardwood from a cabinet store or a mill.
They have more precisely cut wood than your local hardware shop. To assemble the wood, you first need to place two pieces of scrap wood on your workstation.
After that, place parchment paper on top of the scrap wood. This will prevent your hardwood from sticking to the scrap wood when the glue is applied. Take the wood piece sized 16 x 6-3/4 inches and use it as the center of your cutting board. Next, use the two pieces sized 16 x 4-3/4 inches and place them on the sides of the centerpiece.
Step 2: Glue the Pieces Together
The next step is to glue the assembled pieces together. Use glue that’s resistant to heat, solvent, and mildew. It should also be waterproof. You can easily find such wood glues in any hardware store.
Apply a sufficient amount of glue on the right side of the centerpiece and spread it across using your fingers. Quickly press it against the piece on the right side and let it stick. After that, take the piece on the left side and apply glue to its right side. Once again, spread the glue using your finger and press it against the center piece’s left side.
Step 3: Clamp the Boards
After glue application, use two pipe clamps on the horizontal side of the board. On the vertical size, use four bar clamps, two on either side. When using the clamps on seems, make sure you use small pieces of parchment paper. It ensures that any glue that oozes out does not stick to the clamps.
If possible, after placing all the clamps in position, let them sit for a few hours or even overnight.
Pro tip: Wet a rag and wipe off any excess glue that comes out during this step. Removing dry glue is difficult, so it is better to get rid of as much of it as possible when it is still wet.
Step 4: Remove Excess Glue
Even if you remove excess glue while it is wet, some traces will be left behind after it dries. After the glue is completely dry, you can remove the clamps. But before proceeding to the next step, make sure the dried glue is scraped off. You can use a chisel for this step.
But make sure that you remove the glue gently, or it can damage the wood. Make sure you check all the seams for signs of dried glue.
Step 5: Attach the End Pieces
After scraping off all the excess glue, attach the end pieces sized 16-1/8 x 3 inches. Attach the end pieces just like the main pieces were attached. For this, you need to repeat steps 2, 3, and 4. Once the glue has dried and you’ve scraped off the excess, you can proceed to the final step.
Step 6: Apply Finish
Before applying the finish, make sure you sand the front and back of the cutting board using an orbital sander. Start with 80-grid sandpaper and repeat with 120 and 220 grid sanding pads till the surface is smooth without any residual glue. Also, sand the edges to soften them. Sharp edges can cause nasty cuts.
After you’re done sanding, apply a food-safe finish to the front and back of the board. Food safe finishes include beeswax, walnut oil, mineral oil, etc. But make sure that you reapply the finish periodically to keep it safe for a long time.
Once the oil-based finish is fully absorbed, your hardwood cutting board will be ready to use.
Conclusion
You can easily make DIY cutting boards for the kitchen by following the steps discussed above. After you have a suitable cutting board, chopping up food in the kitchen won’t seem like such a tiring task. You can also give hardwood cutting boards as presents to your friends or family who love to cook.
Making the cutting board at home is a simple process. Even a plain board looks aesthetically pleasing. It instantly adds appeal to the décor of your kitchen, plus you get a board that you can use for many years. Maintaining it is also easy, so a DIY project is a wise idea.
