Paint a Room

Choose the Right Paint
Choosing the right paint can make a huge difference in a room’s overall look and feel. When selecting paint, consider the color, finish, and quality. Lighter colors can make a room feel more spacious, while darker colors can create a cozy atmosphere. The finish of the paint can also affect the final result. Glossy finishes are great for high-traffic areas as they are easy to clean, while matte finishes can hide wall imperfections. Lastly, investing in high-quality paint can save you time and money in the long run as it will require fewer coats and last longer. Take the time to research and choose the right paint for your project to achieve the best results.
Prepare the Room
Before starting any home improvement project, preparing the room properly is important. This means clearing out any furniture or decor that may be in the way, covering floors and furniture with protective materials, and ensuring you have all the necessary tools and supplies. It’s also a good idea to open windows or use fans to ensure proper ventilation during the project. Taking the time to prepare the room beforehand will not only make the project go more smoothly, but it will also help to protect your home and belongings from damage.
Prime the Walls
After cleaning and repairing any imperfections on your walls, it’s time to prime them. Priming is essential in any painting project as it helps the paint adhere better to the surface, covers up any stains or marks, and creates a smooth and even finish. You can choose between oil-based or water-based primers, depending on the type of paint you’ll be using. Apply the primer with a roller or brush, starting from the top of the wall and working your way down. Cover all areas evenly and let the primer dry completely before painting. With a well-primed surface, your paint job will look more professional and last longer.
Paint the Walls
Painting the walls is one of the easiest and most effective ways to transform the look and feel of a room. A fresh coat of paint can do wonders if you want to create a cozy atmosphere or a bright and airy space. Before you start painting, prepare the walls by cleaning them thoroughly and filling in any cracks or holes. Choose a color that complements your furniture and decor, and don’t be afraid to experiment with different shades and finishes. With patience and attention to detail, you can achieve a professional-looking paint job that will make your home feel new.
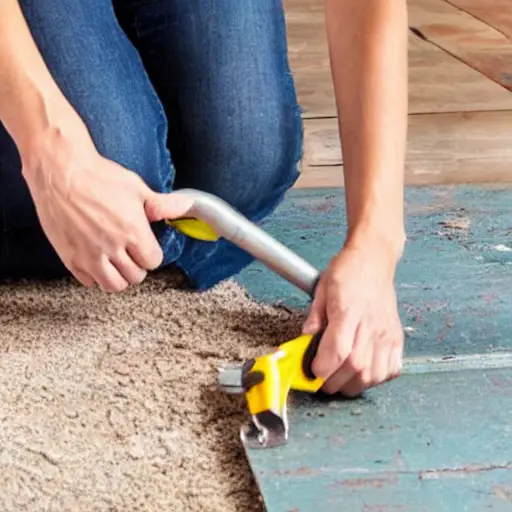
Clean Up
Clean Up:
Before starting any home improvement project, cleaning up the area where you’ll be working is important. This not only makes the space safer to work in, but it also helps you to see what you’re working with. Start by removing any clutter or debris from the area. Then, sweep or vacuum the floor to remove any dust or dirt. If you’re working in a bathroom or kitchen, wipe down any surfaces with a disinfectant cleaner. Taking the time to clean up before you start your project will make the process smoother and more enjoyable.
Install a Ceiling Fan

Choose the Right Fan
Choosing the right fan can make a big difference in comfort and energy efficiency when it comes to home improvement. Ceiling fans are popular for their ability to circulate air and reduce the need for air conditioning. When selecting a ceiling fan, consider the room’s size, the ceiling’s height, and the fan’s style. A larger room may require a larger fan with longer blades, while a lower ceiling may require a flush-mount fan. Additionally, fans with energy-efficient motors can help save on electricity costs in the long run. Take the time to research and choose the right fan for your home to ensure maximum comfort and savings.
Turn Off the Power
Before starting any home improvement project, it is important to ensure your safety. Turning off the power is a crucial step before working on any electrical project. This will prevent any potential electrical shock or injury. Locate your home’s electrical panel and switch off the circuit breaker corresponding to the area you will be working on. If you are unsure which circuit breaker to turn off, it is best to turn off the main power switch. Always double-check that the power is off before beginning any work. Safety should always be your top priority when working on home improvement projects.
Assemble the Fan
Assemble the Fan:
One of the easiest home improvement projects you can do yourself is assembling a ceiling fan. Most ceiling fans come with clear instructions and all the necessary hardware. You’ll need a ladder, screwdriver, wire stripper, and pliers. First, turn off the power to the room. Then, attach the mounting bracket to the ceiling and connect the wires from the fan to the wires in the ceiling. Finally, attach the blades and turn the power back on to test the fan. With patience and attention to detail, you can have a new ceiling fan up and running in no time.
Install the Mounting Bracket
Installing a mounting bracket is a simple and easy home improvement project that anyone can do. First, choose where you want to install the bracket and mark it with a pencil. Then, use a stud finder to locate the studs in the wall. Once you have found the studs, use a drill to make pilot holes for the screws. Next, attach the mounting bracket to the wall using the screws and a screwdriver. Finally, ensure the bracket is level and secure before attaching any items. With just a few simple steps, you can have a sturdy and reliable mounting bracket for your home.
Attach the Fan Blades
Attaching the fan blades is a simple task that can make a big difference in the appearance and functionality of your ceiling fan. Begin by laying out the blades and ensuring they all face the same direction. Then, use the screws provided to attach each blade to the motor housing. Make sure to tighten the screws securely, but be careful not to over-tighten them, as this can cause the blades to warp or become misaligned. Once all of the blades are attached, turn on the fan to ensure it runs smoothly and quietly. If you notice any wobbling or shaking, adjust the blades until they are balanced. With just a few easy steps, you can transform your ceiling fan into a stylish and efficient addition to your home.
Connect the Wires
Connecting wires is essential to many home improvement projects, especially those involving electrical work. Before you begin, ensure you have the right tools and equipment, including wire strippers, electrical tape, and wire connectors. Always turn off the power to the circuit you’ll be working on and double-check that it’s off before you start. When connecting wires, it’s important to match the colors of the wires and use the appropriate connectors. If you’re unsure about anything, consult a professional electrician. With the right precautions and attention to detail, you can successfully connect wires and complete your home improvement project.
Attach the Light Kit
Attaching a light kit to a ceiling fan is a simple and affordable way to update the look of a room. First, turn off the power to the fan at the circuit breaker. Then, remove the fan blades and any existing light fixture. Next, attach the mounting bracket to the fan motor and connect the wires from the light kit to the wires in the fan. Finally, attach the light kit to the mounting bracket and reattach the fan blades. Turn the power back on and enjoy your newly updated ceiling fan with a stylish light kit.
Turn on the Power
After completing the previous home improvement projects, it’s time to turn on the power and enjoy the fruits of your labor. This step involves testing all the electrical outlets, switches, and appliances to ensure they function correctly. You can use a voltage tester to check the outlets and switches and ensure they receive power. If you notice any issues, such as flickering lights or faulty outlets, it’s best to call a licensed electrician to fix the problem. Once everything is working correctly, you can sit back and enjoy your newly improved home.
Replace Cabinet Hardware

Choose the Right Hardware
When it comes to home improvement projects, choosing the right hardware can make all the difference. Whether installing new cabinet knobs or replacing old door handles, selecting the right hardware can enhance the overall look and feel of your home. Before you start your project, take some time to research different hardware options and consider factors such as style, material, and durability. Additionally, measure your existing hardware and choose replacements that are the same size to ensure a proper fit. With the right hardware, your DIY home improvement project will surely be a success.
Remove the Old Hardware
Removing old hardware is a simple and cost-effective way to update the look of your home. Whether it’s outdated cabinet knobs or rusty door handles, replacing them with new ones can make a big difference. To start, gather tools such as a screwdriver, pliers, and measuring tape. Then, remove the old hardware by unscrewing it from the surface. Take note of the size and placement of the holes to ensure that the new hardware will fit properly. Once the old hardware is removed, clean the surface and install the new hardware using the same holes. You can give your home a fresh new look with just a few simple steps.
Measure and Mark
Once you have decided on the home improvement project you want to tackle, the first step is to measure and mark the area where you will work. This is especially important for projects such as painting, tiling, or installing shelves, where accuracy is key. Use a measuring tape and a level to ensure that your measurements are precise and your markings are straight. If you are working with a particularly large or complex area, consider creating a diagram or blueprint to help you keep track of your measurements and markings. Taking the time to measure and mark properly will save you time and frustration in the long run, and will help ensure that your finished project looks professional and polished.
Drill Holes
Drill Holes:
Drilling holes is a simple yet essential task for any DIY enthusiast. Whether you need to hang a picture frame or install a shelf, drilling holes is a must-know skill. You’ll need a drill, drill bits, and a level to get started. First, mark the spot where you want to drill the hole with a pencil. Then, select the appropriate drill bit size for the job and insert it into the drill. Hold the drill perpendicular to the surface and apply gentle pressure as you drill the hole. Once the hole is drilled, use a level to ensure that your installation is straight. With a little practice, you’ll be drilling holes like a pro in no time!
Attach the New Hardware
Once you have removed the old hardware, attaching the new one is time. Make sure to measure the distance between the screw holes on the old hardware and the new one to ensure a proper fit. Use a screwdriver to attach the new hardware securely to the surface. If you are attaching hardware to a cabinet or drawer, align it properly before tightening the screws. Take your time and be patient, as this step can make a big difference in the overall appearance of your home. With the new hardware in place, you’ll be amazed at how much of a difference it can make in updating the look of your space.
Install a Programmable Thermostat

Choose the Right Thermostat
Choosing the right thermostat can greatly affect your home’s energy efficiency and comfort level. Programmable thermostats allow you to set different temperatures for different times of the day, so you can save money on heating and cooling costs when you’re not home. Smart thermostats take it a step further, learning your habits and adjusting the temperature accordingly. When choosing a thermostat, consider your budget, desired features, and compatibility with your HVAC system. Installing a new thermostat is a relatively simple project that can greatly impact your home’s energy usage.
Turn Off the Power
Before starting any home improvement project involving electrical work, it is important to turn off the power to the area in which you will be working. This will ensure your safety and prevent any accidents from occurring. Locate your home’s electrical panel and switch off the circuit breaker corresponding to the area in which you will be working. If you are unsure which circuit breaker to switch off, it is best to turn off the main power switch. Always use caution when working with electricity and never attempt any repairs or installations if you are not confident in your abilities.
Remove the Old Thermostat
Removing an old thermostat is a simple home improvement project that can be done in just a few steps. First, turn off the power to the thermostat by switching off the circuit breaker or removing the fuse. Next, remove the thermostat’s cover and unscrew it from the wall. Disconnect the wires from the old thermostat and label them so you know where they go when you install the new one. Finally, remove mounting hardware and patch holes in the wall before installing the new thermostat. This project can save you money on your energy bills and improve the efficiency of your heating and cooling system.
Install the New Thermostat
Installing a new thermostat is a simple and cost-effective way to improve your home’s energy efficiency. With a programmable thermostat, you can set the temperature to automatically adjust when you’re away or asleep, saving you money on your energy bills. To install a new thermostat, start by turning off the power to your HVAC system. Then, remove the old thermostat and label the wires before connecting them to the new thermostat. Finally, mount the new thermostat and turn the power back on to test it out. With just a few simple steps, you can upgrade your home’s heating and cooling system and start saving money on your energy bills.
Connect the Wires
Connecting wires may seem intimidating, but it’s a simple task that can save you money on hiring an electrician. Before you begin, turn off the power to the area you’ll be working on. Use wire strippers to remove the insulation from the ends of the wires, and then twist the exposed wires together. Secure the connection with wire nuts and wrap with electrical tape. Finally, turn the power back on and test your work with a voltage tester. Remember always to follow safety precautions when working with electricity.
Program the Thermostat
Program the Thermostat:
One of the easiest and most cost-effective home improvement projects you can do yourself is programing your thermostat. By automatically adjusting your thermostat to adjust the temperature throughout the day, you can save money on your energy bills and ensure that your home is always at a comfortable temperature. Most modern thermostats are easy to program and can be customized to fit your schedule and preferences. Simply follow the instructions provided with your thermostat and you’ll be on your way to a more energy-efficient home in no time.
Turn on the Power
After completing the first four easy home improvement projects, it’s time to turn on the power and tackle a slightly more advanced task. Before beginning any electrical work, turn off the power to the area you’ll be working in. This can be done by flipping the circuit breaker switch or removing the fuse that controls the area. Once the power is off, you can safely replace light fixtures, install ceiling fans, or add new electrical outlets. Always remember to follow proper safety precautions and consult a professional if you’re unsure about any aspect of the project. With some knowledge and caution, you can complete these electrical projects and enjoy the benefits of a more functional and updated home.
Create a Garden Bed

Choose the Right Location
When it comes to home improvement projects, choosing the right location is crucial. Before starting any project, consider the purpose of the space and how it will be used. For example, if you’re planning to create a home office, choose a quiet location with plenty of natural light. If you’re planning to renovate your kitchen, consider the flow of traffic and the proximity to other rooms. It’s also important to consider the structural integrity of the location and any potential hazards, such as electrical wiring or plumbing. By carefully choosing the right location for your home improvement project, you can ensure that it will be functional, safe, and enjoyable for years to come.
Clear the Area
Before starting any home improvement project, it’s important to clear the area where you will be working. This means removing any furniture, decorations, or other items that could get in the way or be damaged during the project. It’s also a good idea to cover any remaining items with plastic or drop cloths to protect them from dust or debris. Additionally, ensure a clear path to the area where you will work to avoid accidents or injuries. Taking the time to clear the area before starting your project will not only make the process smoother, but it will also help ensure that your home stays clean and organized throughout the project.
Prepare the Soil
Preparing the soil is an essential step in any gardening project. Before planting, you must ensure that the soil is healthy and fertile. Begin by removing any weeds, rocks, or debris from the area. Then, loosen the soil with a garden fork or tiller to a depth of at least six inches. This will help to improve drainage and allow the roots of your plants to grow more easily. You can also add organic matter such as compost or manure to enrich the soil and provide essential plant nutrients. Once you have prepared the soil, you can start planting and enjoying the fruits of your labor.
Add Compost
Adding compost to your garden is a great way to improve soil quality and promote healthy plant growth. Compost comprises organic materials like food scraps, yard waste, and leaves that have decomposed over time. You can purchase compost at a garden center or make your own by collecting these materials in a compost bin. Once you have your compost, spread it over your garden beds and mix it into the soil. This will help improve soil structure, increase nutrient levels, and retain moisture, all essential for healthy plant growth. Adding compost is an easy and affordable home improvement project that can greatly impact your garden’s health and beauty.
Plant Your Garden
Planting a garden is a great way to improve the look of your home’s exterior. Not only does it add color and beauty, but it can also provide fresh produce for your family. Start by choosing a sunny spot in your yard and deciding what garden you want to plant. You can opt for a vegetable garden, a flower garden, or a combination of both. Once you have your plan, it’s time to get your hands dirty. Dig up the soil, add some compost, and start planting your seeds or seedlings. With a little bit of patience and care, you’ll soon have a beautiful garden that will envy your neighborhood.
Water and Maintain
Water and Maintain:
One of the easiest ways to improve the look of your home is by maintaining your lawn and garden. Regular watering and trimming can make a big difference in the appearance of your outdoor space. Always regularly water your plants and lawn, especially during hot and dry weather. You can also add a layer of mulch to help retain moisture in the soil. Additionally, keep an eye out for weeds and remove them promptly to prevent them from taking over your garden. With a little bit of effort, you can have a beautiful and well-maintained outdoor space that will enhance the overall look of your home.
Now that you have learned about these 5 easy home improvement projects you can do yourself, it’s time to take action and start working on them. Remember, these projects not only enhance the look of your home but also add value to it. So, why not give it a try? If you need more inspiration and guidance, go to our other articles at DIY Gazette, where you can find many DIY projects, tips, and tricks. Don’t hesitate to explore and unleash your creativity!
