Introduction

Benefits of a raised garden bed
There are numerous benefits to using a raised garden bed for your vegetables. Firstly, raised garden beds provide better drainage and aeration for your plants, leading to healthier roots and higher yields. Additionally, raised garden beds can be filled with high-quality soil, customized to meet your plants’ specific needs. This can be especially beneficial if your yard has poor soil quality. Raised garden beds also make it easier to control weeds and pests, as they are elevated off the ground and can be covered with netting or other protective materials. Finally, raised garden beds can be a great option for those with limited mobility, as they can be built at a comfortable height for you to work with. Overall, a raised garden bed can be a fantastic investment for any vegetable gardener looking to improve their yields and make gardening easier and more enjoyable.
Materials needed
You will need a few materials to build a raised garden bed for your vegetables. Firstly, you will need wood planks or bricks to create the bed walls. Cedar, redwood, or pressure-treated lumber are good options for wood planks as they are resistant to rot and insects. You will also need screws or nails to secure the planks together. Secondly, you will need soil to fill the bed. Using a mixture of topsoil, compost, and peat moss is recommended for optimal plant growth. Lastly, you will need a shovel, a level, and a measuring tape to ensure that the bed is level and the correct size.
Step 1: Choose a Location

Consider sunlight and drainage
When choosing a location for your raised garden bed, it’s important to consider the amount of sunlight and drainage in the area. Most vegetables require at least six hours of direct sunlight daily, so choose a spot with ample sunlight. Additionally, ensure the area has good drainage to prevent water from pooling and causing root rot. If the area tends to be soggy, consider adding a layer of gravel or sand at the bottom of the bed to improve drainage. By considering these factors, you can create an optimal growing environment for your vegetables.
Accessibility
Accessibility is an important factor to consider when building a raised garden bed. The height of the bed should be comfortable for you to reach without straining your back or arms. A good rule of thumb is to make the bed no more than 3 feet. Additionally, consider the width of the bed and leave enough space between the beds for a wheelchair or walker to pass through. If you plan on using a trellis or other vertical supports, ensure they are sturdy and easy to reach for pruning and harvesting. By considering these factors, you can ensure that your raised garden bed is accessible and enjoyable for everyone to use.
Step 2: Gather Materials

Wood or other materials for the frame
Wood is a popular choice when choosing the material for the frame of your raised garden bed due to its affordability and availability. Cedar and redwood are great options as they naturally resist rot and insects. However, if you prefer a more sustainable option, consider using recycled plastic lumber or composite decking material. These materials are durable and long-lasting and won’t rot or warp like traditional wood. Another option is to use stone or brick for the frame, adding a decorative touch to your garden while providing a sturdy structure. Ultimately, the choice of material will depend on your preference, budget, and the look you want for your garden.
Soil and compost
Soil and compost are crucial components of a successful raised garden bed. Start by selecting a high-quality soil mix rich in organic matter and nutrients. You can also add compost to your soil mix to improve its texture and fertility. Compost is a great way to recycle organic waste and create a nutrient-rich soil amendment to help your plants thrive. Mix your soil and compost thoroughly before filling your raised garden bed. This will ensure your plants can access the nutrients they need to grow strong and healthy.
Tools needed
Before you start building your raised garden bed, having the right tools is important. You’ll need a shovel or garden fork to loosen and turn the soil, a level to ensure your bed is even, a measuring tape to mark out the dimensions, a saw to cut the lumber, and a drill to attach the pieces. It’s also a good idea to have gloves, safety glasses, and a dust mask to protect yourself while working with wood and soil. With these tools, you’ll be well-equipped to create a sturdy and functional raised garden bed for your vegetables.
Step 3: Build the Frame

Cut the wood to size
Once you have your wood, it’s time to cut it to size. Use a saw to cut the boards to the desired length. Most home improvement stores will cut the wood for you if you don’t have a saw. Make sure to measure twice and cut once to ensure accuracy. It’s also a good idea to wear safety goggles and gloves while cutting the wood to protect yourself from any potential injuries. Once the wood is cut to size, you can start assembling your raised garden bed.
Assemble the frame
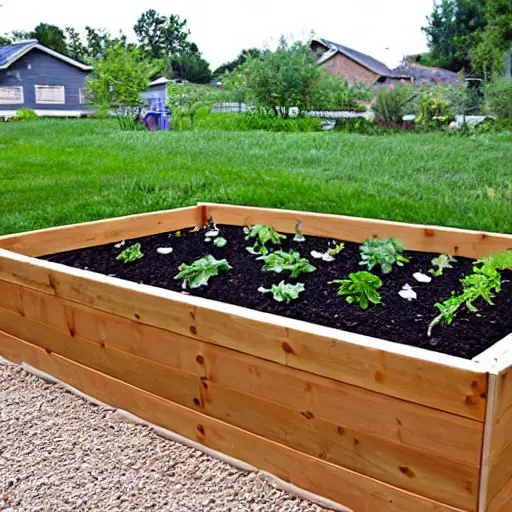
Once you have all your materials ready, it’s time to assemble the frame of your raised garden bed. Start by laying out the four boards for the sides of the bed in a rectangular shape. Use the corner brackets to attach the boards at each corner. Ensure the corners are square and the boards are level before securing them with screws. Once the frame is assembled, place it in the desired location and use a level to ensure it is even. You’re now ready to fill the bed with soil and plant your vegetables.
Add support if needed
If you plan on filling your raised garden bed with a lot of soil, adding support to the sides of the bed may be necessary. This will prevent the weight of the soil from causing the sides to bow outwards over time. One option is to install wooden stakes along the outside of the bed and attach them to the sides using screws or nails. Another option is to use metal brackets to reinforce the corners of the bed. Whatever method you choose, ensure the support is strong enough to hold the weight of the soil and any plants you plan to grow.
Step 4: Fill with Soil and Compost

Layer soil and compost
Once you have built your raised garden bed, it’s time to layer the soil and compost. Start by adding a layer of cardboard or newspaper to the bottom of the bed to prevent weeds from growing up through the soil. Next, add a layer of compost, followed by a layer of topsoil. Repeat this process until the bed is filled to the desired height. Make sure to water the soil thoroughly after each layer to ensure that it settles evenly. Combining soil and compost will give your plants the nutrients they need to thrive.
Mix thoroughly
Mix thoroughly:
Once you have added all the necessary ingredients to your raised garden bed, it’s time to mix them thoroughly. Use a garden fork or a shovel to turn the soil and mix in the compost, fertilizer, and any other amendments you have added. Make sure to break up any clumps of soil and mix everything evenly. This will ensure your plants can access all the nutrients they need to grow healthy and strong. Mixing the soil also helps to improve drainage and aeration, which are essential for healthy root development. Take your time and be thorough, as this step is crucial for the success of your garden.
Leave room for settling
When building a raised garden bed, leaving room for settling is important. This means that the soil in the bed will compact over time, causing the bed to sink slightly. To account for this, filling the bed with soil slightly higher than the desired level is recommended. This will allow for settling without compromising the overall height of the bed. It’s also a good idea to periodically check the soil level and add more to maintain the desired height. By leaving room for settling, you can ensure that your raised garden bed will remain stable and functional for years.
Step 5: Plant Your Vegetables

Choose appropriate plants
When choosing plants for your raised garden bed, it’s important to consider the amount of sunlight and water needed. Some vegetables, such as tomatoes and peppers, require full sun for optimal growth, while others, like lettuce and spinach, prefer partial shade. Some plants, like cucumbers and squash, require more water than others, such as beans and peas. It’s also a good idea to choose plants that are well-suited to your climate and growing season. You can ensure a bountiful harvest and a successful growing season by selecting the right plants for your raised garden bed.
Spacing and depth
Spacing and depth are crucial when building a raised garden bed for your vegetables. The spacing between plants will depend on the type of vegetable you are growing and its size. For example, larger plants like tomatoes and peppers will need more space than smaller plants like lettuce and spinach. It’s important to research the recommended spacing for each type of vegetable to ensure they have enough room to grow and thrive. Additionally, the depth of your raised garden bed will also play a role in the success of your vegetables. Most vegetables require at least 6-12 inches of soil depth to develop strong roots and access necessary nutrients. Consider the depth of your raised garden bed when planning your vegetable garden.
Watering and maintenance
Watering and maintenance are crucial for the success of your raised garden bed. It is important to water your plants regularly, especially during hot and dry weather. Ensure to water deeply and avoid getting water on the leaves to prevent fungal diseases. Mulching can help retain moisture in the soil and reduce the need for frequent watering. Additionally, it is important to regularly check for pests and diseases and take appropriate measures to prevent or treat them. Deadheading and pruning can also help promote healthy growth and prevent overcrowding. Proper watering and maintenance allows your raised garden bed to thrive and provide a bountiful harvest.
Conclusion

Enjoy your fresh vegetables
After all the hard work of building and planting your raised garden bed, it’s time to reap the rewards and enjoy your fresh vegetables! There’s nothing quite like the taste of homegrown produce; you can feel proud knowing you grew it yourself. Harvest your vegetables when they are ripe and enjoy them in various ways, from salads to stir-fries to roasted dishes. Don’t forget to share your bounty with friends and family, and consider preserving any excess produce for later use. With your raised garden bed, you can enjoy a bountiful harvest all season.
Tips for success
To ensure success with your raised garden bed, keep a few things in mind. Firstly, choose a location with plenty of sunlight and good drainage. Secondly, use high-quality soil and compost to fill your bed, as this will provide the necessary nutrients for your plants to thrive. Additionally, water your plants regularly and monitor them for pests and diseases. Finally, consider rotating your crops yearly to prevent soil depletion and maintain healthy soil. Following these tips, you can enjoy a bountiful harvest from your raised garden bed.
Next Steps: Now that you have all the materials and tools to build your raised garden bed, it’s time to start! Follow the step-by-step instructions carefully, and take your time to ensure that your garden bed is sturdy and level. Once you’ve completed your project, share your success with us at DIY Gazette! We’d love to see your finished product and hear about your experience. Don’t forget to check out our website for more DIY projects and inspiration. Happy gardening!
