
Looking for some help on building your do it yourself lattice fence? It’s not that difficult, provided you have some basic knowledge. It’s easy and cost-effective too. These fences can withstand various climates quite well, and you can conveniently build them outside your home.
Another huge benefit is, they can hold plenty of neighbor ogling. You can enjoy your private time in your garden without anyone peeking around. You will only have to be skillful up to some extent, but once you are done, the finished work will look as if it has been done by a professional.
Let’s get to the step-by-step guide so you can start working on your do it yourself lattice fence today!
How to Build a Do it yourself Lattice Fence – Step-by-Step
In search of a step-by-step do it yourself lattice fence guide? Here’s what you are looking for. Let’s begin with the timeline required for the project.
Timeline:
To get you going with this guide, you have to plan when you need to work on your do it yourself lattice fence, especially if you have a hectic schedule.
- You will need to have a prep day to determine where the fence line will go and set your first post, to begin with, the second and third steps.
- On the second day, you can start building the panels and sleeves, which are step four and step five in this guide.
- After that, you will need to install the trim and panels and set your remaining posts, which are steps seven and eight.
Cut list:
This cut list is essential because you will be using different pieces in this project.
Panel:
The cut list we have here is for a 36×51 (inch) panel, and you will have to repeat for each panel. For the lattice panel stops, you need to rip three 1×6 boards from common cedar safely. For just two boards, you can still cover narrower sleeve parts. Here, you can leave up to 43-inch exposed right above the ground.
- Frame top as well as bottom 2×4 = 2 at 51-inch.
- Frame side 2×4 = 2 at 33-inch.
- Stops 0.75-inch = 4 at 31.5-inch (1 material ripped – 0.75 inches wide for creating a 0.75×0.75 square dowel).
- Stops 0.75-inch = 4 at 48-inch (1 material ripped – 0.75 inches wide for creating a 0.75×0.75 square dowel).
- Lattice: 1 at 32.875×47.875-inch (for fitting comfortably within a frame having internal dimensions 33×48 inches).
- Cap rail: 1 at 49.5-inch (Ripped to 5.125-inch width).
- Sleeve and post.
For determining the required sleeve pieces for each configuration, you need to follow the list below.
- Sleeves (top block) = 3-inch (3.625-inch ripped wide).
- Full-length sleeves = 43-inch (5.125-inch ripped width)
- Sleeves (bottom block) = 4-inch (3.625-inch ripped width)
Middle post:
- A front piece 5.125-inch wide (full-length).
- A back piece 5.125-inch wide (full-length).
- Two top blocks 3.625-inch wide.
- Two bottom blocks 3.625-inch wide.
End post:
- Front piece 5.125inch wide (full-length).
- Back piece 5.125-inch wide (full-length).
- Sidepiece 3.625-inch wide (full-length).
- Top block 3.625-inch wide.
- Bottom block 3.625-inch wide.
Cornerpost:
- Front piece 5.125-inch wide (full-length).
- Sidepiece 4.375-inch wide (full-length).
- Top block 4.375-inch wide.
- Bottom block 4.375-inch wide.
- Top block 3.625-inch wide.
- Bottom block 3.625-inch wide.
Step 1 – Positioning the line
For squaring the fence line to your house, you will have to mark a right-angle triangle extending from your foundation. You can stick one stake for your triangle’s corner, and this will be the point where you will stick your first post. Stick the second one in about three feet from the first one right along your foundation.
Make sure to tie the mason’s line to your first steak and stretch it out roughly perpendicular to your house. Just mark it about four feet away from the stake. Now find the 5 feet mark on your tape and angle it from your second stake towards the mason line. Cross the line of the tap until you have 4 and 5-foot marks. This is where you will have a 90-degree angle on your triangle.
Step 2 – Digging your first posthole

Make sure to go beyond the first line and set at least ⅓ of your post within the crushed stone and soil, which works pretty fine. However, if you have solid sand, you can sink your post in concrete. Mark its depth with painter’s tape for reference.
Step 3 – Wrapping the post
You have to prevent water from seeping into the wood if you are using concrete. You can wrap a section of your post using a flashing (self-adhesive). Begin from the bottom and extend it right above the concrete area, but keep it below the ground level.
Step 4 – Setting the post
It’s time to pour about 6 inches of drainage stone right into the hole and tamp it with your post. For getting the right height, you can always add or subtract the amount of stone according to your preferences.
Here, you can clamp a couple of furring strips for adjacent sides for propping up the post within the hole. You can tack a scrap to the front face of your post right to the stand and make sure it stays in touch with the mason’s line.
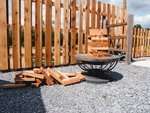
Step 5 – Cutting the pieces of post sleeves
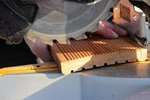
For constructing the sleeves, sandwich your narrow blocks on the sides where your fence panels connect right between those full-length wider pieces. You can use a circular saw for ripping the blocks to about 3.75-inch and a full-length piece of 5.125-inch. After ripping, you can cut the pieces with a mitre saw.
Step 6 – Assembling the sleeves
After that, you need to assemble the sleeves by applying PU glue right to the lower sleeve blocks’ edges. Sandwich them right between the back and front pieces and use your nail gun (1.25-inch nails) for securing the assembly.
Step 7 – Installing the sleeve
Now it’s time to slide your sleeve right over the post and have its front face parallel to the fence line. Make it flush at the top and screw it into the place.
Remaining steps
Following are the remaining steps with brief details.
- You will need to cut the frame pieces and use them as stops for holding the fence according to the measurements mentioned above.
- Attach your front stops and then drill weep holes using a paddle drill bit.
- From there, you need to cut the lattice by determining whether you want to orient it vertically or horizontally.
- After that, you will need to assemble the frame and then install the lattice.
- Then you will need to set the post spacing and then position your second post.
- From there, you will need to attach the panel and attach the cap rail and then secure the post caps. Your lattice fence is ready.
10 Lattice Fence Ideas
Lattice fences look extremely beautiful and work well with most outdoor decors in various settings. Here are some do it yourself lattice fence ideas for your inspiration.
1. Gazebo with lattice walls
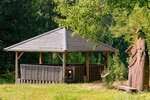
You can go for a gazebo with lattice walls to provide a romantic backdrop that will significantly enhance your patio or backyard. You can add lattice panels because that’s relatively easy and provide you with shade and privacy to create a space for relaxing.
2. Attractive backyard deck with lattice fence

You can also create an attractive backyard deck with a white lattice fence along with a lattice ceiling for creating an inviting refuge.
3. Short diagonal lattice fence
Create short and low diagonal lattice fence panels that outline a property section for a decorative backdrop, and you can use it behind your metal furniture too.
4. Diagonal lattice fence with trailing vines
You can also add trailing vines to your diagonal lattice fence and add an appealing visual section to your contemporary garden that will look stunning.
5. White privacy fence with lattice top
You can use a privacy fence and only have a lattice on top of it. It will work for a quaint patio and separate it in front of our neighbor’s yard.
6. Lattice fence with flower boxes
You can always go with a lattice fence and place some flower boxes on it to add some color to your space. You can always enhance it with climbing flowers for a serene environment in your backyard.
7. Swimming pool with lattice fence
As lattice fences are great for privacy, they can work well with swimming pools. You can create a romantic environment right in your backyard for your sunbathing routines.
8. Diagonal scalloped lattice fence
Such a fence is a bit low on the previous but works more as an open separator that you can use to separate your garden from your outdoor space.
9. Lattice fence with hanging vines and gate
Another great work of art is a lattice fence with a gate in it and hanging vines. You can use it for vertical gardening as well as for those climbing vines or trailing plants.
10. Square lattice fence
These fences have a conventional look and are commonly used in gardens or for landscaping features. You can use them for your trailing plants and blend very well with the surroundings.
Why Should You Never Put a Tall Fence Around Your House?
Taller fences are not allied by law because they fulfill the community requirements. For instance, if your backyard fence will be taller than 6 feet, it will block your neighbor’s sunlight and view.
Similarly, front fences shouldn’t be taller than 3 to 4 feet because they can distract the drivers’ view on the roads as they cannot see what’s going on behind the fence, and there might be kids or pets playing in the area.
Therefore, in most cases, you cannot build taller fences around your house even if that is a good practice for deterring burglars.
Which One is Better: Wood or Vinyl Lattice?
Can’t decide between wood or vinyl do it yourself lattice fence? Well, they both have their pros and cons. Wood will be much better than vinyl because it is a natural product and is environmentally friendly.
Vinyl is a kind of plastic that is not environmentally friendly and won’t give that natural look that blends well with your backyard or outdoor space. Vinyl lattice might be free from rot, mold, or mildew, but you need to regularly clean and maintain it for better looks.
It is far more long-lasting than wood but is way more experience too. If you have enough budget at your disposal, then going for a vinyl lattice fence would be a good option. However, wood will give your outdoor space a more natural look that is way better than what vinyl lattice can provide.
FAQ
Can you add lattice to an existing fence?
Most of these lattices come in 4×2 feet or 8×2 feet size panels, and you can cut with a hand, or a table saw. Therefore, you can conveniently add lattices to your existing fences using metal tie plates. You will have to go with 2-inch screws for securing the plate to the bottom of the existing post to keep the top fence in place.
How tall can my privacy fence be?
Your privacy fence can only be six feet tall, which will prevent any nosy parking from your neighbors. The general law requires it, but if you are fencing your home against a highway, you will have to get approval from your local building code to go for a taller fence.
Does lattice count towards fence height?
Yes, it counts towards the overall height of the fence, and you will have to check your local building code for the exact numbers because they vary in different regions.
What can you do with an old lattice?
You can use it as a wall hanging, or you can also build a rage hood surrounding. Apart from that, you can use it to make a tool holder or even a headboard. It can also work as your porch skirting if you want.
What can I use instead of lattice?
If you don’t want a wood or vinyl lattice look, you can always paint it with a color of your choice and go for climbing and trailing plants on them, and they will disappear.
Conclusion
Building a do it yourself lattice fence will give your garden a great-looking separator that will safely guard your outdoor space from inquisitive neighbors.
You can use such a fence for your outdoor space, backyard, garden, or even your swimming pool. It looks fabulous and works well for most of the properties. Wood and vinyl are the two options, but if you don’t want to go with these looks, you can always paint them and use trailing plants to make them look even better.
