Introduction
Painting may sound straightforward but, if you’ve never done it before, you’re going to need some help. Painting your house isn’t just about redecoration, it also boosts a house’s curb appeal and resale value, which is great for those who are looking to sell. The process can get tedious if you don’t know what you’re doing but, with our help, it should go smoothly.

We have covered everything you need to know below, from the pre-painting logistics to a step-by-step guide for the painting process, with some other renovation ideas thrown in too.
Throughout, we have linked to materials that can help you level up your DIY skills. If you paint/redecorate for your job or you plan on doing it in the future, you’ll want to learn as much as you can about the subject!
Let’s start with the things you should consider before you even pick up a paintbrush.
Table of contents
Before Getting Started
There is no need to grab the paint supplies yet – there are still things you should consider.
If you’re here, you may already have an idea of what you want to do with the house and how long the project is going to take. If you haven’t stopped to think about that yet, we’re here to help.
So, ask yourself these two questions:
1. Why Are You Painting The Property?
This first question helps specify your approach to the painting job and how much of your tastes are factored into the equation. After all, painting a home for a sale might be less about making it look good to you and more about making it look good to others.
Otherwise, you may be painting it as part of general maintenance, in which case you have full control over what colors and styles you want to include. In most maintenance cases, you’ll want to paint with the same colors that your house had before, or at least closely match it.
If using a new color, know that it will take a longer time. You will also need to be 100% sure of the new color schemes, so you don’t change your mind after you have already started and spent money on the paint.
The earlier you figure out why you’re painting, the easier it’ll be. You don’t want to be halfway through the job and then make a U-turn because you were decorating for yourself, not for house buyers.
2. Is It A Long-term Project?
Secondly, how long is the project going to take? Is it a minor maintenance job over a week or is it a full-scale remodeling of the entire household? This influences how much time you need, whether you’ll be doing everything yourself, and how much it all costs to pull off.
Maintenance and minor repaint jobs are sprints while full redecorations and remodeling projects are marathons. Both require different working strategies to get the results that you want.
Most people will need professional help with larger, longer-term projects. Even for somebody skilled at DIY and home painting, doing the whole job by yourself is a big ask. Bringing in friends and family members to help can be an option, of course, but then it can be difficult to maintain a high standard of painting quality if you let anybody take a paintbrush to your household.
Should You Hire Professional Painters?
Depending on your answer to that second question above, you may be wondering which is better for you – DIY or professionally hired house painting.
Let’s go into more detail about what each one of these options entails and how to get the best of each.
DIY House Painting
Most start by considering the DIY option and, if they can’t do that, they’ll hire somebody to help. Most DIY is about saving money and DIY house painting is no different. Whether you’re a homeowner or looking to sell, the idea of cutting costs by doing the work yourself is a very attractive one.
However, you want the job done well. As we said, maintaining the aesthetic qualities of your home is important. You may save money doing the job yourself but, if it looks bad, then you’ll have reduced the value of the home.
There are other benefits to DIY house painting that you may not have expected. For example, it can be less stressful to tackle things at your own pace and work on your own home without a team of suited-up professionals running around. You can also play your own music while painting or enjoy other activities while you work.
It’s also a great way to generally survey your property to identify other things that could be improved or may need work in the foreseeable future.
Professional House Painters
So, maybe getting professionals in for the job is your best option. If the project is too involved, will take too long, or is simply beyond your capabilities, then getting professional house painters to help is ideal.
Exterior painting is where a lot of DIY painters falter. It’s easy to paint your bedroom wall but can you repaint the entirety of your home’s exterior walls? Such jobs often require some remodeling and even landscaping too, to make the property look good from the curb, and those are more advanced skills than just painting.
Here’s are three things you need to know about professional painters and how they work:
- Professional painters should be known to the community and have a backlog of previous work for you to check out. You want professionals, after all, not anybody with a paint roller and a white van.
- Speaking of paint rollers, any professional worth hiring will always come with their own equipment. That doesn’t mean you can’t lend them some of yours but, typically, they will outgun you with high-velocity paint tools and scaffolding that are out of reach for the average person.
- Professional painters typically work in crews to get the job done fast, effectively, and with coordination. Even large jobs can be tackled in a matter of days when there’s a whole team working together. That’s much faster than any DIY enthusiast.
Ultimately, we can’t answer for you. Only you know if the DIY or professional route is ideal for you and the home you’re trying to paint. Hopefully, with the above information, your decision has become clearer and you can start forming a plan of action.
Equipment Needed

Every homeowner should keep painting equipment in the home. It’s the same principle as keeping a toolbox around, so you can perform minor repairs and maintenance when needed. Even if you’re opting for professional painters this time around, keeping painting equipment at home will help with future jobs.
With every project and property being unique, there’s a wide variety of tools that are suitable for one building but not for another. The list of painting tools can get very long as a result and, without knowing your exact situation, we can’t go into that much detail.
However, with that said, there are must-have painting tools that you should keep around. Here’s a list of them:
- Paint that you’re working with.
- Paintbrushes, preferably many in different sizes.
- Paint rollers and accompanying extension poles for high-up places.
- Paint tray for keeping paint out and ensuring you get good coverage on brushes and rollers.
- Painter’s tape and drop cloths to protect surfaces underneath and catch any paint drippage.
- Rags for general clean-up duties and protecting objects.
- Sandpaper for wearing surfaces down where dried paint or the surface itself has become uneven.
- A putty knife or scraper that can be used to even surfaces that have been treated with caulk or other patching substances.
That’s the basics for what you’ll need when painting and performing light maintenance work on the home, alongside a full toolbox. You’ll know what else you need and, if not, you can research into the specific sub-tasks you have planned to find out what other tools may be required.
Choosing The Best Color
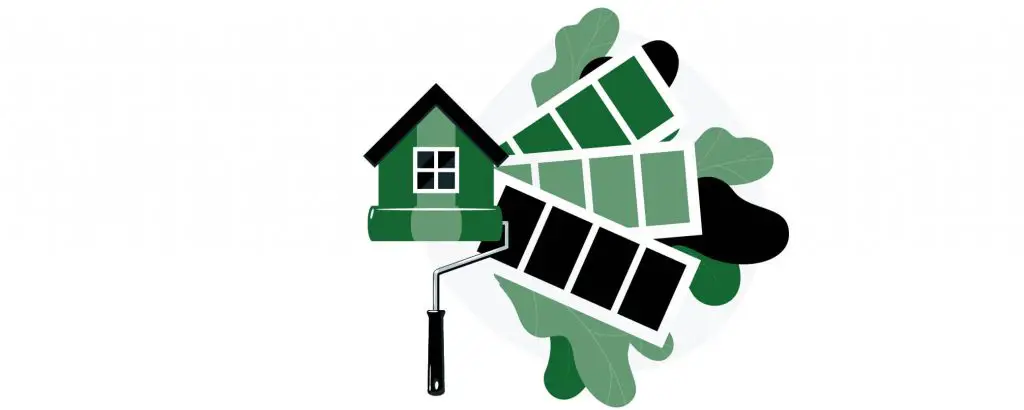
Next, you’ll also need to know what color you’ll be using during the paint job. You want to know this sooner rather than later, so you can find your favorite colors and plan your overall home design around them accordingly.
This is where our earlier advice becomes important again – you need to paint for the intended audience, not necessarily for yourself. If you’re a happy homeowner running maintenance then congratulations, you are the audience!
You can pretty much do what you want, though some may wish to still consider the resale value even if they have no plans of selling soon.
If you’re selling, you’ll want to stick to colors that are more universally attractive to the average buyer. When selling a home, you’ll have an easier job selling to the many people who want a simple white house than the few people who prefer bright purple.
Stay away from bright, garish colors and go for something more homely instead. If they love the property, interested parties can always repaint it with zany colors after they buy anyway.
Just look at the neighborhood for color scheme ideas. Your neighbors’ homes show which colors are permissible in the local area and buyers tend to shy away from homes that stand out from the crowd.
No matter who you’re painting the house for, you should start with samples. You can get samples everywhere, from department stores to dedicated paint shops, and a wide variety of retailers online.
Get a bunch of 1-quart sample packs and start experimenting to find the shades that work best. For exteriors, apply samples to both the sun-facing and the shaded sides of your home to see how the paint interacts with light.
If you are selling the property, you can even get your neighbors and other people you know to give their opinions on color schemes. They can help you figure out which colors are popular and have the most mass appeal.
Once you have decided on a color, you’ll need to figure out how much you need. You want to get larger jobs done fast, effectively, and cost-efficiently, which means preferably doing it in as few sittings as possible.
Nobody wants to have a half-painted house and then realize you don’t have enough to finish the job yet.
There is a general rule – 1 gallon per 400 square feet – but that’s a very rough guideline that won’t work for everybody. Plus, that fails to factor in structural realities like doors and windows that subtract from the total amount of paint needed. In any case, it is best to get slightly too much paint instead of too little – at least you can still finish the job.
For more accurate information on how much paint you will need, there are handy paint calculators online. These account for windows and doors, along with other relevant measurements, so you can get better figures to work with.
Also, consider how much difference there is between your starting color and your desired color. For example, turning a black wall white will require more coats of paint. Think of the spectrum of colors and figure out if you’re painting over deep color bases.
If you want to turn deep color bases light, you’ll need multiple layers, and that means you use more paint. You’ll also need more paint for textured surfaces than smooth ones.
Primers exist to make it easier and less wasteful when transitioning very dark or light colors into the opposite. As for the finish, glossier finishes can cover more, so that changes how much you’ll need.
When To Paint The House
Next, let’s talk more about timing. For a fast and easy painting project, you’ll want to avoid extreme temperatures and moisture. These will stop the paint from drying as effectively, adding valuable time to the project before it is fully completed.
Naturally, this section is mainly for exterior painting more than interior painting.
First is the temperature. This affects the curing process of paint and other substances you may use when redecorating the home. Direct sun is infamous for causing cracks and other imperfections to develop in paint as it dries.
When you get high-enough temperatures, the paint won’t even dry. Paint should have information about their optimal drying temperatures on their packaging. If not, you should be able to find more info online.
As for moisture, you obviously need to stay away from the rain. Surfaces being directly rained on will be near impossible to paint. Even if you do manage it, it’ll be inconsistent and look terrible. If it is raining but there’s a sheltered surface that is dry, you can paint it with less worry.
Of course, moisture is more than rain. The air around us has an ambient moisture level that changes all the time. Get something that can measure relative humidity and, when it is at 50% or higher, reconsider painting for that day. If you must paint, give it more time to dry.
So, when is the best time to paint? Summer is great for exterior painting but can also produce high temperatures and warm, humid showers that make painting tough. If your springs and falls are calmer, it may be worth waiting till then instead.
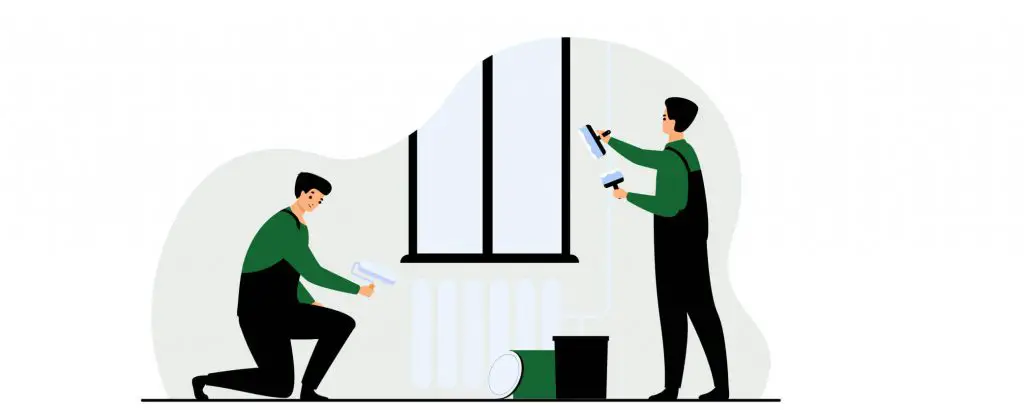
House Painting Tips And Tricks
Now that your house painting plan is coming together, you should learn some of the tips and tricks that make the process easier. They don’t just make it easier for beginners, they also save seasoned professionals valuable time when the project is underway.
Here are small things you can do that will make the process much smoother and give you a better paint job when you finally put the brush down.
- Get the best paint and primers/finishes that you can comfortably afford. Paint quality will have a noticeable impact on the end result. High-quality paints are thicker and tend to cover more ground… or wall in this case. They can also get the job done in fewer coats.
- Next, embrace microproductivity. This is our ability to divide thoughts, subjects, and processes into smaller pieces so that the whole thing isn’t too overwhelming. You’re not painting a house, you’re painting a section of wall, then another, and then more over time, until eventually the whole house is done. By breaking the project into much smaller projects, it becomes easier for a lot of people.
- If you want to do a good job, do not use paint to fill in holes, cracks, and other imperfections in your home. Instead, use caulk and other sealants, like putty, to properly fill them. Then, when they are dried and smoothened out, you can paint over them for an even better, sturdier result.
- If you’re using sheen, know the pros and cons of doing so. Flat paint sheen can be applied more quickly than satin alternatives because it doesn’t lose dullness. However, it isn’t the best for siding that needs to get cleaned more often.
- Paint sprayers are becoming cheaper, so it’s up to you if you want to use them. Know that they require a lot of work to set up and you’ll need a lot of tarps but, if you put the effort in, you can get the job done much faster than you would with a paintbrush.
- Lastly, use a stepladder as much as possible. You should be standing comfortably no matter what you’re painting. If you stand on your tip-toes for a paint job, your lower back will feel the consequences later. It may seem like a small thing but using a stepladder whenever possible will make the process much more comfortable.
Common Mistakes To Avoid When Painting Your House
Before we tell you what to do when painting your house, let’s go through what you shouldn’t do. You can do everything right but, if you make a critical error, all of your hard work will be for nothing.
Here are the common mistakes that everybody should avoid when painting their home.
Not Using Multiple Painting Tools
How much painting equipment do you have? You shouldn’t expect to get the job done with one paintbrush or just a set of paintbrushes alone. Instead, you’ll need to have at least a set of paintbrushes and a roller. You can also opt for a paint sprayer but, as we said, it can take more prep work and they are more expensive.
Not Covering Fixtures
Before you get started, you should cover all the fixtures in your house’s interior. What are they? Those are the objects that you don’t want to paint over, such as door handles, window sills, lights, and light switches.
If they get splotched with paint, you’re going to have to painstakingly clean them all!
As for what you cover them with, it’s best to use tape. Tape adheres closely to the surfaces, avoiding paint bleeding through and touching surfaces where it shouldn’t. You can get masking tape that is specifically designed for keeping paint at bay.
Painting Dirty Surfaces
Just because you can’t see the dirt after it has been painted over, that doesn’t mean it’s gone. You should wash any walls and ceilings that are being painted. In fact, it’s good form to wash them even if they don’t look dirty, just to make sure the paint adheres to the surface even better. The tiniest dust particle can make paint uneven, so you should avoid painting over dirty surfaces.
Not Preparing Surfaces For Painting
Likewise, you also shouldn’t otherwise prepare surfaces to be painted. Sure, the wall may be clean, but are there any other blemishes that will interfere with the new coat of paint?
Look for glossy surfaces that need to be scraped away, along with any flaking old paint or uneven wallpaper.
Painting The Ceiling Last
Many prefer to leave the ceiling for last. It is the most difficult to access, after all. However, you may be disadvantaging yourself here. What happens when you paint the walls first?
You paint the ceiling, then the wet ceiling drips onto the already painted walls. Since lighter colors are used for ceilings, it’s very noticeable and can ruin your walls.
Instead, do the ceiling first and then the walls after it has dried. Put a tarp down to protect the floor from drippage, too!
Painting Wet Surfaces
Speaking of wet paint and drippage, you should also avoid painting on wet surfaces. That may seem obvious to some but you need to make sure the walls are totally dry, allowing extra time for drying if you’re in a humid place.
Even walls that feel fine to the touch can still be in the process of drying and may blister if you paint over them.
Painting Onto Rotten Wood
This one goes together with our advice about dirty walls. Just because you paint over it, doesn’t mean the wood has been cured. You can’t just paint over rotting wood and pretend that it’s fine.
Instead, you need to replace/repair the wood and patch up any imperfections with compound. This may cost more than just painting over it but it’s cheaper than the entire wall rotting through and needing replacement later… which you’ll also need to paint again. Do it right the first time.
Skipping Out On Primer
We’d recommend that you use primer so that your paint adheres to surfaces with ease. Sometimes, you can do everything right and still have awkward surfaces that reject your paint. Primers stop that from happening. They’re also important for painting over darker colors or stained walls.
Throwing Your Paint Away
Let’s say you follow most of this guide and get the job done. That’s great! Now it’s time to throw away any leftover paint, right? Sure, if you plan on never giving the paint job a touch-up.
When looking for colors, you may have realized just how tough it can be to find matching shades. Well, similarly, you don’t want to look for similar shades in the future. Instead, keep the exact same paint around, sealed in a jar for freshness. Then, if you need to touch up the paint, you have the same shade ready for action.
Instructions To Paint Your House
With all of that covered, let’s finish with some general instructions that you’ll need to follow when painting your home. We have focused mainly on exterior painting – we’ve given you enough tips on interior painting already.
There are nine steps in total, though you should add more if needed or subtract those that aren’t relevant to your home and the project you’re doing.
1. Inspect The Home’s Siding
To start, you’ll need to take a walk around your home. Grab a notebook or other papers you have lying around, making note of the exterior parts that you want to paint. You don’t need to be an artist or an architect, as long as you understand your own scribblings.
Make notes of holes and cracks in the siding that need attention – we’ll get to those later. Also note any exterior fixtures that may need removing or covering, like any signage, screens, guttering/drainage pipes, etc.
2. Measure For Paint
Next, you should make sure you have enough paint. We have a more detailed guide to doing this above, so you might already have this covered! If not, now is the time to measure up how much paint you’ll need.
You can go with a generalized figure or you can grab a laser measure and get to work measuring the home. Measure the length and heights of walls and multiply by two to get area measurements, subtracting door and roof dimensions. Do the same with smaller fixtures.
It’s a good idea to get 10% more paint than you need, so you have a margin of error and you can keep some when you’re done.
3. Remove Or Cover Obstructions
Take away other obstructions too, like house number plaques, mailboxes, clotheslines, and any security or lighting equipment that may be mounted on or near your house’s exterior. If removing obstructions is tough, wrap them up instead to keep the paint off of them.
4. Fix Major Problems
Now’s the time to repair any serious problems that you noticed. Whether it’s surface-level wood siding or the stone foundations of your home, swap out the problem areas with matching materials wherever you find splits, decay, and other unsightly issues.
5. Remove Loose Paint
You can’t paint over old, flaking, blistering paint. If it’s not strong enough to handle the new coat, it needs to be removed with paint scrapers. A heat gun can help loosen layers too. Remember to catch any debris with a tarp or cloth.
Make sure your paint isn’t lead and, if it is, take the necessary precautions to stay safe.
6. Clean The House And Mask
Next, wash the exterior surfaces that you’re going to paint. This can be very tedious if you’re doing it by hand but it does get the best results, so try to rope a friend into the fun.
If you go with professionals, they use pressure washers that work fast. They set the spray to its wide setting, to avoid putting too much pressure on the sides.
Wait for the exterior to dry and, when it has, cover any fittings that have yet to be covered. Again, masking tapes and sheets are your friends for this step.
7. Caulk And Patch
You’re almost to the actual painting part, you just need to caulk and patch any splits, holes, and other surface blemishes that cut into your house’s exterior.
Cover intrusion points and make sure they’re fully sealed, dried, and sanded if necessary to produce a smooth, paintable surface. Apply primer to those patched areas, too.
8. Lay Down The Paint Coat
Now you can finally start painting. Use a roller or a paint sprayer or, if you have a friend, both. Pass a paint sprayer over the exterior and then follow up with a roller to catch imperfections. If you use a roller with a sprayer, make sure you don’t directly apply paint to the roller. Instead, roll it over the sprayed wall to spread it out – we call this back-rolling.
9. Paint The Trim
Leave the initial paint coats for a day so they can cure. Then, you can start painting the trim of your house’s exterior, namely the eaves and fascia. This is where brushes work best.
Summary
That brings us to the end of our guide to painting your own house. No matter if you’re doing it yourself or getting professional help, the information here will help with the process. Remember that it’s exactly that – a process – and so it’s natural to make a few small mistakes when you’re starting out. Fortunately, you can always double back and make the house even better later.
