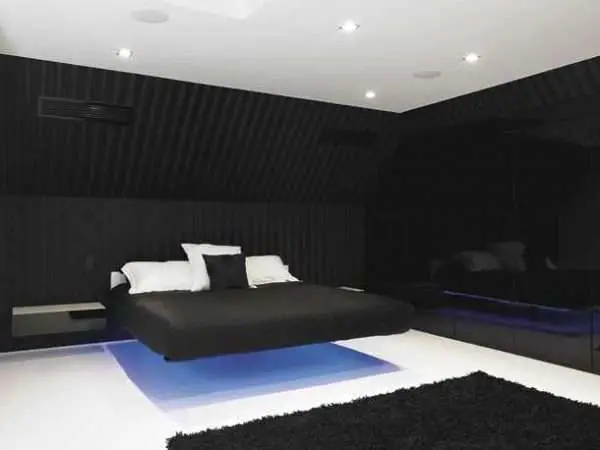
Floating beds look wonderful. They add a nice little charm to your rest area and make it look like part of something magical. But these floating beds can cost you a fortune. Want to build a do it yourself floating bed with LED lights for your bedroom?
Well, you have come to the right place. Here we will provide you with all the information that you need to get it right for the first time.
It might look almost impossible to pull off, but after going through this guide, you will have a lot of fun working on.
So, continue reading to find out more.
How to Build a Do It Yourself Floating Bed?
Want to know how to build a do it yourself floating bed for your bedroom? Here are the tools you will need, followed by the 5-step building process of your fancy bed.
Required Supplies
- 2×8 lumber for bed trim, bed frame, and headboard.
- 2×12 lumber for the bottom and top of the nightstand.
- A small piece of plywood sheet (¾ inch).
- A couple of ¼ inch plywood sheet pieces.
- 10 pieces of 1×4 lumber.
- 4 pieces of 2×4 lumber.
- 22-gauge wire for puck light switch.
- Receptacle tester.
- Extension cord.
- A couple of workboxes.
- An electrical wire for the outlet.
- A couple of outlets featuring USB ports.
- A couple of outlet covers.
- Round switch.
- LED strip.
- Puck lights.
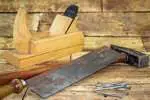
Step 1 – Lumber prepping

You need to sort through a lot of lumber to make sure you have enough to work on this project. So, be sure to check the stock is full with your local wood and hardware store. Make sure you have a rough sketch of what you will make and how it will look when you are done with your do it yourself floating bed.
You can use a circular saw to work on this project, but if you want to speed things up significantly, it would be better to use a miter saw. Want to be successful in your project? Make sure to work with patience all the time.
When you have all the lumber cut to size, it’s time to set up the shop and begin with the sanding process. Keep in mind that sanding might take several hours, and you don’t need to rush through the process if you are expecting some great results. Don’t forget to wear your safety glasses and mask for this.
It would be suitable to sand the wood down with 80-grit sandpaper first and then with 120-grit. In the end, for the best outcome, go with the 220-grit sandpaper to wrap it all up. After that, you will have to paint the bed frame or stain it if you want as per your preferences.
Step 2 – Headboard tackling

You might have to attach a small extended section of the 8-foot plywood sheet if you are dealing with a long headboard. Just paint the bottom of the plywood according to the color if you want for your bed frame.
If you have someone to help you around your projects, it would be better for you, and you can begin from bottom to top if you don’t have a helping hand. You can use the clamps and begin from the top.
It would allow you to stay on track, and you won’t have to make any cuts later on towards the end of the project, as everything will fit in nicely. Once you have the lumber clamped in place, it’s time to screw a few screws in place too.
Keep checking that everything is okay visually and adding a couple of screws every couple of feet. Carry on doing this until you reach the end. Just use a single coat of oil. You can always go for additional coats if you want an even darker finish.
Step 3 – Nightstand construction

As the headboard is massive in size, you might end up covering your wall receptacles. Therefore, it would be better for you to add more outlets to the nightstands. Just find the least attractive piece and choose it to be the back of your nightstand. It’s time to cut the opening out for your electrical work box.
Building
To build the floating nightstand, you can make a dowel jig for making those accurate holes for dowel pins, but please work with them patiently because even if you are slightly off, it will make your worksheet shift its place can be very frustrating for you.
If you don’t want to go down this path, then consider screws as another option. Just fill the heads with wood fillers. Whichever option you consider, don’t forget to use clamps and glue.
Mounting
Next up is mounting the nightstand. When you have given it enough time, claim your nightstand right at the height you desire when the glue is dry. Then drill four pilot hotels from the headboard’s back which will serve to be marking holes.
Your pilot hole must not get quite right out of the nightstand, and it should only mark the nightstands back. Keep your nightstand mounted and trace the hole out for the electric box on the headboard.
Now drill a small hole for a small switch and then drill a hole at an angle right at the bottom into the headboard where you can install the puck light; now repeat the process on your other nightstand as well.
After that, you can remove the nightstand and drill a ¼-inch hole to let the bolts pass right through. Next up is the installation of the threaded inserts right into the back of the nightstand. Don’t forget to add a drill stop bit and avoid going all the way through.
Applying the coat
In the end, you need to apply the topcoat, and you can go for polyurethane or any other coat of your choice. You can go for two coats and maybe go for a third one is the end for even better results. Don’t forget to sand each coat with 400-grit sandpaper as well.
Step 4 – Electronic and power adding

It’s time to attach the lumber strips to the headboard’s back and place an LED strip right here. Make sure to go for low profile puck lights to add here. Wireless is a good choice, but you will ahh veto go through many battery replacement headaches, later on, so going wired would be a better option for you.
Just cut the connector off and pass the woe right through the hole you drilled previously and screw the lights in place. It’s time to connect the power switch to a dual conductor wire. Install the LED strips right on the lumber and back the headboard.
Just strap all your wording down and make sure nothing should be loose. You need to double-check all the connections using your receptacle tester to make sure everything is done correctly.
Step 5 – Assembling bed frame and attaching a trim
It would be better for you to go for corner brackets in all corners of your bed frame and then install the support for bed slats and install a couple of screws at each of these intersecting points on the slat supports.
After that, you will need to attach a trim around your bed frame. You can use brackets on the inside as well as the outside in the bed. And you can add as many as you like, but four would be good enough.
Each of these trims had four 1.5-inch corner brackets inside and 4-inch outside brackets right after the foot. If you can use mending plates for attaching those two intersecting lumbers this way, you will keep your two lumbers even together. Now your frame is done, and it’s time for you to center it up and attach it with your headboard.
How long does a do it yourself floating bed last?
It all depends on the quality of the hardware you have used to develop your do it yourself floating bed. It also depends heavily on how often you use it and who is going to use it.
Usually, it will last for about 7 to 10 years pretty easily if you have used quality wood in the construction and have installed it properly. If you don’t use it that much, it can last even longer. But if you are making this for your kids, it will last for about 3 to 4 years, depending on how your kids use it.
What can I use instead of a bed frame?
The most convenient alternative to a bed frame is to put your mattress and box groping it directly to your floor. Several people prefer going this way if they don’t want any storage space underneath their bed. Plus, it looks far more aesthetically appealing.
If you have the minimalist decor in your room, such a design will work quite well. Installation of such a design is much less time-consuming as well. If you are doing it for the first time, this project would be a suitable option.
What is the most expensive bed in the world?
The most expensive bed in the world right now is the Vividus Bed by Hastens. It is installed on the Regent Seven Seas Splendor cruise ship and recently hit the sea in 2020. This bed is priced at a whopping $150,000, and the company describes it as the most luxurious bed in the world.
It features a high-quality mattress designed to keep your body relaxed at all times, and the plushness of this bed will make you sleep soundly after a day full of activities on the cruise ship. Hastens is one of the world leaders in bed manufacturing as they have used some high-quality materials in the construction of this bed.
How much is a magnetic-floating bed?
When talking about the magnetic floating bed or a floating bed of any kind, the price can suddenly jump even more than what we have just mentioned for the Vividus Bed. Just a yodel can cost you around $147,000, and the original thing will cost you over $150,000.
These beds feature very powerful magnets that keep the bed afloat while keeping it in the apple. It will give you that authentic hovering feeling like you are sleeping on a cloud.
How much does a do it yourself floating bed cost?
For a do it yourself floating bed, if you already own all the tools and are not going to buy them for this specific project, then there are materials that you will use in the construction. If such a bed is not going to cost you more than $150. For the guardrail and the stain or paint,
you will only need to put in around $50 more, and you will have to do it yourself floating bed reading to drop some jaws in around $200 to $250 at max. Compare this number with the rose that we have just mentioned above, and you will see what you can achieve with your do it yourself project here.
FAQ
How do you make a pallet bed frame float?
You can use various pallets to fit his projects, but the best one is the euro pallet. These pallets are smaller than others. Make sure to sand them properly and wear your protection at all times during the process.
Just make sure to go with a slightly smaller base than your bed frame and use a darker finish on it. It will be a better option for you to match your floor completely camouflaged to the naked eye. With this frame, you’ll be able to make your pallet bed frame float well.
Is it cheaper to build your bed frame?
Building your bed frame can be extremely cheap as compared to buying it ready from the market. You will be able to make it according to your plan and give it a finish according to your wish. You will have to put in a lot more effort, but the result will be very satisfying too once you are done with your do it yourself floating bed.
Are Floating beds stable?
It all depends upon how you have assembled all the parts and lumber. These floating beds might look as if they are staying in the air and might break the second you sit on them, but if you have built them in the right way, they will last for a long time. Because it’s all just an optical illusion, and the base of the bed is just painted or is hidden away in the LED light strip.
How sturdy are floating beds?
These beds are as sturdy as a regular bed, but it will heavily depend upon how much you use your bed and how well you have installed the materials. If you have used quality materials in the construction of your do it yourself floating bed and have also installed it properly, it’s not going to go anywhere for the next 7 to 10 years or even more if you don’t use it often. But make sure that you don’t jump around too much on it, or it will certainly break apart.
Conclusion
If you have so much money to spend on your sleep, then okay, but you can always go for a do it yourself floating bed and bring your bed costs under $1000.
You will have to put in some effort and work on your project with a lot of love and passion for making it look exceptional. But working on the project itself doesn’t require any exceptional handyman experience either.
And you will be able to get that satisfaction out of it as well that you have managed it on your own and have brought down the overwhelming costs single-handedly, that is, if you didn’t have any helping hand in the assembly.
Featured Image from Flickr © Susan Quirke – The original image was not changed
