You can explore various options when it comes to do it yourself roofing. You will need a few skills to handle everything with care and precision. Do it yourself roofing will allow you to save thousands of dollars. Professional assistance will help you a lot, but it may cost you a fortune. With a do it yourself roofing project, you will end up saving, and you will have the bragging rights.
This guide will provide you with the step-by-step procedure to follow and get everything on the path right from the word go.
How to Build a Do it yourself Roofing – Step-by-Step
So, have you prepared your mind for a do-it-yourself? This step-by-step guide will sort things out for you.
Can you do it yourself?
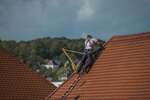
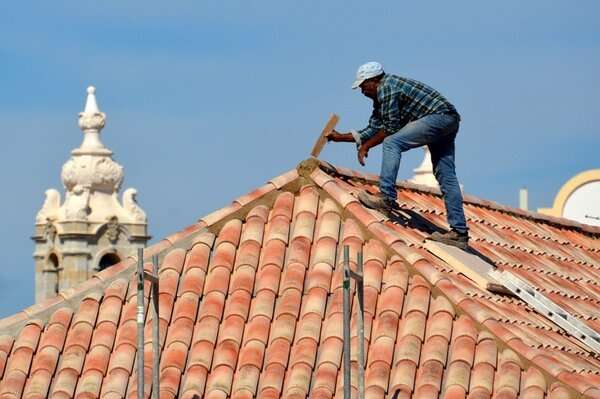
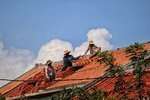
The biggest question that will come to your mind is, can you handle roofing on your own? It will not be an easy task by any stretch of the imagination because roofing is challenging. So, it would be better if you have some experience under your belt.
Moreover, you will have to go through some hard work of walking around on your roof’s surface and carrying the asphalt shingles on the ladder from the ground to your roof. If all this is a pretty tough task for you, you should hire a professional.
In addition to that, you need to get a permit from the city council or your community management office that can do the roofing on your own or not. These are the initial steps to take before you start doing anything with your roof.
Tearing the old shingles
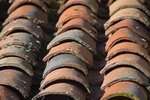
First of all, you will have to tear off the old shingles because you cannot install the new flashing on top of the old ones. You have to get rid of all the old nails because the protruding ones will make holes in your new shingles.
Protect anything under the roof because the shingles you will tear off will fall on the ground, and they might damage anything on their way. Therefore, you have to be careful as well during this process.
Installing the drip edge
You have to be careful in installing the gutter and drip edge. Usually, you won’t need a metal drip edge, but your roof edges will look to have a nice finish and prevents the shingles from curling. Another advantage comes when the water is not running down directly on the fascia boards.
Fasten the drip edge before you install the underlayment. Ensure to install the drip edge on the gable ends and finish your installation of the underlayment. You can use tin snips for cutting your drip edges to the right size.
Step 1 – Rolling out the self-sticking underlayment
You need to keep your roof safe from any windblown rain or ice dams, and for that, you will have to use a rollout of the self-sticking underlayment. You can peel off the top half of the plastic backing and start the rolling.
Step 2 – Peeling off your bottom backing
You must be careful when peeling off your bottom backing because the underlayment needs to be smooth before you nail its top edge. You can similarly install the second course for getting the correct overlap. Ice dams are caused by bad attic ventilation, and if you don’t overlap the shingles properly, water or ice can work their way under the shingles and drip inside your house.
Step 3 – Covering the roof with felt paper

The next step is to cover the roof with felt paper and to start each of these courses but driving a few staples closely grouped. After that, you need to unroll the felt and straighten it. When you are done, you can add a few more staples as well. And make sure you don’t skimp on your staples.
Step 4 – Overlapping the ridge
You will need to run your felt paper right over the peak and overlap the paper right on the other side. You will have to repeat this when you reach the top from your other side. Felt paper is beneficial because it can keep the moisture away from under the shingles.
It will significantly increase the overlapping function of the ridge and will further improve the safety and security of the overall installation of your do it yourself roofing.
Step 5 – Waterproofing the valleys
Install the self-stick underlayment right inside the metal flashing. If you think that you will require more than one flashing within your valley, you will have to lay them both in place. Make sure they are straight before you nail them down.
Step 6 – Fold flashing right over the peak
You will need to cut the flashing right back to the peak, and the cutting should be along the crease as well. From here, you will have to fold the flashing right over the peak and then cover those ends with self-stick underlayment. Also, avoid any extreme temperature at this point.
From here, you can begin with your starter shingles and install the shingles by nailing them into the parcel. Make sure to run your shingles long and trim off anything going outside of the roof. You can use a hook blade for this and try to trim while cutting with an angle on the inside of the edge.
Step 7 – Working around the stacks and vents
You will have to be careful around the vets and stacks. Just make sure you cover most roof areas and leave any tight corners or edges for the end. You can install a layer of underlayment right around the vent pipes. You will have to caulk using roof sealant.
Moreover, you can add a vent flashing as well. And then you can shingle right over the vent flashing and trip off any extra shingle. In the end, you will need to cap the ride and seal it all up.
Types of Roofing & Their Cost
There are different types of roofing available, and they come with different price tags as well. These roofing materials are sold per square, a measurement equal to 100 sq. ft. a 2500 sq ft double story house with a pitched roof of 4-in-12 will need around 1500 sq. ft roofing, or you can say 15 squares. You can add approximately 10% to 15% for the waste as well.
If you are looking to reduce your energy costs, you can go with certain types of asphalt shingles featuring cooling granules and metal shingles with pigment coating. These will help in reducing energy costs significantly and are eligible to tax credits as well.
Asphalt shingles
These are also known as composition roofing, and they are quite commonly used for this purpose. Therefore, these shingles are readily available to do it yourself roofing and are relatively cheap. You can conveniently install them if your roof is not that steep.
The individual shingles come with slits that separate a shingle into 3 different pieces to give your roof a textured appearance when it’s all done. Therefore, they are also known as 3-tab shingles.
You can expect to pay around $200 to $400 per square here if you go for professional services. If you do it on your own, you will spend around $65 to $100 per square for these shingles.
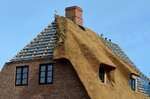
Wooden shingles
Wooden shingles are premium quality products, and they look incredibly nice and have a traditional appearance. They will continue to look similar for an excellent periodic time. But if you have these shingles in place for a long while, they will fade in color and exhibit a mellow grey tone.
There are shakes available on the market as well, but they are constructed differently. These shakes are mechanically different and have a rustic surface. These are not the best option to consider for the installation on your own. But if you have a considerable amount of experience with roofing and woodworking, you can go for it.
You need to apply these changes only if you have a roof with a 4-in-12 pitch or bigger. You can expect to pay around $400 to $900 for professional services, but for do it yourself will be about $125 to $175 per square.
Metal roofing
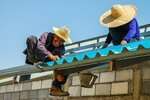
Metal roofing is another option, and it features different tiles and panels. The length of these panels is around 20 feet long. You can join these panels with the edges of the standing seams. These dreams can prevent water, and they are not cheap either.
But the good thing is that they can conveniently last for a very long time, so you will get the worth of what you are investing. They will cost around $300 to $700 per square, but if you are going to install it on your own, the cost will vary from $175 to $250 based on the quality of your roofing.
Other types
There are some other types of roofing also available on the market. For example, you can go or clay tiles if you want, but they are pretty experienced, and you won’t be able to handle them on your own either.
There are concrete tiles as well, and they should be installed professionally as well. Both these types of tiles will cost you around $400 to $1100 per square when fully installed. You can also go for rubber and slate shingles, but they are even more expensive.
Overlay vs Tear Off
You might be thinking, why can’t I go for the overlay? Well, both these techniques are different, and they have their pros and cons as well. First of all, you need to check with your local building code and see what you can do and can’t do in this regard.
For example, some building codes allow couples to have layers of shingles on the house. It means you can go for an overlay and don’t have to tear anything off. Your entire installation process is going to be a lot faster and less costly. If your roof is in good condition and has only a few signs of damage here and there, then overlaying is a good option for you to consider.
On the other hand, tearing off is expensive because you will have to do extra labor to strip off the old shingles. If your old shingles are not in great condition, you need to strip them off and go for a new installation. You will also have to tear off if you already have two layers of shingles on your roof.
Benefits of Roofing
There are various benefits of do it yourself roofing. And the biggest one of them all is savings. Going for professional services is going to cost you a lot. You will get a good job done, but if you can handle that work on your own using your past skills and experience, why not!
But with roofing, you will end up taking care of rain effectively falling through your roof. It will ensure that your ceiling inside the house remains safe from any seeping water. You will be able to extend the overall life of your home by doing so. This way, you will prevent ice dams from occurring and fending off rain during the season will become much more manageable.
FAQ
How long does it take to put on a new roof?
When talking about the roof of an average house that is around 3000 square feet or anything less than it can be replaced within a day. If you are going for professional help. If you have some experience under your belt, this will take at least a couple of days. In case of bad weather or any other complexity, it can even take a week.
What happens if it rains while getting a new roof?
This is not good news for your new roof installation because rain is bad for your new installation. Rain can damage your roof decking. You have to make sure never to install a new roof on a wrinkled barrier or a wet wood as it is entirely against the building codes.
Conclusion
So, are you ready to go for your do it yourself roofing? Just make sure you have the experience and skills to handle this kind of project. You have to work your way very patiently and make sure you don’t begin your project during the monsoon. You will save a lot this way if you handle the project carefully without any loose ends.
