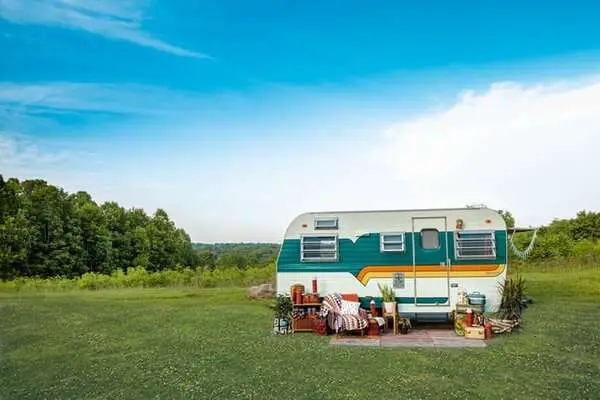
Are you looking for do it yourself trailer wraps? This guide will help you determine whether you can handle it yourself or go for professional help.
You might think it’s just a sticker, and nothing can go wrong even if you don’t get it right. Well, the thing is that you will end up wasting a lot of time and money. When you are handling this project yourself, you will have to be cautious at every step. You might end up damaging the finish of your vehicle as well.
In this guide, we will look at various aspects associated with these do it yourself trailer wraps. It will allow you to carry on with your project without making any errors.
Should You Do It on Your Own?
If you have a considerable amount of do it yourself projects and handled such vinyl stick-on graphics before, you can go for it.
The entire project will take a lot of your precious time, so you have to be cautious. With more experience, you must plan your project and carry out each step meticulously.
If you don’t have much time, you should seek professional help to do it on your behalf.
Do it yourself Trailer Wrap Preparation

To be successful in your project, you need to have a checklist on your hand that you can follow closely.
Get your trailer through these steps before you embark on the wrapping journey.
- Clean the trailer thoroughly to get rid of any grease or dirt. If you leave any residue or debris on the vehicle, it may lead to rips or bubbles.
- You also need to prime your trailer, especially if you are going for 3M adhesive products to do it yourself trailer wraps.
- Make sure to remove the mirrors and trim. It’s just like painting your room where you remove the fixtures or outlets and don’t just try to paint around them. You will have to make sure that the outlets and fixtures are in good condition before removing them. Some fixtures cannot be removed, though.
- Don’t forget to check all the measurements. The components should match. Take your time and double-check all the measurements.
- Make sure to apply your vinyl wraps using squeegees, and don’t forget to cut off any excessive vinyl.
- Using heat to smoothen the vinyl sheet, especially over the complex angles and curves, is extremely useful. But don’t overheat, or you will end up damaging your vinyl sheet and the surface of your trailer.
- You can covalently use a razor or an exacto knife for cutting around the seams, rivets, bolts, and edges. But you will have to be careful that you don’t damage the paint underneath the vinyl sheet.
- It would be a good option for you to install decals even if you are a newbie. These decals can be extremely useful and look pretty attractive. They can also avoid removing the equipment to cut around the protuberances. These decals will be very effective in handling heat too.
Be very careful and slow in your execution and work on those tiny details. Going step-by-step by covering a smaller area will allow you to get better results in the end.
What Needs to Be Kept in Mind While Installing A Trailer Wrap?
You might wonder if there is something you need to avoid when dealing with do it yourself trailer wraps? Well, yes, there are, and you need to keep them in mind right from scratch.
There are a few things you shouldn’t do when dealing with do it yourself trailer wraps. These rules shouldn’t be broken under any circumstances, or you will have to deal with certain problems during your project and eventually increase your costs.
Temperature

So, are you ready to wrap your trailer? If you have designed and created your do it yourself wrap, you might have spent a lot of time working on it. Just make sure you laminate your wrap after you have printed it.
You will have to be in a temperature-controlled environment for the installation process to work. The temperature needs to be within the range of 60F to 80F. Make sure not to leave any room for error and go slow on your project. If you are not careful about your proceedings, you will end up with imperfections.
Keep the weather conditions in mind
You have to make sure that the weather conditions are just accurate. If it’s too hot or cold or humid, your trailer wrap will fail in any case. Installation adhesive for your vinyl will always fail when dealing with cold temperatures under 60F.
Most vinyl adhesive suppliers recommend installing at around 70F, and there shouldn’t be over 50% humidity. If you do all this on a cold winter day, it will be quite an expensive mistake.
Never ignore your substrate
You need to consider any damage to your vehicle seriously and keep in mind that the trailer wrap will only hide it and not repair it. Such damage can occur due to rust or corrosion. But wrapping a vinyl sheet is not going to fix this issue.
This damage and rusting will cause the adhesive not to stick to the surface for an extended period. Therefore, you need to repair the surface damage before you start applying your wraps.
Always prep the surface before you start wrapping it
Make sure that the surface of your trailer is entirely clean and properly dried before you begin installing your graphics. Any solvents, grime, or petroleum residue will cause the adhesive not to work, and your vinyl sheet will loosen up or start to bubble.
The surfaces must be adequately cleaned, finished, and dried. Remove any organic compounds caused by insects or animal residues, food particles, and plant material.
You might need some solvents to remove petrochemicals like diesel, oil, or wax. Follow the instructions given on the solvents to treat these petrochemicals and prevent any failures.
Ensure you don’t skip this step no matter what happens.
Remove your equipment
Make sure to remove the equipment, mirrors and those license plates that need to be removed. You will be able to finish the work with more details by doing that. It is just like removing the lights and fixtures when you are painting your home.
Know what you should use and how to use it
You need to know how, where, and when to use the tools appropriately. Anyone can go for a squeegee for applying adhesive to the surface. But there is a proper way to do it.
Doing it the wrong way will cause problems, and similar is the case with using heat. You will also have to be careful while working around those rivets, as well as equipment.
Using decals will work well for you here. You can use your credit card for a small decal, but you can also do a partial or a full wrap. Therefore, you need to have the right tools to get the job done.
Cleaning Your Do it yourself Trailer Wrap

So, what should be done to keep the trailer wrap clean? You will have to wash your trailer often to prevent any build-ups, including grime and dirt. Moreover, you will have to go for different spot applications for those tough stains with isopropyl alcohol. You can use them on matte vinyl wraps as well.
It would be suitable for gentle cleaning, handwashing, and hand drying. You can always use a silicone squeegee for removing any extra water before you start drying by using your microfiber towels.
Make sure to be subtle on your vinyl wraps. You can go for brushless and touchless trailer washes if you want, and you can also go for pressure washers but on a full low power setting below 2000 PSI. Just keep the spray tip at least 12 inches away from the surface.
Ice spray will work well if you are looking for that showroom shine. Don’t use wax or polish products, or it will haze the wrap’s look and appearance.
Removing the Wrap from Your Trailer
And what if you want to remove the wrap from the trailer? These do it yourself trailer wraps are not that difficult to remove from your trailer’s surface. You can use your fingernails or a plastic scraper for pulling the wrap from your trailer’s surface. Make sure to begin to the front edges and work your way to the center of the panel. Your surface will look pretty gnarly, but it will all fade away in a few minutes.
After that, you can use a heat gun on the surface evenly at around 120F. It will loosen all the adhesive, and you can pull that conveniently. You can always go for a non-contact IR thermometer to confirm that you are not overheating the trailer surface, else you will end up with a lot of mess on your surface.
You need to make sure to pull those do it yourself trailers wraps at steep angles right from the edges. The best practice is to remove the wrap back on itself at around 15 to 20 degrees and get the job done pretty quickly.
If this wrap gets too tough to pull, you can reheat it and start pulling it again. In the end, you can use bug and tar remover to get rid of any adhesive left on your surface.
FAQ
Can I go for do it yourself trailer wrap?
You can certainly go for such a project but make sure you have a very patient approach and the right tools for the job. Also, make sure that you clean your work area thoroughly and fully dry it.
Can I go for a car wash with this trailer wrap?
No, hand washing is the best technique to wash your trailer with a wrap. However, you can go for touchless and brushless car washes for this purpose. In a subtle setting, you can even use a pressure washer on your wrapped trailer surface.
Can this trailer wrap damage the paint of my trailer underneath?
In reality, a trailer wrap can protect the paint that is underneath the wrap. The wrap blocks UV rays that can be damaging to the paint. When you remove the wrap, the original finish will remain intact.
How long does a trailer wrap last?
It all depends on the wrap’s quality, type, and care while installing the wrap. Care after the installation and different environmental factors are there too. However, these trailer wraps can conveniently last anywhere from 4 to 11 years.
Can you wrap your entire trailer with it?
Trailer wraps not only stick to the smooth painted surfaces, but you can use them on rigid plastic as well. It will not bond well with bad paint jobs, deep scratches, rust, chopped surfaces, gouges, textured surfaces, flaking paint, ABS plastics, rubber, or spongy and porous materials and surfaces.
Conclusion
So, what do you think about these do it yourself trailer wraps? Do you believe you have the skills and patience to take the project on?
You need to have the right tools to carry out the installation process. Also, be extremely patient in handling your project. Just make sure you have thoroughly cleaned your trailer’s surface, and is completely dry for the best results.
