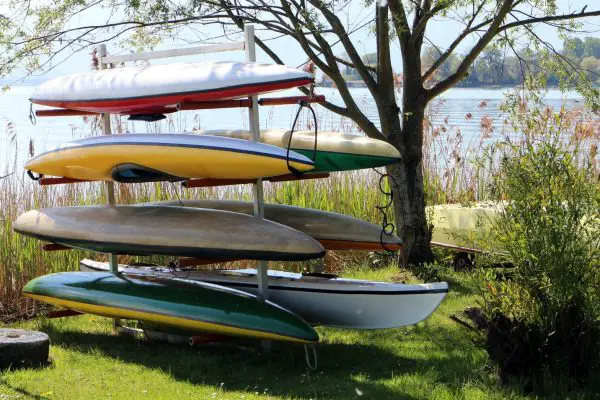
Kayaking is rapidly becoming one of the most popular water recreational activities for waterfront dwellers. Kayaks are a smart and inexpensive alternative to jet skis, boats, and other personal watercraft due to their simple design and the numerous health benefits they offer. However, like any vessel, they require a fair bit of care and maintenance, especially when it comes to storage. Storing them on the ground or in the water can cause deformations and damage in the form of warping, holes, cracks, and even mold. Therefore, you need dedicated storage that lifts your vessel off the ground after you spend some valuable time in the lake or nearby river.
While there are many ways you can do this, such as installing a kayak rack on your car or suspending your vessel from your garage ceiling, having a kayak storage rack is the simplest and most practical storage option, especially if you’re short on space. Depending on your location, you can find hundreds of ready-made and custom options in the market. Although we feel this is something any homeowner with basic tools and DIY experience can build on their own.
If you’re up for a challenge, keep reading our detailed guide on how to build a DIY kayak rack using PVC pipes so you can safely store your vessel without overcrowding your garage or shed and save a fortune in the process.
Benefits of a Kayak Storage Rack
If you’re on the fence regarding whether or not you need a kayak storage rack, here are some incredible benefits that might change your mind:
Safety and Protection for Owners and their Vessels
Although kayaks are among the lightest water vessels, they can be dangerous if you don’t store them properly. For instance, if you suspend them from your ceiling or lean them against a wall, they can fall, especially when wet. A kayak storage rack is specifically designed to hold kayaks securely since it’s equipped with locks and straps you can use to secure them in place. Plus, you can drill your rack into the ground or in concrete for more security and protection, especially if you have kids. This simple yet effective storage solution also protects vessels from different forms of damage, such as wear and tear due to rubbing, and inclement weather, such as heatwaves and storms.
Easy Accessibility
Storing your kayak on a rack enables easier access to your vessel, especially if you install it on your dock or near the shore. You can also place it close to your truck or vehicle in case you don’t live on a waterfront and have to drive there to use it.
Fewer Space Requirements
If you have an overcrowded shed or garage, installing a kayak storage rack is a smart way to utilize your vertical space, especially if you have multiple kayaks. Depending on the design, storage racks can serve multiple purposes. For instance, if you install them 3-4 feet off the ground, the bottom space can serve as an excellent storage spot for your fishing equipment. You can also install hooks at the top to hang your lifejackets and boots to dry.
How to Build a DIY Kayak Rack from PVC
If you’re intrigued by the benefits above, you’d be even more pleasantly surprised when you discover how easy it is to build a DIY kayak rack. So, without further ado, here’s everything you need to build a dedicated parking spot for up to three vessels (two at the side and one on the top):
Tools/Equipment
- Hacksaw or backsaw
- Table clamp (optional)
- Basic tool kit
- Safety equipment (gloves, mask, etc.)
Materials
- 2-inch PVC pipe (24 ft)
- 2-inch T-joints (8 pieces)
- 2-inch 90-degree elbow joints (8 pieces)
- PVC cement (to glue the piping)
- Foam insulation tubes (10 ft)
- Cable ties (pack of 100) or Duct tape
Steps
Cut the PVC Pipes to the Proper Lengths
The first step is to cut and prepare your PVC pipes for the structure. For this, we recommend using a hacksaw as it’s great for cutting metal and PVC pipes. You can also use a table clamp for safety and better accuracy by holding the pipes in place. Here are the pipe lengths you’ll need for this project:
- 2 48-inch pieces
- 2 30-inch pieces
- 2 17-inch pieces
- 4 15-inch pieces
- 4 12-inch pieces
- 6 6-inch pieces
- 10 3-inch pieces
Note: These pipe lengths are suitable for kayaks up to 9 ft long and 3 ft wide so be sure to measure your vessel and adjust accordingly. The general rule of thumb is to leave at least 3-6 inches of space to avoid rubbing.
Build the Rack’s Base
Once your pipes are ready, attach 2 15-inch pieces into a T-joint and an elbow joint at the other two ends. Next, attach a 3-inch piece on top of each elbow. Remember; do not use PVC cement at this point since you need to make sure the rack fits your kayaks perfectly. Once you’re done, repeat the same steps for the other base.
Build the Vertical Supports
Once the two bases are ready, insert a 17-inch PVC piece into the central T joint and then attach another T joint pointing towards the middle to receive the 48-inch pipe that will tie both ends together. Next, attach a 6-inch piece on top of the T. Repeat the process for the other end.
Build the Top Rack
Once your vertical supports are ready, you need to attach a 3-inch piece to the top of the T joint and then 2 12-inch pieces parallel to the ground to support the third kayak. On each end, attach the elbow joints and then insert a 3-inch piece pointing upwards. Once you’re done, attach the two ends of the rack with the 2 48-inch PVC pieces.
Check the Fittings and Glue Everything Together
Once your structure is ready, you need to ensure all the pieces fit perfectly. You can do this by gently placing your kayaks on the rack and checking for any loose fittings. If all pieces fit perfectly, take your rack apart and put it together again by adding PVC cement at every joint to form one compact structure. From there, all that’s left to do is to measure, cut, and attach the insulation tubes to minimize rubbing and secure them with either cable ties or duct tape.
Conclusion
And there you have it – Everything you need to know about building a DIY kayak rack. With this information, you’re a fun weekend away from customizing your dock or waterfront property with a storage rack that’s not only more durable compared to wooden racks but also relatively simpler to build. Furthermore, building a PVC kayak storage rack is much more cost-effective compared to buying ready-made designs or hiring a professional installation service.
So, what are you waiting for? Head to the nearest hardware store or order everything you need online to get started and upgrade your dock or waterfront backyard with this incredible DIY project.
