Whether you’re on the road or transitioning between flights, you need to ensure that your valuables stay protected at all times, not just from theft but also from unnecessary damage. It’s no secret that baggage handlers don’t care about the equipment you’re carrying and are typically in a hurry to get the job done. Similarly, your equipment is at even more damage risk due to collisions and accidents if you travel by road.
Therefore, you need something strong and durable you can use to store and safeguard expensive equipment, such as cameras, guitars, amps, carpentry, etc. Here, a road case comes in handy, helping travelers get peace of mind knowing their valuable items will come out unscathed on the other end.
However, these storage containers tend to be more expensive than typical luggage and aren’t always one-size-fits-all, which is why most people forego buying them. The good news is that a road case is something you can easily build on your own and save some serious money, depending upon your DIY skills and experience.
If you’re up for a challenge, you’re at the right place, as we’ll share a detailed guide on how to make a custom DIY road case from scratch.
What is a Road Case?
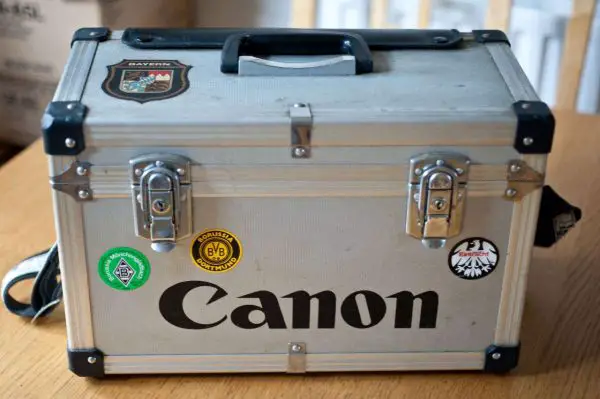
A road case or flight case is a shipping container or transit equipment case specifically built to protect and transport personal equipment in highly-demanding industries, such as music, avionics, entertainment, photography, and videography. Common storage items include musical instruments, cameras, firearms, amps, and testing equipment. These rigid enclosures come in different sizes and are typically made from plastic or metal and equipped with heavy-duty foam inserts or additional protective padding. The term ‘road case’ is commonly used in the US, and it originates from its use for safely transporting band equipment for bands and musicians on the road. However, this does not apply to that they’re only for road-based travel. You can use these containers for any form of long-distance travel and long-term storage.
Benefits of a Road Case?
In case you’re still on the fence regarding whether or not this DIY project is worth the time and investment, here are some of the main benefits of custom road cases:
Custom Shape and Size
The biggest advantage of making a DIY road case is that you can make it in any shape or size you want. This way, you won’t have to try and squeeze your equipment in and risk having it damaged. So, whether you’re planning to transport a guitar or a ukulele, you can design and build one specifically to its parameters.
Strength and Durability
Road cases are designed to be incredibly impact-resistant and durable since they’re made of high-quality plastic, fiberglass laminate, Astro board (honeycomb polypropylene), or metal. You can rest assured that they can protect your valuable belongings.
All-Round Protections
While road cases are designed to withstand rough handling, they offer more protection benefits. Depending on the build quality, they can be waterproof and dustproof on top of impact-resistant, making them more useful for extreme situations, such as bad weather or long-term storage.
How to Make a DIY Road Case
Without further ado, here’s everything you need to know about making a DIY road case using ABS laminated plywood to secure your fragile items and equipment:
Tools/Equipment
- Cold saw (recommended) or hand saw
- Jigsaw
- Drill
- Basic toolkit (hammer, plier, cutter, tape measure, etc.)
- Tape measure
- Pneumatic riveter (recommended but optional)
Materials
- Plywood (ABS laminated recommended)
- Rivets and washers (set of 100)
- Aluminum extrusions
- Protective (flat) corners
- Brace plates
- Butterfly latches
- Wheels
- Clasps
- Handles
- Road case wheel
- Lid stay hinges
- Foam lining and adhesive
Steps
Preparation
The first step in making a DIY road case is to gather your supplies, starting with the plywood, which you can buy from any local hardware store. Next, you need to purchase pre-laminated sheets and adhesive to wrap around the plywood. A panel saw will come in extremely handle as far as the tools are concerned. You’ll have to manage with a table saw if you don’t have the panel saw. Before getting started, you should measure and cut the measures of your road case according to the item you’re planning to store while leaving some room for getting it out again.
Cut the Aluminium Extrusions
We recommend using a cold saw to cut the aluminum to get the best result. A horizontal band saw should suffice if you don’t have one as long as you know how to handle it. Place an uncut piece of U-channel on a side piece and measure the remainder before cutting four pieces. Once done, assemble them but don’t connect. You first need to match the long dimension of the case after setting up the U-channels at 45º. Before measuring these dimensions, you need to cut the corner extrusion to connect the sides to the top or bottom of the case.
Cut Notches and Pockets
Once your extrusions are ready, you need to cut the wood using a jigsaw and precise measurements to ensure an accurate template. If you’re using a black ABS, it may be difficult to see the measurement marks, so you can use a white marker or draw on the unfinished side. After cutting the notches, trim down the aluminum U-channel to match and then mark the location of the handles so you can drill the required holes.
Attach Corners
The purpose of the corner brackets is to physically hold your road case together since you’ll only be using rivets and washers, meaning no glue, screws, or nails. Next, you’ll need a pneumatic riveter or hand rivet gun to splurge the corners so they can effectively absorb and deflect impact force. To start, hold the corner snug and drill the first hole for the rivet. Repeat for the second before attaching the washers.
Attach Other Hardware
Once your basic road case structure is ready, it’s time to attach all the other hardware you need, such as rubber feet, wheels, hinges, and handles. Remember, when attaching the hinges, make sure you close the case and carefully align it with the seam to ensure there are no gaps when you move it. First, secure the rivets on the bottom half after drilling the hole, so you don’t have to hold the case cover for long. For the other hardware, you need to follow the same drilling process.
Line the Foam Interior
The interior framing of your road case depends on how fragile your storage item is and the size of your case. Ideally, you should use at least ½†foam when lining the interior. To do this, all you need is a powerful adhesive or filler material to carefully glue it to the inner surface after measuring.
Conclusion
And there you have it – everything you need to know about making a DIY road case. So, what are you waiting for? Head to your nearest hardware store or order online to get started with this incredibly challenging project. Custom road cases are not only a smart way to protect your valuables but also to personalize your luggage. You can design the surface with unique logos, imagery, and text to boost its aesthetical appeal. Whether you’re looking to transport a telescope, guitar, or testing equipment, you can arrive in style.
