Lava lamps look very complicated, but once you understand the basic principle, you can see that building your own DIY lamp is fairly easy. It is a wonderful marvel for children and adults alike, and whether you are just making an attraction for your child or helping them with their science fair project, it is sure to stand out.
This article will discuss how a lava lamp works, and you can easily make a DIY lava lamp for yourself or your child. A basic, cost-effective version may cost you less than $10, but you can also refine the lava lamp you create by purchasing high-end material.
What are Lava Lamps?
DIY lava lamps involve the raw implementation of the principle of convection, i.e., the transfer of heat from one point to another by the agitated atoms physically transporting themselves from one point to another. The liquid in a lava lamp keeps on moving because of the heat generated by the bulb below.
When heated, water expands and gets lighter. It travels upwards while the heavier waterfalls below. The material in between (usually colored oil) ‘dances’ because of the water’s movements. The light bulb below and the material within the lamp give off a glow, making the oil seem like gooey, hot lava.
This is why you may find that your lava lamp may not move around as much when you turn it on, but as the water heats up, the movement also increases. There are some fizzy elements in lava lamps as well that further give off the impression that the ‘lava’ inside is hot.
In commercial lava lamps, this fizz is made possible with bubbling machines, which is why they may also end up costing more.
How to Build a DIY Lava Lamp
There are different types of DIY lava lamps that you can make, each offering a unique aesthetic value to your place. There are some that use fizzy material (such as pills) to keep the reaction going. You will need to keep on adding these pills whenever you want to ‘turn on the lava lamp.
Others may host a mechanism closer to what traditional lava lamps have, i.e., they may use an incandescent bulb to heat water up. Let’s take a look at some of the more common ways to make DIY lava lamps.
Material You’ll Need
- Clear jars or bottles. You can also use plastic soda bottles or mason jars for this.
- Vegetable or any other oil. The less-dense your oil is, the better.
- Eno, Alka Seltzer, or another fizzy additive.
- Food coloring – preferable liquid
- Photoluminescent pigment. You can find this in most high-end stationery shops.
- Baking soda
- Citric acid. Lemon extract will also work, but it may turn the water slightly foggy.
- Vinegar
- An incandescent light bulb
- Lots of water.
Tools You’ll Need
You will need:
- A teaspoon. That’s literally it!
Basic DIY Lava Lamp
- Add about 250 ml of water to your bottle or jar with water. It should be filled to about ¼.
- Add as much vegetable oil as you’d like. Start small. We added four teaspoons of oil to 250 ml water. Be gentle here.
- Add a drop of food coloring, and you’ll see the water change color. Don’t shake the water violently.
- Add half a teaspoon of Eno or Alka Seltzer and watch the magic happen! Within two to three seconds, you will start seeing the water inside start to bubble and then spin the water inside rapidly.
- The reaction will last only for a few minutes, depending on the type of additive you chose and how much you added.
- Let the reaction settle before putting on the lid; otherwise, the gas being released may cause the container to explode.
There are only so many times you can use this DIY lava lamp before the water inside will start fogging up, and you must remake it.
Glow In The Dark Lava Lamp
To make a DIY lava lamp that glows in the dark and truly gives off that ‘lava’ feel, you can add some photoluminescent pigment into the mix as well. For best results, we recommend adding the oil into a separate container and adding both components therein.
Mix the oil up and add it SLOWLY into the water. Don’t drop it from too far up to make sure that the oil doesn’t split up. Let it settle for a while if the oil accidentally broke up. When you are ready, you will see a clear distinction between water and oil. Add the reacting agent and see how your lava lamp rolls! Turn off the lights for a better view.
Again, this lava lamp will also slow down, and the reaction will eventually stop. Furthermore, if you are just looking to relax, it may not be the best lava lamp because of the reaction speed and the constant need for adding the Eno or Alka Seltzer.
Making a Professional DIY Lava Lamp
You may need to buy a high-end lava lamp bottle for this or make one on your own. You will need a couple of more things as well for this:
- Benzyl alcohol
- 4.8% saline solution
- 40-60 W warm light bulb
- Glass container – preferably 10 inches tall.
- Oil-soluble marker
- Tin can
- A switch. We used a fan dimmer switch to be able to control the reaction speed.
- A piece of wood
Thankfully, you can find all of this at your local hardware store and pharmacy easily.
Now, to make a real DIY lamp;
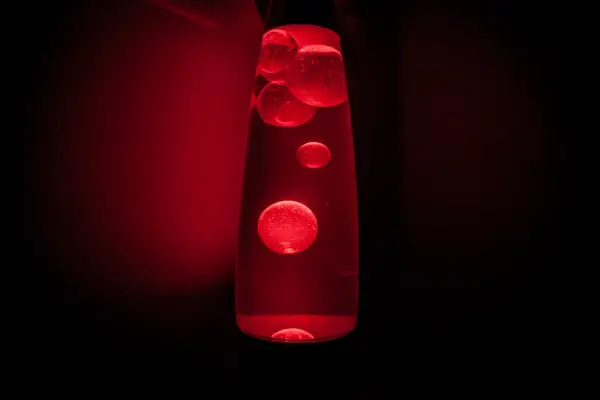
- We chose a red oil-soluble marker for this. Break it open and drop the felt tip into the benzyl alcohol. We left it in for about 8-10 seconds, but you can leave it for longer if you want. The longer you leave it in, the darker it will be. However, don’t make it too dark as it may start bleeding.
- Add some salt to the water. You need a concentration of about one parts salt and 19 parts water (5% saltwater solution). You now have a saline solution.
- Trace a hole on the base for your bulb.
- Next, trace the container’s width on the same base. Remember, you need to leave some space between the bulb and the container!
- Drill/cut a hole in the base for the bulb.
- Create edges on the base to hold the container in place on top of the bulb with any type of wood and tin can. If you are resourceful, you can also weld a holder specifically for the two.
- Install the bulb on the base and, with the help of a holder, connect it.
- Install a dimmer in the line and place/paste it neatly on the base.
- Fill the container with benzyl alcohol and saline solution. Leave some airspace to account for water expansion (about 1 inch is enough) and seal the container.
- Hide behind something (just kidding – you should wear proper PPE) and turn on the lamp. Let it run for 5 minutes before going near it.
It should take no more than a minute for the reaction to start and your ‘lava’ to start bouncing.
Making a DIY lava lamp – especially a professional one – can be quite dangerous. Adult supervision is necessary for the lamp because of the flammability of materials used. Make sure you have proper safety gear to protect yourself should things go wrong. So long as you are safe, everything is possible with a DIY spirit!