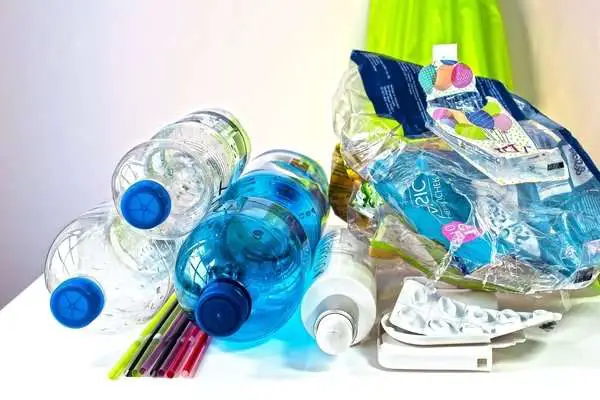
Many people are trying to cut single-use plastics out of their lives, in a bid to contribute some positive change to the environment. But what happens when your home is still full of the single plastics you’ve been using for years?
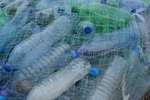
Plastic bottles, for instance, are common in the average household. Whether you’re buying soft drinks and bottled water, or just have a lot of empty detergent bottles. Instead of recycling them, why not try upcycling plastic bottles instead?
That’s right, you can breathe new life into something as simple as an old bottle. Below we’re going to share some of the coolest ways that you can upcycle your plastic bottles into clever and useful things!
Bird Feeder
If you are lucky enough to have a few feathery friends who visit your backyard, consider making a charming bird feeder they can eat from. All you need is a few materials, and a handy tree to hang it from. We promise the local birds will be thanking you!
What You Need:
- Plastic bottle
- Sharpie or other permanent marker
- Two wooden spoons
- Scissors
- Thin Wire
- Craft knife
Step 1: 4 inches from the base, use your permanent marker to draw a small circle on one side of your bottle. Make sure the hole is large enough to fit the handle of your wooden spoon. Cut the hole out with your craft knife.
Step 2: On the other side of the bottle, cut a larger hole that can hold the top of the spoon.
Step 3: In addition to this, repeat steps one and 2, but two inches from the base (just below your first set of holes). Make sure to cut the holes further around the bottle, so both spoons will sit at a 90-degree angle when inserted.
Step 4: Fill with birdseed.
Step 5: Use the wire to form a hanger from the top of the bottle lid. Hang from a tree branch in your back or front yard. Voila!
DIY Sprinkler
One of the most satisfying ways of upcycling plastic bottles is by using them for your gardening. And that’s because there’s no better feeling than taking something that harms the environment and using it to help. And here we have a simple DIY garden sprinkler, that will gently water your gardens for you as well as providing some great summer fun for the kids.
What You Need:
- 2-liter plastic bottle
- Drawing pin/thumbtack
- Bamboo skewer
- 3/4 inch female x 3/4 female swivel hose adapter (can be found at your local hardware store)
- Hose washers to seal any leaks
Step 1: Rinse and de-label your plastic bottle.
Step 2: Place a washer inside the adapter you are going to place over your bottle. Secure the adapter tightly over your bottle.
Step 3: Take your pin and pierce 8 evenly-spaced holes on one side of your bottle only. Use the bamboo skewer to widen the holes.
And it’s that simple! You can even experiment with water pressure and the size of the holes to ensure that it waters your garden exactly to your liking.
Drip Irrigation System
Did you know that you can set up your own drip irrigation system with a few empty bottles? It’s true, and it is incredibly easy to set up. What’s more, drip irrigation is not only a convenient way to water the garden if you’re out of town for a while but it is considered the most efficient and least wasteful way to water your plants. Upcycling plastic bottles, and saving water, what a bonus!
What You Need:
Plastic bottle
Drill, or hammer and small nail
Serrated knife or scissors
Gardening trowel
Step 1: Rinse your bottle and remove the label.
Step 2: Remove the bottle cap, and use your drill or your hammer and nail to poke 4 or 5 holes into it. Keep in mind that the size of the holes will dictate how fast the water drains out.
Step 3: Use your knife or scissors to cut off the bottom of your bottle in a neat line. We recommend removing around an inch of plastic. Additionally, be sure to keep the bottom of your bottle as you’ll need it later.
Step 4: Dig a hole in your garden deep enough to fit at least half of your bottle. There needs to be at least one inch sticking out above ground. Make sure that you don’t dig close enough to cut any of the roots of your plants.
Step 5: Put your bottle inside the hole, upside down. Pat the soil down firmly to ensure your bottle won’t tip.
Step 6: Pour water into your bottle. And once full, take the bottom of the bottle that you previously cut, and place it inside the bottle. This will stop any debris from getting into the bottle and clogging the holes.
Now you can leave the bottle to do its work! Or if you have many plants, simply repeat this process until you have enough bottles to water your garden completely.
Cell Phone Charging Station
Do you hate the sight of phone charger cords dangling across the floors and counters when people charge their phones? If so, we’ve got the solution for you! Because this plastic bottle charging station will hold your electronics and make it so you never have to see those pesky wires again.
What You Need:
- Plastic bottle (preferably of the flatter variety i.e shampoo or lotion bottle. It MUST be wide enough to fit your phone and charging cord!)
- Pen
- Scissors or box cutter
- Sandpaper
- Fabric
- Mod Podge
Step 1:
Draw a line across one side of the bottle, at the height you want your holder to be. It should be tall enough to hold at least half of your phone so it won’t fall out.
Step 2:
Draw around the bottle until you get to the other side. On the other side, curve the line upward, so that this side will be a couple of inches higher.
Step 3:
Cut across the lines with your scissors or box cutter. This will be the shape of your holder.
Step 4:
Draw a small hole, slightly bigger than the port of your phone charger, on the taller side of your holder. Cut it out with scissors or a box knife.
Step 5:
Take your sandpaper and sand down all of the cut edges of your holder until smooth.
Step 6:
Cut a piece of fabric that can cover the entire exterior of the holder, with an extra inch on the top and bottom.
Step 7:
Apply Mod Podge liberally to the front of the holder, and center the over the top. Continue to apply Mod Podge around the sides, pulling your fabric tightly around the bottle as you go. Make sure the fabric sits smoothly, and layer one end slightly over the other, before cutting off the excess fabric. Trim the rest of the fabric close to the bottle’s edge.
Step 8:
Apply a generous layer of Mod Podge over the fabric. And don’t forget to cut a small oval of fabric that will cover the bottom of the bottle.
Step 9:
Wait for your holder to dry before cutting out the fabric over your charging hole.
Now you can use your charging station, by simply plugging in your charger through the charging hole. Place your phone inside, and you’re done!
No-Sew Pencil Case
A perfect little project for the kids, or a quick DIY if you want to keep your office clean and tidy. This pencil case is cute, eco-friendly, and you don’t even have to sew on the zipper! Because of this, it’s one of the simplest ways of upcycling plastic bottles.
What You Need:
- 2 identical water bottles (preferably same size and brand)
- 1 zipper long enough to fit the circumference of your bottle
- Hot glue
- Scissors
Step 1: Cut the tops off each bottle. In fact, you will cut based on how long you want your pencil case to be. For a typical pencil case, you want to cut one bottle short, and the other long. Remember that only the bottoms of your bottles will be used.
Step 2: Check that your zipper will fit around the bottles, with room for a little overlap.
Step 3: Glue one side of the zipper to the inside of the bottle, with the zipping side facing outward. Remember to keep the zip at least ⅛ of an inch away from the bottle, to avoid grazing the edges of the plastic when you’re opening and closing your pencil case.
Step 4: Glue all the way around, making sure not to get any hot glue on the tracks of the zipper. You can glue the overlapping piece over the other end of the zipper.
Step 5: Unzip your zip, and begin gluing the free end to the inside of the other bottle. Make sure both bottles ends line up correctly and keep going till you get to the other side, so the zip can be pulled open and closed with ease.
Now you can put all of your pencils and pens inside, and you’re done! It really is that easy.
This is not an exhaustive list for upcycling plastic bottles. There are many other uses for those pesky single-use plastics. You can even come up with ideas of your own – it’s a great exercise in creativity and helping the environment! Check out our guide to upcycling for more brilliant upcycle ideas.