DIY beauty products can help on saving or earning a lot of money. Every woman spends fortunes on small tubes! Have you ever been buying the same tubes and stuff month in, month out, since the age of twenty? It is obvious that women have an excellent relationship with beauty products.
However, who doesn’t want to erase the smile lines or the forehead lines? Men nowadays turned to beauty more than ever before. Aging affects everyone, and beauty products can save us some years.
Don’t believe it is hard to start making your own natural DIY beauty products. You will be surprised how many options you have only by using products that you have at your house.
Of course, learning how to make DIY beauty products can be proven quite profitable too. As it is mentioned above, women and men are definitely looking for new beauty product options. So why don’t you consider creating a new online business with handmade organic beauty products? The profits will blow your mind. It is about one of the most profitable businesses.
Read below and find some tips and ideas of products you can create in the comfort of your home.
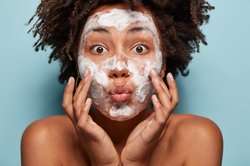
DIY Face-wash

Facial cleansers are essential, but they are also super expensive. If you want to use a natural and organic product, you will definitely need to give a fortune. Let alone that we run out of our facial cleaner every one or two months.
However, you can create your own facial cleanser at home at no extra cost by using natural ingredients.
Ingredients
- Natural soap
- Almond oil
- Vitamin E oil
- Ylang Ylang essential oil
- Frankincense essential oil
- Lavender essential oil
How to make this DIY beauty product?
It is easy to make a DIY facial-wash. You just need liquid natural soap, water, essential oils, and carrier oil. The magic is that you can add any essential oil and fragrance that you like. According to your skin type and requirements, you can add ylang-ylang, geranium, rose, helichrysum, etc.
When you have all the ingredients, simply shake them all together and create a unique facial cleanser. What do you think? Is it something that you can try? Facial cleaning is essential after a tiring and dusty day. Why don’t you try to help your skin breathe with a new natural product?
DIY eye cream

There are so many good reasons to create your own DIY firming eye cream. First of all, you will avoid going to the nearest beauty store or any other department. Turn your home into a personal spa! Second reward; it is fun and fantastic, like finding a new game. Third and best bonus; Just think of all the wrong and unhealthy ingredients included in the standardized bought creams. By creating your own eye cream, you will have something healthy and homemade.
Are you ready to formulate the best anti-aging cream?
Here is what you need:
- 1/4 cup Green Tea
- 1/8 tsp. NeoDefend
- 1 tbsp. Rosehip Seed Oil
- 1 tbsp. Sweet Almond Oil
- 1/4 tsp. Vitamin E
- 1 tsp. Emulsifying Wax
- 1 drop Carrot Seed Essential Oil
- 3 drop Lavender Essential Oil
Steps to create your DIY eye-cream
- Brew a cup of tea.
- Fill two saucepans about half-way with water.
- Add a glass bowl with a spout into each saucepan.
- Place rosehip seed oil, wax, vitamin E oil, and sweet almond oil to one pot.
- Add the green tea and the NeoDefend to the second pot.
- Heat the mixtures until the wax is fully melted.
- Both mixtures should be at the same temperature. Check them with a thermometer.
- When your mixture reaches 130 degrees, pour your water mixture into your oil mixture.
- Mix your cream with a handheld mixer.
- Continue to mix every 10 minutes until you notice that water is no longer separating on the bottom. (It usually takes 30 minutes)
- Once your mixtures are thoroughly mixed, add all the essential oils and then pour into containers.
Remember that your cream will continue to thicken for 24 to 48 hours, so don’t be scared if you see that it is more liquid than it should. When it is entirely ready, pour it into a pump bottle or on any container that you like.
That recipe creates a light cream that can be used both day and night. It works even under your make-up.
However, when it comes to creating high-effective DIY beauty products, you should pay attention to your materials and ingredients’ quality. It may be tricky to make a new handmade cream, but it totally worths it.
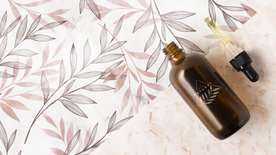
DIY facial oil moisturizer

There is the myth that our skin doesn’t need oil. In fact, after a lot of research, it is proven that our skin needs the oil, and it actually absorbs it better than any other cream or lotion.
After applying the face lotion based on oil, you will feel your skin smoother, nourished, and balanced. The skin needs the oil to maintain the balance, or else it quickly goes dry.
If you think of making your own facial oil moisturizer try the following recipe:
Ingredients
- Argan oil (rich in Vitamin E, carotenes, and fatty acids)
- Frankincense essential oil
- Lavender essential oil
Step by Step Guide
- Add the essential oils to a dropper bottle
- Fill the dropper bottle with argan oil
- Screw the lid of the bottle
- Shake it well
- Store it in a cool and dry place.
It is definitely easier than you think; all you need is the correct quality ingredients, and your moisturizer is ready for your skin or even for selling.
Of course, you can replace those oils with others. Try whatever is more suitable for your skin type. You can use almond oil, apricot seed oil, avocado oil, or jojoba oil in place of the argan oil. You can even go with a combination of those. For example, jojoba oil is perfect for oily or combination skin.
A glass container is always better for storing your facial oil moisturizer. Try two to three drops of the mixture each day, and you will be surprised with your skin.
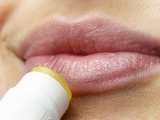
DIY Lip Balm

Making a lip balm is one of the easiest DIY beauty products to make. Κeep your lips juicy and hydrated by using your own handmade lip balm.
All you need is:
- Coconut oil
- Bee wax
- Essential oils of your choice
Some of the favorite and healthy essential oils are lavender, lemon, grapefruit, geranium, or even rose. However, avoid oils like lemon and grapefruit, as they make the skin photosensitive to the sun.
Guide to make your DIY beauty product
- Melt the coconut oil, almond oil, and beeswax in a pot on low heat.
- Once everything is completely melted, remove the mixture from the heat.
- Fill your tins and let them dry out for a couple of hours.
- Your lip-balm is ready!
Using lip balm should be a regular part of our night routine. Our lips are a sensitive part of our face, don’t neglect them.
DIY Charcoal Peel-Off Mask
Have you ever bought those peel-off face masks from the nearest beauty shop? It seems like fun and effective, but unfortunately, it never really is. Τhe biggest problem is that all those masks contain a ton of chemicals and synthetic ingredients. Even a DIY charcoal mask contains…glue! However, you can make your own charcoal peel-off mask using kitchen ingredients and make it as healthy as you can.
Ingredients
- Activated charcoal
- Bentonite clay
- Gelatin (helps on nourishing the skin)
- Tea tree essential oil.
- Except for the tea tree essential oil, you can use a combination of other oils, like aroma Life, blue tansy, cypress, elemi, frankincense, geranium, lavender, myrrh, patchouli, or rose.
How to make and use the mask?
- Remove your make-up and keep your skin dry.
- Open the activated charcoal capsule and place the ingredients into a bowl.
- Drop bentonite clay and gelatin in the bowl, and then add boiling water.
- Mix the mixture well by using a silicone spatula.
- When the silicon mask thickens up, add one drop of tea tree oil and mix again.
Tips for using the charcoal face mask
- Do not apply to your eyebrows. The mask attaches firmly and could pull them off.
- Use warm water to help with the removal if the mask is too harsh.
- It is better to apply it only on specific areas of your face, like the nose and the T-spot.
No one can deny the fact that handmade, DIY beauty products are natural and high quality. However, it is impossible to know the exact expiration date. That’s the reason we can advise you to make only small amounts, and your beauty products will always be fresh and ready for usage.
However, make sure that you use the right containers for your DIY beauty products, especially if you want to sell them. Avoid contamination in any possible way.
If you enjoyed reading these DIY beauty product recipes, make sure you read the ‘‘DIY jewelry tips and ideas” and take more ideas on how to expand your beauty business.


