You must be planning to pursue the skill of do it yourself acrylic nails at home. It’s worth performing at home as it saves you from the hassle of spending extra bucks at a salon. However, to do acrylic nails at home, you need the right set of skills and instruments to get that perfect celebrity-style nails.
Have a detailed look at our step-by-step guide to master the skill of performing acrylic nails without going to the salon.
Do It Yourself Acrylic Nails – Step by Step:
Invest in an acrylic nail kit:
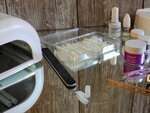
It’s best to start with an all-inclusive kit, like Mia Secret professional acrylic nails kit, which is for beginners and available at a cost-effective price. This kit contains all essentials you need to do it yourself acrylic nails.
While buying the acrylic kit, rest assured you get tips from MMA (methyl methacrylate). This material is relatively inflexible and very strong, which can severely damage the nail beds. Instead, try looking for kits that come with tips made from EMA (ethyl methacrylate), as it serves as a safer alternative.
Once you get used to performing this process at home, you will notice that buying individual supplies suits your needs. It becomes easier for you to grab acrylic tips which complement your natural nail shape.
Moreover, it’s advised to get your hands on a full-size product rather than the mini kits as you don’t need to head over to the store again and touch up every two weeks.
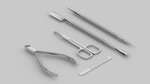
Individual nail care supplies:
If you find it more convenient to stock up on individual manicure supplies, get your hands on the products listed below to perform do it yourself acrylic nails:
Prep your nails thoroughly:
Get rid of old nail polish from nails like you would do while performing manicures. Startup by preparing the nails. If your nails have gel on them, take your time to soak them off, so there is no unnecessary damage to the nails before you do it yourself acrylics.
Next up, make sure to push the cuticles back. Avoid soaking them before you push the cuticles. Because as soon as your nails dry out, they result in contraction, causing the acrylic from the top to chip.
After you have entirely removed the nail polish and cuticles are appropriately pushed back, trim the nails beyond its smile line, which is the nail’s end.
Keep your nails short as you’ll be applying acrylic on top of them, and if you apply acrylic on long nails, there are high chances that your natural nails will snap off, leading to chipping of acrylic as well.
Once you are done, file the nails correctly, making sure they are completely even without snags. Now buff each nail so all acrylic tips have a good grip. It’s better to cut against your cuticles. This reduces your accidental chance of clipping off the skin as it can lead to infection. Just soak your nails within a small tub filled with warm water so that it softens the entire area and push the cuticles back using a wooden nail pusher.
Sizing of acrylic nails and application using the acrylic nail glue:
Which size acrylic nails go well and how to apply? It all varies based on the type of kit you get. There are different acrylic tip widths, sizes, and lengths, which means you can choose from any one of them. However, if no size fits your nails, you can use the nail filer to achieve the correct length, width, and shape.
It is advised that acrylic nail tips come with an indent within the tip, which is almost 2-3mm, which should be placed at the free edge of your nail. Make sure to keep the nails short before you apply the acrylic tips.
Once you are done choosing the tips, make sure to apply them one by one using a small dot of acrylic glue. Keep the acrylic tip’s bottom edge in the center about 1/3rd way from the nail to ensure it stays sturdy once your natural nail starts growing. Next, apply firm pressure for around 5-10 seconds, ensuring that the nail is entirely secure, and then move to the next step.
Shaping the new acrylic tips:
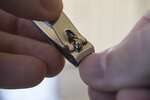
How to shape acrylic tips? Once you are done securing all acrylic tips in their place, make use of nail clippers and file the tips accordingly. If you see a noticeable line at the point where acrylic tips are applied, buff it to create an even surface.
Application of acrylic dehydrating nail primer:
Wondering why to apply acrylic dehydrating nail primer? After applying and shaping the tips properly, keep your acrylic kit material in front of you. Now pour liquid acrylic within the acrylic dish. Bear in mind that acrylic comes with strong fumes, so make sure to perform it in an airy place.
Organize all the materials and start by dehydrating the natural nails. Get rid of all moisture that might prevent the acrylic tips from sticking. Prime the entire nail and paint it beyond the nail cuticle up to acrylic tips. This ultimately allows the acrylic mixture to adhere to the tips and the nails properly.
Coat the nails using acrylic mixture:

How to coat the nails using an acrylic mixture? Next up, dip the acrylic brush within the monomer bowl. Tap some of it over the side to not over-saturate the brush and then dip within the clear powder. This entire process creates perfect acrylic beads compared to the dry or drippy ones.
Start it from the cuticles and extend this entire mixture up to the acrylic tip. Ensure to smooth the nail edges and wipe the brush off over the paper towel so that there are no clumps in between.
Some people recommend splitting your nail into three sections: a small acrylic bead for an edge, one on nail apex, and one for nail cuticle.
Repeat the entire DIY process on each of your nails to create a smooth base. Follow the entire process of using acrylic powder in your choice of color. To get the shiny top coating, finish it up using a thin encapsulated layer of acrylic mixture.
Dry off the nails:
So, what’s up with the drying process of acrylic? Bear in mind that acrylic is sensitive to temperature. The warmer the temperature of your room, the quicker acrylic will set down. So, if you plan on do it yourself with acrylic nails, you should perform it in a more relaxed space allowing the acrylic to dry. The process of drying the nails will take around 10 minutes. Just tap them a little to check that the acrylics are completely dry. If you hear a clicking sound, your acrylics are good to go.
Finalize the acrylic tips:

How to finalize the acrylic tips? Now that you are done with the application of acrylic, and they are dried out, touch up your edges. Just file the tips along its edges and achieve a splendid do it yourself acrylic nail look.
Moreover, never pull off the acrylic nails. Make use of an e-file for removing the top shine and coating. Clean it with an alcohol swab and hydrate with any essential oil.
Top 5 Acrylic Nail shapes
Wondering which acrylic nail shapes go well with your fingers? Having acrylic nails gives a mesmerizing shape to your nails, giving an eye-pleasing look. To make your task of performing acrylic nails at home, we have listed down the top 5 acrylic nail shapes ranging from square, rectangular, round, oval, and much more.
Dive in to find out all about acrylic nail shapes and when to wear each one of them.
- The round acrylic nail shape looks quite elegant, natural, and straightforward. This shape is relatively easy to maintain and works well for short nails. This shape is perfect for daily wear.
- Square acrylic nail shape, on the other hand, looks very classy. You can maintain this nail shape at all lengths while giving you a great feel. This shape is ideal for family gatherings, friends’ outings, holidays, and more.
- Oval tips are a bit thinner compared to round shape. These nails are more modern and go well for outings and modern gatherings.
- Squoval shape is somewhere between oval or square shapes. You can easily achieve this shape by rounding off the corners of the square nails. Most people love this look as it seems pretty natural, giving a perfect edgy look to the square nails. This shape works well for holiday seasons, and everyday wears too.
- Coffin acrylic nail shape is one of the most popular and most sported by celebrities, especially Gigi Hadid, Kylie Jenner, and more. They are similar to almond shape except that they come in a straight line similar to the square over the tips. Coffin shape is perfect for a girl’s night out or if you are going on a date.
Difference between Acrylic Nails and gel extensions:
If we talk about the difference between acrylic nails and gel extensions, we should know the difference.
Acrylic nails:
But the acrylic nails are harder than gel ones. Acrylic nails are done by mixing powder and liquid, which results in dough-like consistency, which is then filed or molded within the desired shape.
Moreover, if you have visited the salon and undergone the dip powder technique, it’s somewhat more damaging to your nails. The dip powder technique is slightly more complicated, more rigid, and comparatively less flexible.
Gel extensions:
Gel extensions are softer and more flexible than acrylics. They tend to be less damaging to nails. In terms of chemical difference, gel extensions are already mixed and can only be done using a UV lamp or LED light.
If we talk about the durability of acrylic and gel, the gel is common because it’s more flexible. Acrylic is, however, more durable and complex, but for it to adhere to the natural nails, you need shredding of some natural part.
If a person comes with brittle, hard nails, they need a flexible solution with gel extensions. However, if clients come with soft, splitting nails, they require specific strength for their nails and acrylic nail extension.
FAQs:
What is the best alternative to acrylic nails?
Gel extensions are a perfect alternative to acrylic nails. They are simple to apply and comparatively easy to remove.
Can I do acrylic nails without a drill?
For acrylic nails, you need to remove oil from the nail bed and rough up the entire surface, so that acrylic nails adhere well with the nail surface. For that, you can also use a nail file rather than a drill.
Should you cut your nails before getting acrylics?
If your nails are already short, you won’t need to cut them. Just file the nails. However, if they are long, cut them properly, file them and follow all steps as you’ll attach acrylic tips to the nails.
Can I make use of a regular Dremel for acrylic nails?
Yes, you can use Dremel for acrylic nails as it reduces the time of prepping your nails.
Can you do acrylic nails without UV light?
You can do acrylic nails without UV light because the monomer and the polymer mix bind well through a chemical reaction. It doesn’t need any UV light.
What lasts longer, gel or acrylic?
Acrylic nails being more rigid and more durable, lasts longer than gel nail extensions.
What can I use if I don’t have acrylic liquid?
Acrylic nails dry out very clearly, but they result in toxic fumes. So, the excellent alternative for acrylic liquid is a polyester resin. The addition of peroxide to the polymer creates polish which casts easily similar to acrylics.
Conclusion
Do It Yourself acrylic nails is an entire process for which you need complete patience. So, stay calm and adhere to the whole process step-by-step and get the desired results similar to the salons!