A do it yourself kitchen island will give your kitchen a modern look. These islands give you additional space, which always seems to be scarce in the kitchen. You can have shelves on these islands and use them for storage too.
Here’s how you can build your do it yourself kitchen island in any shape according to your needs.
What is a Good Kitchen Island Size?

Your do it yourself kitchen island needs to be at least four feet long and 2 feet deep. It must have some room for people to move and work around it comfortably. You don’t have to think about a kitchen island unless you have at least 12 feet long and 8 feet deep space.
A smaller kitchen than this size will not fit well in an island because you won’t have much space to move and work over it.
The size of the island itself will be unproductively small. As it will be in the center of your kitchen, it needs to have enough space from all sides.
How to Build a Do it yourself Kitchen Island – Step-by-Step
You might be thinking that building your do it yourself kitchen island is a tough pill to swallow? But it’s not like that if you follow the steps closely. Making your kitchen island is simple. You can easily use your stock doors and cabinets.
You will need straight cuts on your plywood along its stock boards for wrapping your cabinets. Use a countertop that is around 21.25-inch wide and 36-inch long. This will make the top ready for installation when you are done with the base piece.
Building the case

The first thing you will do is to cut the boards. You can use poplar boards that are 1×4 in size to length for your bottom rails and ends. Assemble the frame with the help of wood glue as well as 1.5-inch #8 wood flathead screws.
Then cut the birch plywood that is 0.75-inch thick. Cut the bottom and back and its ends with the help of a circular saw and a straight edge. The next step is to attach the bottom right to the base frame with the help of the screws and glue.
You can always drill a countersunk pilot hole to avoid wood splits before you drive each of those screws.
Now, cut half-inch thick boards to match the height of the ends. You can always apply glue on one stile and then nail it to your plywood to make the bottom, top, and edges flush.
After that, you will have to assemble your kitchen island ends by gluing and nailing the rails directly to the plywood panel. Ensure that the top rails are even with your top panel and the bottom rail is directly located at least 3 inches right above the panel bottom.
Your base trim will cover this space and complete the base of your kitchen island. You will have to stand those ends upright and then attach them to the back assembly. Now drive the screws within the open area right at the bottom. It will reduce the fasteners that will need wood fillers.
Trimming the island

Take a start by assembling the pilasters. These pilasters are key elements that will make your do it yourself kitchen island design more sophisticated.
Therefore, you have to cut them to length and match their height. Sand the parts and use glue for assembling half pilasters (two) with nails.
Attach the pilasters by laying the island directly on its face and attach a 1×6 pilaster (half) directly to the cabinet. Now stand this island up and drive screws right through the back into the adjacent pilaster. It’s time to add the second pilaster assembly on the opposite end of the island.
Now cut the front rail (1×4) for matching the overall island length. You can glue and nail the rail with the ends even if there are outside faces present on end stiles. You will need to cure and attach the corner stiles, and for that, you need 1×2 boards.
The next step is to prepare the cabinets of your kitchen island by removing the doors from your 15×30-inch unfinished wall cabinets made of oak. You can apply glue and then slightly overhang the cabinets along with the side of the island.
Cut the spacers for the panel support. Just cut a wood scrap of about half-inch in length to provide support to the panel centered vertically as you glue and nail it into its place. After that, you need to cut and install your shelf cleats.
You will need to cut four 0.75-inch square dowels that are 11.25-inch long for the cleats. And then glue and nail them in the place.
Lastly, you will have to cut the cabinet’s shelves from 1×12 boards and need to be 1.8-inch shorter than the cabinet sides. From there, you will only have to fit the base trim and cut the trim to length.
Finish and install the do it yourself kitchen island
You will have to sand the base parts using 150-grit sandpaper and ensure all the edges are smooth. You will also have to sand the 10-foot long base piece that you will use after installing your island in the kitchen.
The next step is to paint it. Lightly sand the cabinet with the help of a 220-grit sponge. Don’t forget to fill those nail holes using your wood filler. Now, let the filler dry and sand again.
You can always apply primer and semi-gloss paint in a couple of coats. Don’t forget to sand between the coats using your 220-grit sponge. Now paint the entire island and the base.
Finally, position the island for installation. You can add a few beads of silicone adhesive to the back and top, intact with the countertop. Add the shelves and doors once the glue is dry.
Top 10 Do it yourself Kitchen Island Budget Ideas
If you are looking for some do it yourself kitchen inspirations and ideas, you need to go through them. There are so many designs that you can choose for your kitchen island. You only have to ensure enough room available in your kitchen so you can efficiently work around it.
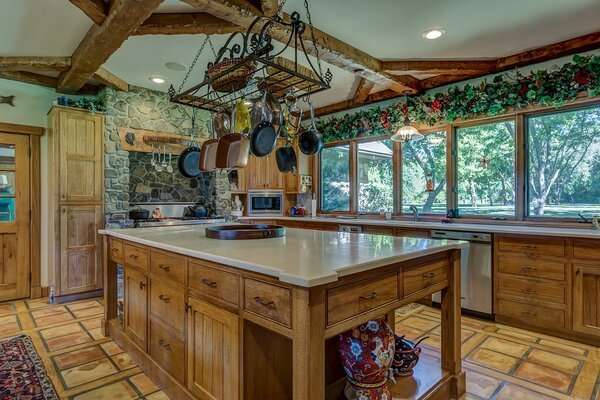
1. Farmhouse kitchen island
You can use paint and a wood finish to give your kitchen island that farmhouse look. This will provide you bar-style seating. You can place decorations, food items, and plates to use the island in various ways.
2. Rustic kitchen island
You can combine the rustic design and practicality on this bar-style island. You may add metal elements, especially a countertop, to your wood pieces for some modern touches to your vintage style base.
3. Upcycled kitchen island
Use this style of upcycled kitchen island as your eating point as well as your workspace. This unique design will be highly productive, and you will never need a door or a cabinet on your island. You can utilize an old door, place it on top of the counter and use it as your countertop.
4. Woodwork Design
Do some awesome woodwork to create your do it yourself kitchen island. It’s a smaller-sized island, and it won’t take much space in your kitchen. You can use decorative molding on the top.
Use wood posts at the bottom, and attach them to your base. You can paint it according to your kitchen decor too.
5. Quick trash bin access kitchen island
With this design, you won’t have to deal with trash separately. You will have a separate space for your trash on this island, and it will keep the unwanted smell well contained.
Plus, you won’t have to cross your kitchen to get to the bin. Just turn around and put the garbage in the bin with ease.
6. Use an old desk and transform it
If you don’t want to build anything or have some old desk lying around in the junk and don’t have too much space available in your house, you can use this desk to make a kitchen island.
Of course, you will have to prepare and polish it according to the decor in your kitchen and give it some finishing touches.
7. Making an island out of an open floor plan
You can turn your open floor plan into a kitchen island, but tear down the wall and make a table out of it. You can extend your kitchen counter to make it an island between your kitchen and lounge.
8. Expand a current kitchen island
You may add another table or increase the surface area of your current kitchen island to get more space. This way, you can add more cabinets and doors to your island as well.
9. Pull-out drawer kitchen island
Another great way to save some space is to go with a pull-out drawer kitchen island. You can use the cabinets and drawers under the island or storage space and use its top surface for prep work.
10. Use our old bookshelf as your kitchen island
Old bookshelves might be small, but their design is something you can use as a kitchen island. You will have to repaint and polish them and use the cabinets for storage, while the top surface can be used as a countertop.
What’s the Standard Height of the Kitchen Island’s Counter and Bar?
The standard height of a kitchen island’s counter should be 36 inches, and the bar needs to be 42 inches. This height will define the space between the rest of your home and your kitchen. The counters and bars of this height are great for having breakfast.
You can use it for your prep work as well, and they are great for installing a variety of amenities into them. You can either extend your current island or increase the height by placing another slab on your existing counter.
Why Should Your Kitchen Island Match Your Cabinets?
Your cabinets in your kitchen and your island need to match for a coherent look. Otherwise, your island will look odd-one-out. Although it will look elegant, you can eliminate them if you don’t want to go with the same cabinets.
Go for just a seating area that cannot be used for storage. This is usually the case if you are using an old table with its cabinets and doors. You can remove them if you don’t want them.
FAQ
How far should a kitchen island be from the cabinets?
The general rule of thumb is the space between your kitchen island and the side cabinets needs to be around 42 inches to 48 inches. But it is not recommended to add it if your kitchen is not at least 13 feet wide.
What is the smallest size for a kitchen island?
The smallest of the kitchen islands can be 4 feet long and 2 feet deep only. But it needs to have some room around it for people to move around and work on it.
How much does a kitchen island cost?
Kitchen islands are modern, so they will cost you a lot. The average cost ranges from $3,000 to $5,000. Custom-built kitchen islands can be even more expensive and can be around $10,000.
Can you make a kitchen island with base cabinets?
Yes, you can make a design with base cabinets as long as they are big enough and the space is available around them to move easily and work on the island itself.
Are kitchen islands attached to the floor?
Some of them are, while some of them are not. But a kitchen island doesn’t need to be attached to the floor. It’s just based on the type of design you are using.
Conclusion
Building a do it yourself kitchen island will save you a lot, especially if you are looking to go for a custom-built model. It’s not that difficult to build. Just follow the instructions carefully and attach all the panels and base correctly.
You can always repaint and polish your old tables, cabinets, and drawers to use them as your kitchen island.
