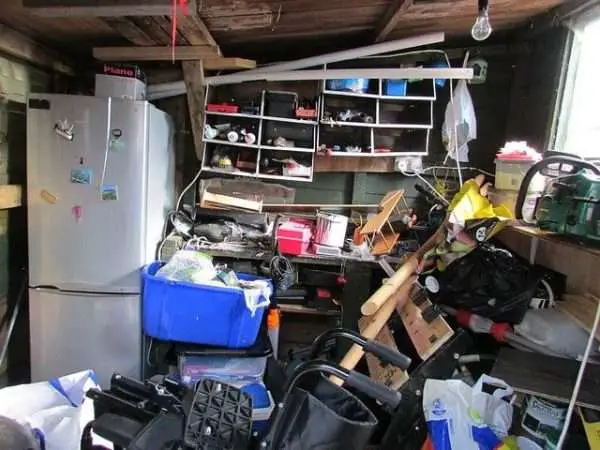
Are your tools lying everywhere in your garage? Would you like to build some wall storage for your home? A lot of homeowners experience problems with storage but they are unsure how to tackle the problem. Well, perhaps it is time to create a do it yourself slat wall. This is a storage solution that you can build with some tools and affordable materials. Let’s get started and see how you can make a do it yourself slat wall.
What is a Do It Yourself Slat Wall?
First of all, let’s take about what a slat wall is. Often, this is a construction that you see in stores. It is used to display items and it consists of horizontal panels. There are grooves, which are referred to as slats and they are able to hold shelves, hooks, arms and other organizational accessories.
Since they are affordable and versatile, a lot of homeowners are choosing to build a do it yourself slat wall. You can use a do it yourself slat wall for almost anything. From storing your gardening tools and sports equipment to cycling gear and car accessories, it is all going to be easy to access in a garage, shed or closet.
What are the Benefits of a Do It Yourself Slat Wall?
A lot of people wonder why they should choose a slat wall compared to other storage solutions. There are many reasons for this. Let’s take a look at the advantages of a do it yourself slat wall.
Maximize Storage Space
One of the main reasons that homeowners and business owners look into slat walls is because they want to maximize storage space. In particular, you can create storage on walls in your property. This is a great thing to do if you want to create floor space to walk around or you simply need more storage for all of your belongings. A slat wall can be positioned anywhere and can offer everything from extra shelving to storage bins.
Personalize the Storage
Do it yourself slat walls are a lot of fun to create. Of course, it is rewarding to build anything from scratch. But, a lot of people like to build slat walls because they can personalize the storage space. A slat wall allows you to connect all types of storage solutions to suit your needs. From racks and shelves to storage bins, you can decide how you want to store all of your belongings. Some other attachments you can use include:
- Boxes
- Arms
- Rings
- hooks
Stay Organized
A lot of people are attracted to a slat wall because it offers a way to organize your items. Since you can decide how to configure the do it yourself slat wall, this means that you can personalize it to your needs. You can know where everything is and since it is on display, you can find it quickly and easily. What’s more, a slat wall can look modern and attractive in your home.
You Can Reconfigure
A lot of storage options out there are one-dimensional and permanent. But, the opposite can be said about a do it yourself slat wall. This is a storage solution that can be reconfigured over time. So, you can start off by having shelves. But, if later down the line you need more options, you can simply attach other storage solutions to the slats. You can change it as many times as you like so that you can suit your needs.
What Type of Wood Should I Use for a Do It Yourself Slat Wall?
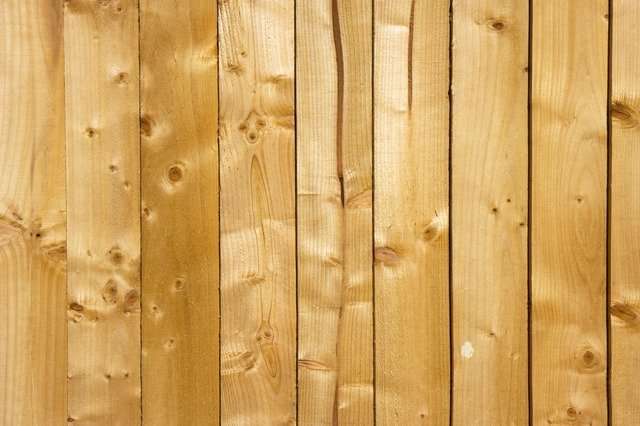
To create all of your slats, it is recommended that you use wood. This is going to provide you with the strength and durability that you need. But, there are some woods that are better to use than others. Let’s take a look at your options.
Pine
First of all, let’s consider using pine. This is a type of softwood, which can mean that you find it easier to build your do it yourself slat wall. For instance, if you have basic tools, you will be able to use screws a lot easier and without having to purchase drills. In addition, a lot of people like the yellow color that pine has. This might be ideal for your home if you do not want to paint the slat wall.
Cedar
Next, we have cedar. This is another type of softwood that is going to be easy to work with for this project. It is a durable option, which makes it a good investment. It also has a lovely scent that homeowners like. This is along with having warm and red tones to the wood. You may have to spend more if you are using cedar. But, for a lot of people, it is worth it.
Redwood
Do you plan on using your slat wall for a lot of outdoor equipment? Then you may want to consider using redwood for the slats. This wood is moisture-resistant, which makes it great for hanging up outdoor clothing or sports equipment. It is not a difficult wood to work with since it is classed as a softwood. In addition, it has a beautiful red hue that homeowners like to have.
How To Build a Do It Yourself Slat Wall
You can purchase a slat wall for your home. But, this can work out very expensive. This is particularly true if you need a professional to attach it to the wall. But, the good news is that you can build a do it yourself slat wall. Not only is this easy and rewarding, but it is also going to save you money. So, let’s get started.
Find the Studs
The first step to building a do it yourself slat wall is to find the studs in the garage. Use can use the stud finder to examine the wall you are going to be using. Make sure that you mark where all of the studs are. This is going to create the foundation for your project.
Secure the Vertical Boards
Once you know where all of the studs are, you can start to cut the vertical boards. Essentially, you want to make them the same length. After all, you want to secure then along the stud and you can use screws for this part. This is going to keep them securely in place and give you peace of mind for your garage storage. In particular, wood screws are going to work best for this part of the project.
Install the Slats
Next, this is the fun part. You can attach your slats and watch your wall come to life. They are going to be secured onto the vertical boards. You want to ensure that they are all even spaces apart. This is going to create the design you desire, as well as make your new storage solution. Remember that you want big enough spaces so that you can hook on your accessories. It is worth thinking about what accessories you would like to use beforehand so that you can get this part right and not be disappointed with the result.
Paint the Slat Wall

Remember that you can get creative when it comes to a slat wall. Since it is made from wood, you can paint it any color you like. This can match the décor of your garage or the room you are using the slat wall in. You may find it easier to paint the pieces before you install them. But, you can also paint it once all of the parts are up too.
Use Accessories
The last step of the do it yourself slat wall project is to hang up the accessories. You have a lot of choices when it comes to accessories. You can choose whatever accessories you like and that is going to be suitable for your storage needs. They should be easy to attach between the slats and it should be very secure too.
To Summarize the Do It Yourself Slat Wall
You can easily build a slat wall to solve your storage problems. Whether you want to organize all of your tools or maximize space for outdoor equipment, this can be the way to do it. What’s more, people like how you can personalize your storage space and choose everything from boxes to hooks. You can simply attach them to the slats and reconfigure them later on to suit your needs.
When it comes to what wood to use, you have a few options. For the most part, it is going to be your personal preference. Some people like the yellow coloring of pine while others need a moisture-resistant option and choose redwood. Just make sure that you take your time and choose the right wood for your property and storage needs.
For building your slat wall, finding the studs will be important. This is going to create the foundation. Then, it is a case of securing the vertical boards and installing the slats. You have the option to paint the slat wall and for what accessories you purchase. For more garage storage ideas, you can read this article.