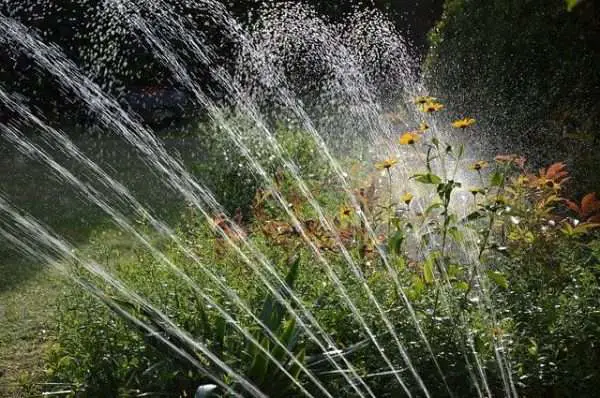
Do you live in a part of the country where there is not enough rain for your yard? We all know that plants and lawns need regular water to stay healthy. But, certain climates mean that there is simply not enough rainwater for this to happen. So, what is the alternative? A lot of homes will choose to have a sprinkler system. But, having a sprinkler system installed in your yard by a professional can be expensive. This is particularly true if you have a large lawn. The good news is that there are some do it yourself sprinkler system ideas that you can try out if you are on a budget. This is going to allow plants and grass to get the water they need, as well as offering some summer fun for young kids.
Without further ado, here are some do it yourself sprinkler system ideas you can try out.
What are the Benefits of a Do It Yourself Sprinkler System?
A lot of people like home projects to keep them busy and to have some fun. But, one of the main reasons that people really like a do it yourself sprinkler system is because it can save a lot of money. Professional installation is often expensive and it can be time-consuming in your schedule.
If you are on a budget, this is not going to be what you want to spend your money on. Thankfully, a lot of the do it yourself sprinkler system ideas we have can be done for less than $50. This is going to allow you to take care of your yard but without having to pay a lot of money.
The Bottle Do It Yourself Sprinkler System
Why spend a fortune on a sprinkler system when you do not have to? There are objects you can use in your home that are going to create the same type of system without having to spend a lot of money.
For example, you can try this do it yourself sprinkler system with a plastic bottle. Simply, choose a large 1.5 to 2-liter plastic bottle that you have already used. Clean it out thoroughly before you attempt this one. You also want to take off the label.
The next step is going to be creating holes in the plastic bottle. You want to create a line of several holes. You can use a thumbtack or pin in order to do this. The holes should not be huge. You only want to make it big enough so that water can spray out of it. Keep rotating the bottle around to have several lines of holes. They should be around 1-inch apart.
Now, it is time for the fun part. Take your bottle outside and take off the lid. This is where you are going to insert your garden hose. You can take on the hose so that it cannot escape from the bottle when the water is turned on. Now, all you have to do is place the sprinkler near to plants or on your lawn so that it will spray them with water. Turn on the tap and there you have your own do it yourself sprinkler system. When the bottle fills up with water, it will spray out of the holes and do the hard work for you.
What You Need:
- Thumb tack or pins
- Plastic 1.5 to 2-liter bottle
- Tape
- Garden hose
The Pool Noodle Sprinkler
Do you have a pool noodle lying around that you do not use? Even if you do not have one yet, they are only a few dollars to buy. This is going to save you a lot of money as opposed to having a professional install your sprinkler system.
The first thing you want to do is cut one of the ends off the pool noodle. Take this chunk and cut it into four parts. You can use two of the pieces to stuff the end of the pool noodle. This is going to block the exit so that the water does not escape when you turn on the tap. A good way to secure it is with duct tape.
The next step is to use scissors to create holes in the pool noodle. This is going to be where the water sprays out for your plants or lawn. You can create several rows of holes and they can be around 2 to 3-inches apart. Then, all that there is left to do is to put your garden hose into the other end of the pool noodle. You can secure it with duct tape so that the force of the water does not affect it. Turn on the tap and watch your handy work in action!
What You Need:
- Pool noodle
- Scissors
- Duct tape
- Garden hose
The Tall Do It Yourself Sprinkler System
There are a number of reasons why you may need a tall and over your head sprinkler system. For example, you may have plants that are different sizes and you want to make sure they are all enjoying water during the day. This next do it yourself sprinkler system will take a little bit more work but it will be worth it if this is what you need.
First of all, let’s talk about the materials you are going to need. Namely, you are going to need a 1.5 feet PVC pipe. You are going to be able to purchase a large PVC pipe and cut it to this size. This can be around 0.5-inch thick. Then you will also need a spike base, which is what is going to secure the pipe to the ground. Purchasing two male thread connectors and a sprinkler head will also be necessary.
As you would expect, the spike will go on the bottom of the PVC pipe while the sprinkler head will go on the top. You can use the two male threads and tape to secure everything. Then you can attach your garden hose. When the water is turned on, it will travel up through the PVC pipe and through the sprinkler head. This is going to create a rain effect and cover a lot of ground.
What You Need:
- PVC pipe
- Spike base
- Two male thread connectors
- Saw
- Tape
- Garden hose
The Durable Sprinkler System
If you are feeling slightly more ambitious and want to build a sturdy, long-lasting sprinkler, we have another idea. It is also going to be easier to move around your yard. It is made using materials you are going to find at your local hardware store.
First of all, you are going to need a 10 mm aluminum tube and two PVC pipes. This is going to act as your sprinkler. You are also going to need a hose clamp. Start by using your drill and making a 10 mm hole in both of the PVC pipes. They should be in the same place and you should take measurements to ensure that happens. Simply, insert the aluminum pipe through the holes on the PVC pipe.
You are also going to need a hole for the water to come out of the aluminum pipe. So, you are going to want to saw a pattern into the material. In particular, making several markings can ensure that the water sprays out equally. For water to spread evenly in several directions, a cross cut notch is recommended.
You will use the hose clamp to secure it to the sprinkler you have constructed. Now, you can move around your sprinkler anywhere you need it. The PVC pipes make it easy to move.
What You Need:
- 10 mm aluminum tube
- Two PVC pipes
- Garden hose
- Hose clamp
- Drill
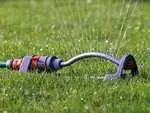
The Easy Do It Yourself Sprinkler System
If you are somebody that is on a budget but does not have a lot of tools, you may be looking for a simple sprinkler system to try out. Well, we have the answer. Thankfully, there are a lot of sprinkler system attachments that you can purchase that will connect to your garden hose. This is going to avoid bringing in the professionals, as well as making a sprinkler system from scratch. You can purchase them for around $10 to $30, depending on the size and rotation.
As we have mentioned, there is really nothing complicated about purchasing a sprinkler attachment for your garden hose. It will have a connector that you attach to the hose, which should only take a few minutes. You will place the sprinkler where you need it and you can watch the magic happen. There is no messing about.
The good thing besides the lack of manual work is that you can enjoy a more sophisticated do it yourself sprinkler system. For example, a lot of the attachments will rotate so that it can capture different plants and areas of your lawn. They can also have different spray patterns to cover a wider area.
What You Need:
- Sprinkler system attachment
- Garden hose
Do you want to get rid of weeds in your yard? Here is an article on Do It Yourself Weed Killer to get rid of them all.
