A DIY toolkit can help you save thousands of dollars. Instead of hiring a carpenter, plumber, or mechanic for simple jobs, you can do it yourself. You can even make your own furniture, renovate your home, and do custom designs. Here’s how to assemble a toolbox for DIY projects.
Hammer

It’s one of the cheapest DIY tools and the one you’ll use the most. Aside from the obvious use for driving in or removing nails, it’s useful for giving anything a powerful whack—either to break it apart or bang it into place.
Since it, you’ll use it so often, get a durable hammer that fits comfortably in your hand and gives a balanced swing. Experts recommend getting a 16-ounce hammer—light enough for precision work but still sturdy enough for bigger jobs like DIY carpentry.
Screwdriver
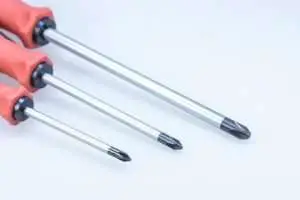
You’ll need this for many DIY projects, from assembling an IKEA cabinet to attaching doorknobs. There are many different types and sizes, but you’ll be using the flat-head screwdriver and Philips screwdriver more often.
It’s easier to get a set since it can be annoying to stop a project just because you don’t have the right screwdriver. You can get a basic set for about $15. If you don’t have a lot of space, get a multi-bit screwdriver to switch out the attachments.
Electronic screwdrivers, where you press a button, so it twists on its own, can save a lot of time and effort. Look for one with good torque and ratcheting design, which minimizes the risk of stripping the screws.
Adjustable Wrench
You need this to tighten or loosen any bolts. They’re usually for home repairs like plumbing, craft projects, and even car repairs.
Depending on the kind of DIY work you’ll be doing, you’ll need wrenches of different sizes. Smaller 6-inch wrenches are good for working in very tight enclosures, while the longer 10-inch wrench is better working with very tight bolts.
It’s worth getting both sizes (or even buying a three-piece set) since these will only cost about $20 to $25.
Utility Knife
A utility knife quite handy for quickly and precisely cutting and trimming wallpaper, vinyl flooring, or cardboard, making light notches on boards, or shaving and smoothening wood edges. For your convenience, get one with built-in storage for extra blades and lets you lock it into position.
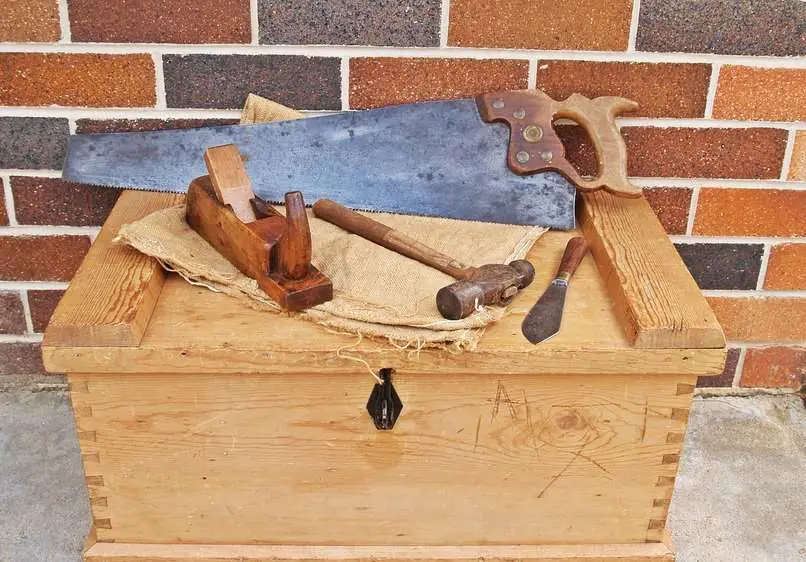
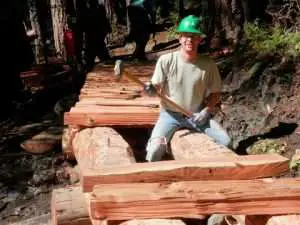
Handsaw
You’ll need this for any kind of woodwork, to cut your boards into the right size. Pick from a western-style saw with a tapered edge and is pushed forward, or a Japanese pull saw with a straight blade and is pulled toward you. Some people feel that a Japanese pull saw gives you more control and more precise cuts, but it’s a matter of preference.
If you’re a beginner and work with light materials, a handsaw is safer to use and lighter. A power saw is faster and more powerful, but it’s heavier and harder to control.
You should also consider the number of teeth: 6 to 8 per inch work well for rip cuts, and 8 to 12 per inch work for cutting against the grain. If you don’t want to buy two saws, get one with 8 teeth per inch for more versatility.
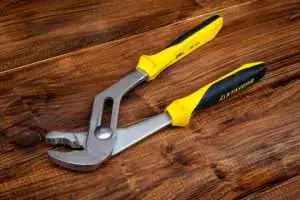
Pliers
Most DIY projects will require pliers to grip, pull, turn something into place—whether it’s positioning a plumbing fixture or splicing a wire.
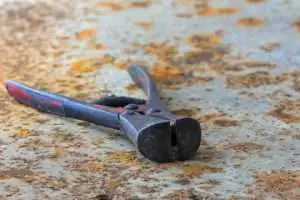
Pliers come in different sizes and tip shapes. For example, needle nose pliers help with delicate work like electrical wiring or even jewelry crafts, while locking plyers is better for heavy-duty jobs requiring you to apply brute strength.
If you’re on a budget, get a plier set with at least 3 to 5 pliers that can work for most jobs. If you are a serious DIYer or craftsmen, it’s worth buying high-quality pliers one by one. These “high-end†tools have adjustable jaw and better locking mechanisms, so you can use both hands to apply pressure. That’s handy for stubborn, rusted objects.
Electric Drill
This power tool is well worth the investment. You’ll need it for simple tasks like hanging pictures or installing bookshelves to bigger projects like constructing your own house deck.
Look for both a power drill (which can make holes) and a power driver (which can drive in screws). It’s easier than switching between tools, especially when you’re working on top of a ladder. If you can afford it, get a cordless drill with 18 volts or more, which can handle even heavy jobs.

Sledge Hammer
If you need to split wood, drive a stake into the ground, or do any heavy-duty hitting, add a sledge hammer to your DIY tool kit. Look for one that has a shock-absorbing material to help prevent muscle injury and strain.
Stud Finder
This is useful for heavy construction work where you need to mount cabinets or other heavy objects to the wall securely.
If you’ve ever done this, you know what a headache it is to find the wooden wall studs located behind the draw wall. Most carpenters will knock on the wall and figure out location just from the sound—but that takes time and experience.
Stud finders have magnets that zero in on the metal screws that hold in the wooden studs. Basic models start at $10; they’re a cheap and convenient tool to have in your DIY kit.
You can get an electronic, high-quality stud finder for $50 or more. These can often detect plastic plumbing pipes, live AC wiring, rebar and metal objects, and more. Consider investing in one if you do a lot of home renovation projects.
Beam Level
Don’t trust your eye: use a beam level to make sure you’re getting a straight line. Accuracy and durability are key—a good one can cost about $30, but you’ll use it for decades and never have to worry about a crooked cabinet again.
Wire Stripper
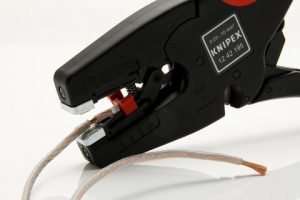
If you plan to do electrical jobs, you need a tool that can help remove insulated tubing and cut and crimp wire. Look for multi-purpose strippers with clear marking and the ability to adjust the tension.
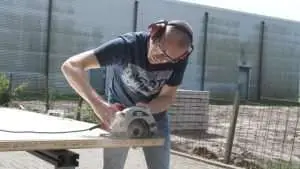
Circular Saw
Larger home projects like replacing windows or building a patio will require you to cut a huge volume of heavy wood—and your handsaw literally won’t cut it.

Power saws (also called circular saws, because of the spinning round blade) will make the job really easy, but they cost from $100 to $200—and even more for the heavy-duty models. If you foresee using this only once or twice, it may be better to rent it instead.
Jig Saw
Jig saws are essential for cutting curves and are needed for very detailed carpentry work. Some of the more powerful ones can cut through both wood and metal. You may need to spend about $180 to $200 for a good one, so consider renting it first if you’re not sure if you’ll use it often.

Tile Saw

You can get a cheap tile saw to cut ceramic and porcelain tiles for as low as $50, but they cant work with larger or thicker tiles like marble. These need commercial saws that can cost $1200 or more and even have a slider that pushes several tiles into place. Since it’s pricey, consider renting this or buying second-hand.
Post-Hole Digger
With this power tool, you can build a fence in half a day. However, you need a high quality, heavy-duty digger to break through rocky or compact soil. Since you’re not likely to use this tool often, this is best rented from a tool library or rental center.
Rotary Hammer
If your power drill can’t drill deep enough, or make a dent in a very tough masonry material, consider renting a rotary hammer. They can cut through even the thicket walls like they’re butter, and you won’t end up breaking up all your bits in the process.

Paint Sprayer
These can leave an even layer of paint without a brush or roller marks. It can make a big difference in how your walls look and are particularly useful for small paint jobs like cabinets or closet doors. You also save a lot of time: you can finish a room in 60 minutes or even less.
Paint sprayers can cost $1000 or more, but you can rent one for about $60 a day.
Flooring Tools
Floor sanders and floor staplers are essential for installing hardwood floors. You can rent one for $45 a day, which is far less than you would spend hiring someone to do it.
Toolbox

Keeping your tools well organized, clean, and in a safe place. This will not only keep your tools alive longer but also let’s you transport everything to the place where you are working on your DIY project. A toolbox from plastic will most likely have to be replaced a lot earlier than a solid metal made toolbox.
Down to the nuts and bolts
Your toolkit should also include safety gear (like a glove and mask), nails, screws, tape, and other accessories. Don’t forget simple tools like a flashlight, measuring tape, marker, or pencil.
With the right kit, you can make anything—and after all the money you save from DIY jobs, it practically pays for itself. Most of all, you get the satisfaction of a job well done and the confidence and skill to try more difficult DIY jobs.
Conclusion
If you are assembling a basic toolbox, it should contain the following items:
| Tool | Cost |
| Hammer | $5 |
| Screwdriver Set | $15 |
| Adjustable Wrench | $20 |
| Utility Knife | $7 |
| Handsaw | $12 |
| Pliers Set | $20 |
| Electric Drill | $25 |
| Sledge Hammer | $25 |
| Stud Finder | $10 |
| Beam Level | $30 |
| Wire Stripper | $6 |
| Toolbox | $25 |
| Total | $200 |
Tools are a long-term investment
With tools, a higher price means typically higher quality. If your tools break at the moment you need them the most they become useless. Look at them as a long term investment and consider the costs listed above as the lowest minimum.
Once you assembled your toolbox, check out our DIY ideas right here!
