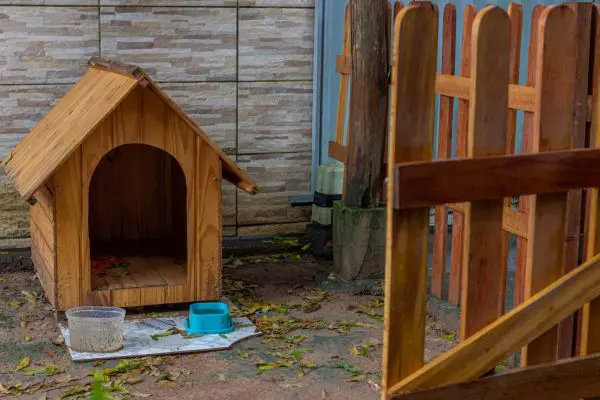
There are many reasons a dog is a man’s best friend. These social pack animals love attention and affection and pack several attributes and characteristics that make them the king of pets. However, just like humans and most animals, they require a place to call their own. This is where a DIY dog kennel comes in to offer an enclosed shelter that enables confinement and increases comfort and security.
So, if you’re a dog owner with basic handyman skills and tools, you’re at the right place. In this post, we’ll share how to build a DIY kennel from scratch using plywood, which is the most popular material choice due to its ease of construction.
Let’s get started!
Benefits of a Dog Kennel
At its core, a dog kennel is simply an enclosed space for sheltering your dog for a limited time. For instance, if your pet loves to spend time outdoors, a dog kennel is an excellent place to crash after playtime. Confinement is an essential aspect of proper dog training as it helps improve discipline and their overall mental and physical well-being.
Here are the main benefits of a dog kennel:
Independent Living Space
While there’s nothing wrong with having a couch potato or snuggling buddy, a kennel offers a dedicated living space with sufficient room to rest and relax.
Confinement
Your dog might be your best friend but a nightmare for others, depending on the breed and its personality. A kennel keeps your dog confined to protect others, especially during its training phase. The last thing you need is for your pet to cause damage or, worse, harm someone. Sure, you could set fences around your yard. However, installing them is much more expensive and time-consuming.
House Training
Building a DIY dog kennel is a great way to accelerate house training. You can use confinement to teach your pet what to do or not do gradually. For example, many dog owners use kennels to ease potty training by setting a fixed spot for them to poop. Similarly, you can use it to improve food training and behavior around strangers.
Why Build a DIY Dog Kennel?
You’re probably wondering why you should build a DIY kennel when you can purchase a pre-fabricated one. After all, this is the go-to choice for many dog owners, especially those with no DIY experience or sufficient time on their hands.
However, buying a dog kennel isn’t the cheapest option. You can save a lot of money by building your own. Besides, the construction is fairly simple, and you don’t need a lot of tools or equipment. You can also customize your DIY kennel according to your pet’s specific requirements, such as dimensions, color, floor, and ventilation.
Lastly, building a home for your dog from scratch is a great show of affection towards your pet.
How to Build A DIY Dog Kennel From Scratch
if you’re intrigued by the prospect of building a DIY dog kennel, here’s everything you need to get started:
Tools
- Basic tool kit
- Drill with 3mm drill bit and screwdriver bits
- Saw
- Clamps
- Hammer or nail gun
- Paintbrush
- Ruler or tape measure
- Pencil for measurements
- T-square (optional)
Supplies
- Structural grade plywood sheet (at least 12mm thick)
- Pine for floor frame (100 x 1200mm) and roof cleat (50 x 50mm)
- Galvanized nails (100mm x 4.5mm and 40mm x 2mm)
- Superglue or construction-grade adhesive
- Sealant for waterproofing
Steps
Build the Frame
Before you start, think about your dog’s size, especially if it’s still growing. Ideally, you want the kennel to be at least a foot higher and longer than your dog’s height and body length, so there’s sufficient room. These dimensions will also enable proper air circulation.
Cut the treated pine for the floor frame according to your desired specifications. For instance:
- 2 pieces 4 feet long sides
- 3 pieces 3 feet long ends and center
- 2 pieces 1.5 feet long
Square one end of each timber and cut neatly with a saw after marking the dimensions using a pencil and ruler. Once the pieces are cut, lay them to form the frame and drill nails into them using a screwdriver bit.
Prepare the Walls and Roof Sections
Next, you need to measure and cut the walls and roof pieces according to your dog’s size and attach them just like the floor frame. However, you’ll have to leave some space for the door opening. Use the construction adhesive on all vertical joints and screw them to the frame.
Lay Out the Kennel’s Floor
Once you have all the frame pieces ready, lay the timber according to the length and width of the floor frame with a little bit even gap between each board. Timber expands during the winter and contracts during the summer. Screw all the boards to the floor frame.
Make the Door (Optional)
If you want your confine your dog without using a leash, you’ll need a kennel with a door. To make this kennel, you’ll have to construct the front vertical frame with a few minor changes. Leave a space in the middle for the opening. Alternatively, you can skip this step and use a chainsaw to drill a hole in the structure. However, this can cause structural damage and affect the overall integrity.
Assemble the Roof
Most dog kennel roofs are designed to have openings at the rear to minimize dog smells and simplify cleaning. Ideally, you should build a 45-degree triangular roof by cutting two pieces of plywood to size. Attach the two pieces using galvanized nails and cover the front by cutting the plywood sheet into a triangular shape according to the opening’s dimensions.
You can also apply hinges at the end to further simplify cleaning.
Final Touches
By the end of the last step, your DIY dog kennel should be complete. Now, all that’s left to do is apply a few final touches. For example, you should finish the structure with gloss or semi-gloss paint to waterproof it and prolong its life. You can also customize it with unique designs to make it more aesthetically pleasing or add some insulation for harsh winters.
Conclusion
And there you have it – how to create a DIY dog kennel for your dog. With this information, you’re merely a few hours from giving your best friend its tiny apartment. So, what are you waiting for? Head to the nearest hardware store and get everything you need. You can also use scrap wood to save more money and borrow tools from your neighbors or friends to save unnecessary expenses.
