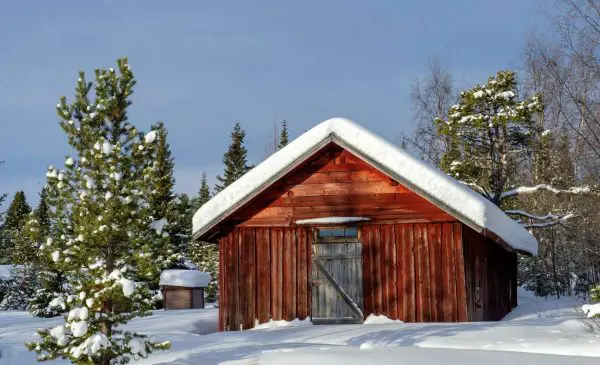
Even though building your shed is a challenging project, it is most rewarding. A shed can be used for multiple storage purposes and saves you the time and effort of taking back all the summer or winter gear and supplies that were brought outside from the basement and garages of your home.
Regardless of what you use choose to use your shed for, our guide on how to build a wood shed step by step will help you build the perfect shed for your home and yard from scratch.
Let’s get building!
Step 1: Setting The Shed Foundation
An easy way to set the shed foundation is to know that the shed doesn’t necessarily have to rest on deep footings.
You can start by:
- Digging two trenches that are 16 inches wide, 13 feet long, and d12 inches deep.
- Placing the trenches 66 inches apart.
- Filing in the trenches with a 3-inch layer of gravel and compacting it with a hand tamper.
- Keep repeating this process until the trench is full.
- Now cut the treated 6X6s to 12 feet and set them on the gravel, so they’re parallel, and the outside edges are 6 feet apart.
- Cover it with the treated ¾ inches plywood.
Step 2: Assembling The End Walls
- To assemble the end walls, you can start by securing the perimeter and adding the center stud.
- Then by measuring from the center stud, start marking for the remaining studs.
Step 3: Flashing Attachments
- Start by attaching the flashing over the side seams.
- You must nail the siding to the walls before you stand them up.
- It is advised to cover the horizontal seam with metal Z-flashing to keep out of water.
Step 4: Siding The Walls
- Start by fixing the wall to the platform to hold it square and in place while adding the siding. Then start aligning the bottom plate with a chalk line so that it holds up straight.
- To indicate the inside of the walls, snap chalk lines on the plywood deck 3-1/2 inches from the edges of the platform. Then measure them and be sure that the lines are 89 inches apart and parallel. If yes, chalk a line down the center. This line will help indicate the top plates meet in the center.
- Then snap the lines for the peak and cut 2X4s to fit inside the lines, and fix them to the plywood so that they are secured in one place so that you can fill in the center studs and nail on the siding.
- A smart thing would be to fix the outside so that you can access the screws after the siding has been mounted.
- Start nailing on the siding to overhang the framing on each side by 3-1/2 in.
- Start trimming off the top corner to follow the slope of the angled top plate.
- Now when you’re done with building the front and back walls, keep them aside so you can focus on building the roof.
Step 5: It’s Time To Build The Frame Of The Roof
- The first thing you need to do is cut out the rafters.
- Exclude the bird’s mouth from four rafters and make use of these on the ends.
- Next up, cut the 2X4s for the ridge and subfascia to length and mark the rafter positions.
- Now start by lining the rafters with marking – nail through the ridge and subfascia with 16d nails to lock them.
Step 6: Installing The Soffits
- Start by lining up the subfascial with a chalk line on the platform and pin it in the max of four places with toe screws to hold the frame straight for you to install the soffit easily.
- One should always add the soffit to the roof frame while it’s on the platform. This saves the hassle of upside-down nailing in a limited spot.
- Now nail the soffit to the frame of the roof with the help of 6d galvanized box nails.
- Now set this roof panel aside and start building the other half using the same technique.
Step 7: Stand & Pin The Walls In Place
- Start by making the back wall stand.
- Now add to it the sides and the front.
- Start nailing each wall to the platform as you go, locking the corners together by determining the overhanging siding into the studs.
- To hold the bottom wall in position, line it up with a chalk line and nail some 16d nails so that it stays intact and in place.
Step 8: It’s Time To Lift The Roof
- Slide the roof panels up the roof till the bird’s-mouths drop over the top plate of the wall.
- Check if the 2X4 ridge aligns well with the peak of the wall.
- Carefully lock the roof panels with some toenails through each bird’s mouth into the wall’s top plate.
- Now nail the 2X4 ridges and complete the roof framing by adding two 2X4 collar ties, 4 feet apart.
Step 9: Marking The Gable End Trim
- The first step is to cut the gable end trim longer while cutting the angle on the top.
- Fix it up parallel to the end rafter and then mark for the bracket notch.
- Marking is a better way to go about it than measuring as it is prompt and more precise.
Step 10: Assembling The Door Frames
- Start by building two frames.
- Now glue them well and lock them together, and you’ll have a 1-1/2 thick door.
- Now with the help of pocket screws, assemble each frame.
Step 11: Holding The Plexiglas In Place
- Start by setting the plywood and plexiglas insert into the settled area on the back of the door.
- Now nail the wood stops around the entire perimeter so that they are locked into place.
Step 12: Routing The Door Hinge
- An intelligent way to avoid potential mistakes is to ensure the door and trim are locked together before routing the hinges.
- Keep in mind to trim piece extends 1/8 inches above the top of the door before you start clamping it.
Step 13: Attaching The Door Trim
- Start by entering the door on the opening and then secure it through the trim to attach it.
- It’s best to provide support to the door with a temporary 2X4 screw to the platform.
- Now attach the opposite side trim and then finally the top.
Step 14: It’s Time To Build The Door
- The door has two layers that are ¾ inches thick boards overlapping at the corners to add force. Rip 1X6 boards to 4-1/2 inches on a table saw for the outside layer.
- Now complete the door frame. To fit the lower recess cut, a 4 X 8 feet grooved plywood and acrylic sheet with ½ inches x ½ inches molding nailed to the inside. For the final step, sand the edges of the door.
Step 15: It’s Time To Hang The Completed Door
- Use a sharp chisel or a hinge-mortising bit to cut the hinge recesses. It is an easy way to mark and cut the door. Make sure that it extends 1/8 inches beyond the top of the door and then keep the hinge cutout on both the door and the trim simultaneously.
- Fix the hinges to the door and start trimming.
- Mount the door to a 1-1/2 inches thick trim piece and then screw the trim to the wall.
- Get done with the installation by adding to it the side and top trim pieces.
Step 16: Marking The Window Arches
- Start by marking out the arched window trim with the help of a trammel.
- This setup can also be used to mark the curved bracket support and the curved 2X10 header.
Step 17: Marking The Side Trim Pieces
- Now mark and cut the angled cuts on the side trim pieces.
- Set them into place on the top piece to mark the angled cuts.
Step 18: Start Routing The Back Of The Window Trim
- Start by assembling the window frame with the help of some pocket screws.
- Then begin routing a recess in the back for the acrylic sheet.
Step 19: Installation Of The Windows
- Start by resting the windows on the temporary 2X4 and then fix it to the wall. Then center the window on the opening before you start to attach the screws.
- Cut the side pieces, set them in place over the top of the header, and start marking the angled cuts.
- Finish the curved trim pieces by cutting the angles, sawing the curves, and sanding them smooth.
- Prime and paint the windows and leave them to dry.
Step 20: Installing the Exterior Trim
- Start by mounting the brackets.
- Then start lining up the outside edges of the lower brackets with the siding face, push them tight to the soffit, and fix them to the wall.
- Now center the top bracket and push them tight to the soffit. Start with the pieces that go under the brackets by wrapping the corners with the corner board.
- Then overlap the front corner board onto the side corner board.
- Now start with the roof installation by adding the fascia boards and shingle molding. Cut the fascia boards so that they fit around the brackets and keep the 1X2 shingle molding flush to the topmost of the roof plywood.
- Finish by roofing, staining, and painting the shed.
Step 21: Shingle And Finish
- Your shed is complete with the installation of shingles.
- Complete the shed by installing and finishing the exterior.
Our guide on how to build a wood shed step by step will save you time and money while ensuring your final wood shed is solid and durable.
