Do you want to add a personal touch to your picture frames?
If so, then the best way to do that is through building your own picture frames. Not only that, but this is one of the easiest wooden DIY projects you can take up since it requires fewer materials and is not time-consuming. In fact, you can make several wooden picture frames in a matter of a few hours and use a variety of wood to do so.
If you have wooden scraps or reclaimed wood lying around, you can actually make use of them by building a picture frame with them. You can also customize the size of the frame depending on your pictures or choose a modern, colorful, or rustic design; truly, the possibilities are endless!
So, if you are wondering how to build a wooden picture frame, keep reading this comprehensive guide that will walk you through each step and all the tools and materials you will need.
Why Build a Wooden Picture Frame?
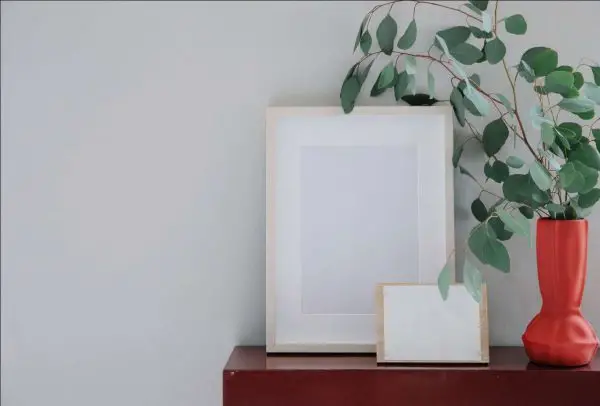
A picture frame is a perfect way to preserve your art and display it. These frames are also an excellent way to showcase all of your favorite memories in the form of pictures. You can hang them on the wall in your living room or bedrooms or set them up on your nightstand or even your kitchen.
More often than not, the pictures or art you have may not fit the standard size of frames that you can buy from the market. This is when building a wooden frame becomes handy since you can customize it according to your preferred size.
When you build a wooden picture frame from scratch, it is an extremely rewarding and cost-effective experience. You will need only a few materials, and there’s a good chance if you are already an avid builder that you have all of the required tools, for example, a saw, glue gun, and pieces of wood. In the end, the final result of your project will be something beautiful and quite practical.
How to Build a Wooden Picture Frame
Building a wooden picture frame is an excellent project beginner to woodworking can take up. It only requires basic tools, and you will need to join four wood panels together with glue, and voila, your frame is ready!
Here’s a detailed step-by-step guide that will help you make the perfect wooden picture frame of any size, wood material, design, and color:
Tools and Materials You May Need
It would be best to gather all of these tools together before starting your woodworking project. This way, you will stay organized, save time, and breeze through the project instead of running to the hardware store once you have commenced the project.
Moreover, if you are a beginner and have never used a table saw or miter saw before, it would be best to look up a few guides and videos on how to use them first. This is because this guide is primarily regarding the use of uncut wood. Or better yet, have a professional use these tools and cut the wood for you. Many hardware stores allow you to get your wood cut from their table saw and professionals.
- Wood boards, such as timber, plywood, or even scrap wood
- Table saw
- Miter saw
- Measuring tape
- Wood router
- Hammer
- Brad nails
- Wood glue or a hot glue gun
- 80-grit Sandpaper
- Linseed oil
- Paint
- Wood stain
- Matting board (optional)
- Glass or plastic panel (optional)
How to Build a Wooden Picture Frame: Step-by-Step Guide
Once you have gathered all of the required tools and materials in your wood, it’s time to start putting them together. Take a look at this guide below to know how you can get started:
Step 1: Determine Frame Size and Prep Tools
First of all, before you cut the wood and get the glass or plastic for the top, you must determine the size of the frame you want. For this, take a measuring tape and measure the size of the art piece or picture you want to frame. If you don’t have a particular photo or art, you can go with random size. Typically the standard picture frame size is 11″ x14″.
Once that is ready, you can then move on to prepping all of your materials on your workstation so that they all are accessible.
Step 2: Cut All of the Wood
If you don’t have cut and prepped wood, you must follow this step. You need to make sure that all four sides of the wood boards are the same; otherwise, you will not be able to glue them together to make a proper frame. You can either have them cut professionally in your desired dimensions or do it yourself.
Another thing to keep in mind is that the wood you choose should be thick if you plan to install glass or plastic frame since you will need to cut a rectangular rabbet on it.
First, cut the wood boards into your desired dimensions with a table saw. You will also need to cut these panels on one end of each panel at a 45-degree angle. Essentially, the shorter sides of these panels should be the inner part of the frame, and the longer ones will be on the outer parts of the frame. Once you have done this, join all the panels together to see if they make a frame.
Then, with the help of the wood router, cut a ½ x ½ sized rabbet in them. This should be along the longer sides of the wooden boards. You can make a bigger rabbet depending on the thickness of the inner frame.
Step 3: Glue the Pieces Together
With the help of a hot glue gun and wood glue, apply it to the sides of the wood generously. Then press two of the panels together so that they create a 90-degree angle. Clean away any traces of glue on the wood that is leaking out using a cloth. Then use a clamp to fasten all four wooden panels together so that they can dry and stick properly to each other.
If you want your wooden frame to be sturdier, you can reinforce it using nails and a hammer. Drive nails through the outside of the frame with a hammer. Make sure to be careful and not break the entire frame in this process.
Step 4: Sand the Picture Frame
After you have let the glue dry on your wooden frame, it is time to sand the entire frame using 80-grit sandpaper. This will smoothen out the wood and make it easier to apply varnish or paint. Once done, wipe away the sawdust with a damp cloth.
Step 5: Paint the Frame or Apply Stain
Now, your wooden frame is ready for the final touches. Depending on the design and finish you want, you can choose to simply apply linseed oil which will leave a shiny finish and enhance the rustic and wooden features of the frame. To give it an even more rustic look, you can also leave the frame and not apply any finish or paint.
Alternatively, for a pop of color, you can get wood paint and apply that to the frame. However, make sure to apply a primer layer, let it dry, and then apply the paint. Depending on your home décor and the kind of frame you want, you can also embellish it.
Step 6: Insert the Glass or Plastic
Once the paint or finish has dried, it is time to insert the glass frame or plastic. Flip the frame over so that the back is facing upwards. Then, slowly and gently fit the glass or plastic. You can already get this pre-cut based on your dimensions. Once done, simply place your picture or art inside and then cardboard on the back. Fasten it with tape.
Step 7: Mount the Frame
By this point, your frame is nearly ready. Depending on how you want to use it, you can mount it accordingly. For example, if you want to hang the frame, simply install turn buttons and screws on the back. You can also use D-rings if you plan to hang the frame.
Alternatively, if you want to set your frame on a nightstand, you can simply stick a sturdy piece of cardboard on the back.
Final Words
With this guide, you will know how to build a wooden picture frame. You might already be aware by now of how easy the process is. All you need to pay careful attention to is to have all of the wooden boards for the frame be the same size and cut the right edges at a 45-degree angle.
While others might consider the art inside your wooden picture frame to be beautiful, the real masterpiece for you will surely be the frame itself, so do give this DIY guide a try!
