
Have you ever wanted to know how to build your own tiny house out of a school bus? Maybe not, but we promise you’ll be considering it when you read this story about one ambitious young man who did.
US-based graphic designer Michael Talley gave up his expensive city apartment for a new life- one that involved building his own off-the-grid home with the foundations of an old school bus.
With the rising popularity of tiny house living, people all over the world have been thinking outside of the box when it comes to alternative living. From living in houseboats, glasshouses, and domes, and even living underground! Keep reading for Michael Talley’s inspirational DIY story.
A New Life
Like many young people today, Michael Talley found himself disgruntled with the ever-mounting cost of rent in his home city of Austin, Texas. He was paying $1200 for a tiny studio apartment in the north of the city, but he knew that his living circumstances just weren’t sustainable for the long term. He needed a solution.
And that’s where the idea for a tiny house came in! Michael had worked and studied illustration and graphic design, so he had the kind of creative spirit one needs to find a new and affordable way to live.
“I spent years playing around with tiny house designs in my spare time,” Michael would say in later interviews. He had held onto the idea of building one for himself, but it finally seemed like the right time.
Home On Wheels
“I always wanted to build a tiny house and I always wanted to travel,” the young man shared. It was only natural that he put two and two together. He began brainstorming ways to build a tiny house on wheels. But he had two major problems.
Cost:
RVs are the most convenient way to live on wheels, but Michael just didn’t have enough money to buy one. Even a run-down old RV would be too expensive.
Building Experience:
He also had no prior experience building anything substantial. “I have never built anything,” he admitted. “I’ve helped paint a few houses on mission trips and I helped install some plastic lattice once, but that’s about it.” Even despite this, he knew he wanted to be in control of the building process so he could minimize cost and also have his new home constructed exactly to his liking.
And that’s when he decided to do something unconventional…
Buying A School Bus
If you’re thinking of how to build your own tiny house, you probably don’t think of a school bus as the ideal place to start. But it all made sense! Traditional American school buses are large enough to act as a makeshift tiny house (around 42 to 45 feet long), and they also provide the existing foundations that a rookie DIYer might need to build their own home.
“Ultimately I decided upon a school bus because I thought, ‘Hey, there’s already four walls and a roof,” he explained. “Throw some wood and some light bulbs in there and call it a day.” Of course, it wasn’t going to be that easy.
Now he just had to buy his pet project. While a minibus is fairly easy to come by, it wouldn’t cut it for Michael’s ambitions. But how does one acquire a school bus?
“I purchased the bus from the Austin Independent School District for a cool $2,200 off PublicSurplus.com,” he explained. The Austin school district seemed to be selling a small fleet of old, but functional school buses. He jumped on the deal.
“I picked up the bus… and parked it temporarily at a used car dealer’s back lot for $100 a month,” He shared on his blog. “It was only two weeks before this that I decided I wanted to do a bus conversion instead of a tiny house or RV.”
Five Steps For Building Your Tiny House School Bus

Now that we know how Michael Talley secured the bones of his new house-bus, let’s take a look at the steps he took to transform it into a functional, liveable, and loveable home! We hope that exploring his creative process will help you learn how to build your own tiny house.
1. Seats
Removing seats from a school bus is harder than one might expect. Due to necessary safety procedures in a school vehicle, it’s not as simple as just unscrewing a few bolts from each chair and wrenching it from the floor.
Removing chairs is a two-man job: Michael had to recruit his step-father who helped him with the effort by crawling beneath the metal structure to remove extra bolts one by one. He later described the process as “grueling.”
If you’re in the midst of this process and you want to make things a little easier on yourself, considering using an angle grinder to cut out the seats. Michael admitted this himself, saying, “If I did this again I would have used an angle grinder, but this was still only days into the build and I was terrified of power tools.”
2. Flooring
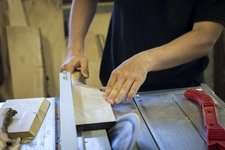
Next up is flooring. Most school buses, particularly of the American variety, are covered with cold rubber. While this is great for rows of school children, it isn’t so good for the inside of a home. He set to work stripping the flooring and replacing it with affordable plywood.
3. Walls and Windows
It was time to replace the rectangular window panes covering both sides of the bus. “Part of me wanted to keep them,” he said. “But I knew they would rattle, provide little privacy or insulation, and look weird with my roof raise and design.”
He removed them and replaced them with steel sheets, before cutting several holes into the walls for new windows.
A word of advice if you find yourself removing windows in this fashion – be very careful while handling both glass window panes and steel sheets. Michael shared on his blog that the process was “easily the most painful and bloody part of the build. Got a sweet permanent scar on my forearm from when one of these steel sheets fell and sliced my arm open.”
But it wasn’t all so difficult. The young man was able to keep the wide rectangular emergency window that covered the back of the bus, as a window for his bedroom.
4. Ceiling

At 6’4, the school bus ceiling simply wasn’t high enough for its owner. Raising the ceiling would prove to be a “terrifying” prospect for Michael, but it was necessary. He went ahead and used SketchUp, (a 3D modeling program used for architecture and interior design) to build a rig that could act as scaffolding for the roof.
To raise the ceiling of a house bus, you’re going to need to cut your bus in half horizontally before lifting and reconnecting the top part of the bus. In Michael’s case, he used a saw to cut through the roof and the “steel ribs” that had divided the windows.
“I decided to use scaffolding instead of farm jacks because of cost, safety, and precision,” he explained. “Scaffolding ready, screw jacks in place, all that’s left to do now is cut my bus in half!”
He then hired a steel fabricator for temporary use. A steel fabricator is a piece of equipment used to cut, bend and assemble pieces of steel into temporary frames. He used this to reshape these steel ribs into 25 separate parts that could be used to reconnect the bottom half of the bus to the newly raised ceiling.
Now onto the next step. Michael added steel extenders to the ceiling rig, to perfect the scaffolding before raising the roof. He rallied a group of friends to help with the lift. “Each one of us turned our respective jack in unison and raised the roof perfectly level in one try.”
5. Extra Touches
Though the main foundations of his home had been laid, there were still a few things that needed to be done. This included:
- Rustoleum: Rustoleum is a protective, industrial-strength paint used as a topcoat in homes. Michael applied a coat of this to the walls and floor of the bus.
- Insulation: There was competent insulation in the ceiling of the bus, but more had to be added to the walls to make this bus truly liveable.
Completing The Interior
Once the structure of the bus is completed, it’s time to add appliances and furnishings. The first places to start were the kitchen and living room spaces.
Now when you think of how to build your own tiny house, you may be daunted by the expenses of furnishing a new home. But Michael had multiple tactics for avoiding a big furniture bill. All up he managed to spend only $150 on wood for the shelves and frames for both areas.
”IKEA phased out their old kitchen line and I got a hell of a deal on these drawers and cabinets,” he said. “I paid $30 for everything! The butcher block was also a great deal. All the butcher block in this bus was bought on clearance for $120.” That’s right, looking out for deals and buying on clearance is an essential way to build on a budget.
Michael managed to build a large kitchen counter and shelving fairly easily, as well as shelving and storage for a small recreational living room area. He even managed to fit in his old couch from the studio apartment, by removing the back and arms and refitting the base and cushions into a new frame. He abstained from buying new furniture which saved him a lot of money in the long run.
Bedroom and Office
Fitting out his bedroom was fairly straightforward. Living in a tiny home requires considerable downsizing, so Michael was prepared to fit his remaining belongings into a relatively small space.
But his office space was a different story. Michael spent a lot of time working from home, so he needed a space that would be large enough for him to work in comfort for long hours. So how did he do it?
Using reclaimed floorboards and wooden cubes as desk supports, he was able to build a large and functional desk with extra storage space, measuring 5 feet wide. And by using a foldable desk chair he was able to further maximize space.
Using reclaimed or recycled wood and other materials is a fantastic way to build affordably with quality materials. If you’re thinking of how to build your tiny house without breaking the budget, reaching out to local businesses or even friends and acquaintances can be a great way of sourcing unwanted materials.
Bathroom And Electricity
Now for the finishing touches. Any functioning tiny house needs water and electricity to be fully liveable, and Michael jumped into this final technical challenge. In the living area beside his sofa, he installed an entire water compartment including a massive 40-gallon tank, a water pump, water heater, and greywater tank.
For electricity, he installed solar panels on the roof of the bus. These solar panels would provide more than enough power for his new home, and he even made a compartment beneath his bed to hold the solar batteries.
So now things were almost complete! But what about the bathroom?
“I have a composting toilet that works great, and it just so happens that I get by using the one at work,” he said. “The bathroom is mostly used for storing materials for my current van conversion project.”
“I can use it, however, I rarely do. I pee outside as the good Lord intended,” he said. “As for showering and stuff, I built an awesome little outdoor shower or I shower at the gym.”
In Conclusion
For visuals of Michael Talley’s project, watch the video below!
As you can see, building your own home out of a refurbished school bus isn’t the easiest process, but it’s possible. And it’s affordable too. Michael only spent USD 15000 on the entire setup, including the purchase of the bus! And he’s not looking back either.
“All in all this will be a bigger kitchen than the apartment I currently lived in, the largest entertainment center I have ever owned, the largest desk I’ve ever had, and the same couch I’d had the past couple of years,” the amateur builder said. “I wouldn’t change anything about it.”
Amazing things can be done on a budget, and there are alternatives for you when you find yourself dissatisfied with expensive rent and a lackluster living environment. We hope Michael Talley’s story has inspired you and given you new ideas of how to build your own tiny house.
