Let’s be honest, buying furniture is not cheap. This is particularly true if you like to redecorate your home every year or so. If you have a large budget when it comes to your home, perhaps you do not mind. But, if you are looking to upgrade your house and not spend a lot of money, you can check out some DIY furniture projects cheap ideas that we have. Without further ado, let’s take a look at some of them so that you can have some fun and save a lot of money along the way.
From a Cot to Child Workspace – DIY furniture Projects Cheap Ideas
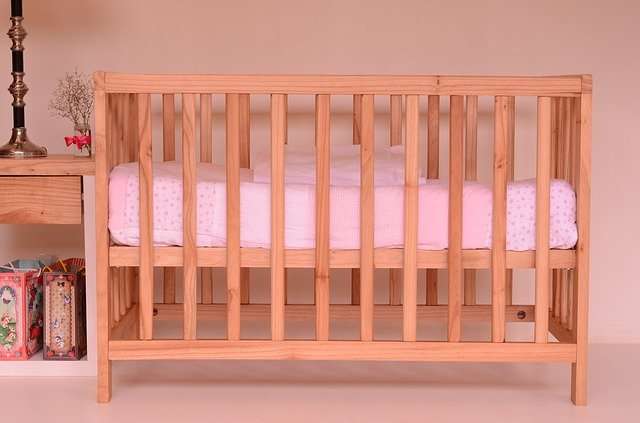
Has your child grown up and left you with a cot you cannot use? Instead of throwing out this piece of furniture, realize that it actually has a lot of potential. It does not matter whether it is a wooden or plastic cot, you can turn this into a desk for your growing child to use. We love this idea since it is perfect for beginners and those searching for DIY furniture projects cheap ideas.
So, first of all, find the old cot that you want to repurpose. Then, what you need to do is remove one side of the cot. In other words, take off the front frame from the cot. This should leave one side open. This is going to form the front of the desk. Hopefully, this should be an easy task and simply mean removing from screws. Next, you will remove the mattress from the cot. This is going to be the desk. If the slats on the cot are open, you can easily purchase fibreboard to make it a solid surface. All you have to do is find some small chairs and your child has their own workspace made from their cot!
Of course, there are some fun ways you can accessorize the desk. This includes adding hooks and baskets for all of your child’s stationery. In addition, you can have some fun and paint the cot any color you wish to make it a bright space for your child to learn.
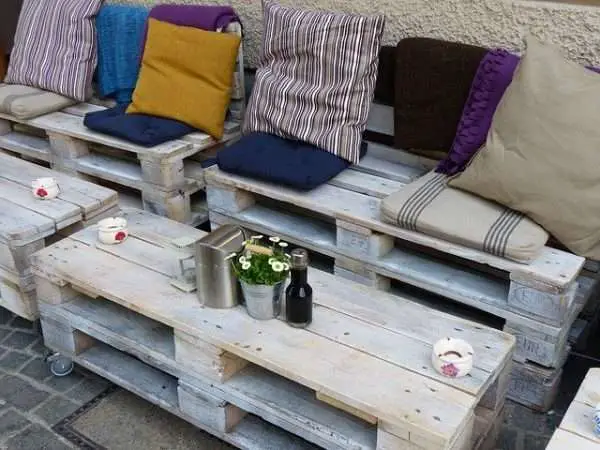
From a Pallet to Footstool
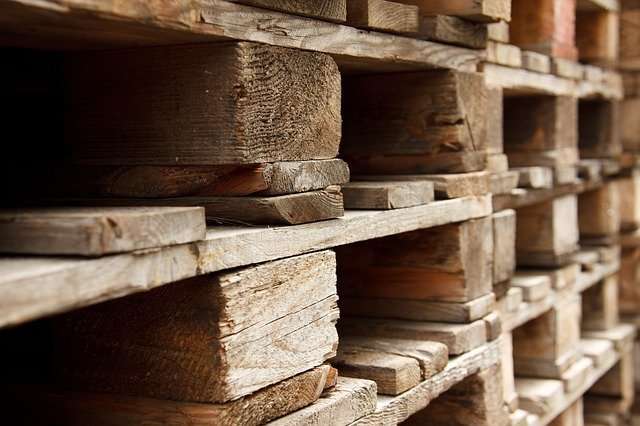
Everybody knows that pallets are great for DIY furniture project cheap ideas. First of all, you want to ensure that the pallet you have is safe for indoor use. It is best to look for one that has a HT stamp on it. This is going to create the foundation of your footstool for your living room. You are also going to need four candlesticks holders. They can be anything that you like and cheap ones too. They are going to form the legs of your pallet. You will also need to purchase foam and fabric ahead of time.
To begin, take your pallet and sand it down if there are any rough edges. Then, drill pilot holes onto each corner of the pallet to attach the candlestick holders. Then, with your foam, use a spray adhesive to attach it to the pallet. Of course, you want to ensure that it is the same size for a result you like. The next step is going to be attaching your chosen fabric. You can choose any style and color you like to compliment your home. You can attach this by using a staple gun.
From pipes to Couch Side Table
Are you looking for a side table that you can use when you are eating dinner in front of the television? Well, instead of spending a fortune purchasing one online or at your local furniture store, you can make your own. This is relatively simple and you can definitely do it on a budget with just a few items.
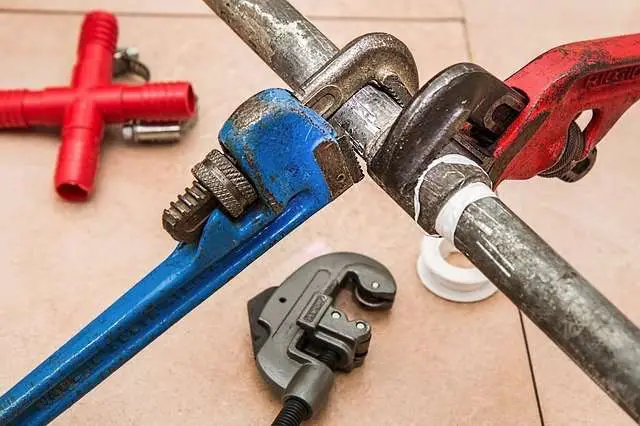
To create the top and base, you will need two wood boards. Think about the size you want for your side table and cut them down to this size. Paint them any color you wish, such as white, grey or black for a contemporary style. If you like the look of real wood, all you have to do is treat it so that it will be durable and last for a long time as a side table. Then, get your galvanized pipes. You can choose the size you need depending on what height you want your couch side table to be. Floor flanges will help you attach the galvanized pipes to the wood boards.
If you are using older galvanized pipes and want to clean them up, you can use mineral spirits. You can also spray paint the pipes if you want to change the color to match your design. Attach the floor flanges to the wood boards using a drill. Position your pipes and attach it all together.
From Wooden Crates to a Television Stand
A lot of people want a television stand for their living room. This is a great way to raise your television to the appropriate height for a better viewing experience. it is also ideal if you are looking for extra storage and a place to put DVDs, CDs and even game consoles. But, if you have been trying to find a television stand for a while, you will know that they can be expensive. This is particularly true if you have a large television.

The great thing is, the DIY furniture projects cheap ideas we have described all cost little money. So, we have the solution to all of your problems. It is possible to make a functional and stylish television stand from old wooden crates. This is going to give you a surface for your television, as well as plenty of storage space.
First of all, you are going to need to gather some wooden crates. This is something that you can do cheaply. Perhaps you have some lying around your home. Alternatively, you can get them from local stores and this can be for free. Gather around four to six of them to create a stand. If your television is larger than two or three in a row, get more from your local store.
If the crates are older and worn, you will want to sand them down and treat them. Alternatively, you can paint them to make your interior décor. Then you simply want to attach the crates together. You will be positioning them on their side and you can use screws for this task with a drill. Your television will be able to lay across the crates and you can use inside of them as shelves for all of your television accessories. Since the crates are made from wood, they can be strong and sturdy. But, if you think your TV is heavy, you can always purchase plywood and create a top shelf for it to sit on.
Do you like making thing from old crates? You can also make raised garden beds with them. Check out this article to find out how.
From a Mirror to a Desk – DIY furniture Projects Cheap Ideas
More people are working from home than ever before. If you are having to work at home, you will know that there are a lot of distractions out there. This means that it is essential you have your own space so that you can get your work done. Namely, it is recommended that you do not work in your bed or on a couch. You need a desk so that you can feel like you are working and to get into the zone.
But, before you rush out and purchase your own desk, know that this is one of our DIY furniture projects cheap ideas. First of all, grab a mirror that is going to be the side of your desk. You also want to purchase some wood for the top. You can paint these items any color you wish. Join them together using butt hinges. This is going to allow you to fold away the desk and save space. Then, use more butt hinges to attach the wood to the wall. When your desk is out, the mirror will be on the side and you can use the surface to work. Then, at the end of the working day, the butt hinges will allow you to fold the desk in towards the wall and you can simply enjoy having a mirror.
A Suitcase to a Chair
Did you know that it is possible to make a chair from an old suitcase? Since it will be small, this might be best in a child’s room. But, they are going to love how original it looks and you can get creative with it. What’s more, as a parent, you are going to be happy to know that this chair will not cost a lot of money!
First of all, find a hard-shell suitcase. This might be something that you already have in your house. Alternatively, you will be able to purchase one cheaply at a thrift store. Ideally, you want to choose one that you like the outside style. This way, there will be minimal work to be done. When you have your suitcase, pull out all of the inside materials and lining. You may also want to clean it out.
It will be beneficial to purchase flat brackets to attach legs to the chair. You have the freedom to choose the legs you like. Use a drill to attach the brackets to the base of the suitcase. You will need foam to insert the upholstery into the suitcase. Purchase a large piece and you can cut it to the size that you need. You will need one for the seat, as well as for the back of the chair.
Attach L brackets so that the top of the chair stays in place. It can be beneficial to place plywood inside the suitcase so that the foam does not sink all the way down. This also gives you a base to attach the fabric for upholstery. You can have a lot of fun and choose fabric that you love. Use a staple gun to attach this fabric. You can follow the same steps for the top of the suitcase. Then all that is left is to place the foam into the suitcase.
From a Milk Crate to Ottoman – DIY furniture Projects Cheap Ideas
Let’s face it, everybody could do with some extra storage space in your home. If you are on a budget, you are going to have to get creative. Well, we have the perfect way to create some storage, as well as an interesting feature for your living room. We are talking about using a milk crate for an ottoman. This is something simple that you can do with little DIY experience and without spending a lot of money.
The main item you are going to need is a milk crate. This is something you may already have if you get milk delivered to your door. But, it can also be something you find at a junkyard or from a local store. You can clean it up and spray paint it any color you wish. This is going to form the storage you need. Then, purchase some foam that is going to be the same size as the top of the milk crate. This is going to be your lid and you will attach it to plywood. You also want to buy fabric that is the size of the plywood. You can use a staple gun to attach it.
In order to get your lid to stay on your crate, you want to purchase an extra piece of plywood. Cut it so that it will fit inside the crate. Screw it onto the main plywood you have for the lid and this should mean it stays securely on top. There you have it; your own ottoman that you can use for storage!
