
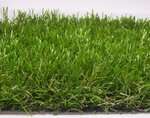
Installing a do it yourself artificial turf has become very popular in recent years. And the best part is the increased number of turf products available, more than ever.
You can find these products at different home improvement stores and garden centers. More people are considering installing a do it yourself artificial turf independently without seeking any professional assistance.
And why not? These kits are becoming more user-friendly, and do it yourself enthusiasts can’t seem to get enough of them.
Here we will discuss different matters such as the cost, the jargon, the mistakes to avoid, and the installation process with some other relevant and useful information.
So, keep reading on.
Artificial Turf Jargon Explained
What about all the technical jargons involved here? If you are looking to install, do it yourself artificial turf without any professional assistance, you need to know the different technical jargons. Here are some valid terms that will help you get along with the proceedings conveniently.
Infill
Infill is the sand or similar material that will go right on top of the artificial turf. Mistakenly, people think that infill is the stuff that goes underneath the turf. But that is not true. Infill goes over the turf.
Total weight vs. face wight
The weight of the products is given in either of the two terms and is weighed in ounces per square yard. If this number is not mentioned, you need to ask the seller. Face weight refers to the fibers’ weight that makes the turf pile and doesn’t include the backing weight. On the other hand, the product’s total weight also includes the weight of the backing and the fibers.
Thatch
It’s a shorter fake grass blade that has a different color from the taller ones. These are slightly curlier, too, and make the product look more realistic. The colors available for thatch include green, yellow, brown, and tan.
Base
It goes underneath the fake grass because you cannot install artificial turf directly on the dirt. It’s a drainable and durable base and the life source of your artificial turf. The most common bases are decomposed road bases or granite. It needs to be at least 4-inch thick.
Pet turf
It’s one kind of artificial turf and just a pet-friendly version. It comes with a permeable backing to ensure proper drainage to get rid of the liquids and avoid odors.
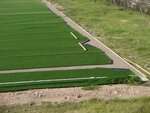
How to Build a Do it yourself Artificial Turf
Thinking about how to install your artificial turf? You will have to keep in mind that building on your do it yourself artificial turf is a time-consuming project. And you have to do it with love if you are looking for some great results.
Here are the detailed steps for the entire process of installation.
Removing grass
First of all, you need to remove your lawn that has been the source of many problems for you over the years. You had to deal with brown spots, water bills, mud, and meowing a lot throughout these years. Remove a layer of the base of your lawn that is at least 4-inch thick.
Have a dump trailer on-site because the earth can add up fast. Make proper measurements to dispose of the existing base accurately. You can also check your local city website to dispose of your soil.
Preparing base

You need to evenly spread 4 inches of class-2 road base or something similar. Such a base will ensure proper drainage and an even platform. You should go for a weed barrier to prevent vegetation from growing.
Install a gopher wire if you want. This wire is a 0.75-inch hexagonal woven mesh that is made of 20-gauge wire. It prevents gophers from burrowing into your artificial turf.
Laying turf

It’s time to layout your turf by rolling it out. Allow it to sit in the sun for at least half an hour to expand before you start installing it. If there are multiple rolls in your do it yourself artificial turf kit, check the direction of the blades and their stitch patterns that they are in the same direction.
Cross blade directions will look very poor. You have to be very careful in moving your artificial grass into its proper direction and position. Make sure to wear knee pads to keep your knees and shins manipulating the turf. Carpet kickers can be very useful here to maneuver you stretch your artificial turf.
Cutting to fit
After making your turf positioned and placed into the desired area, you now have to make those adequate cuts. Carpet cutters and razor knives come in very handy here. Keep in mind to make the cuts from the back of the grass to make the stitch rows visible. When you are cutting, leave 0.25-inch to 0.5-inch turf right over the border edge.
It will be useful for you to give those finishing touches right at the end. If there are multiple pieces of artificial grass, this is the right time to secure those seams with glue or seam tape. Move your turf into place and let it rest for about 15 minutes. When you brush up your seam, it will disappear.
Securing the perimeter
It’s time to secure your synthetic grass. And you can begin by tucking the 0.25-inch to 0.50-inch edge that you left in the border using a hammer and a putty knife. Use the hammer gently and nail or staple until it pierces right into the backing.
Now disperse the turf blades with your fingers and drive the staple or nail into the ground. The nails or staples need to be positioned every 6 inches right along with the entire outside perimeter and every two feet right on the inside.
Make sure to reinforce the seamed areas with some extra staples and nails. Right before you infill, ensure brushing up the turf with a push or a power broom. The blade memory will stay vertical this way.
Spreading the infill
You have to meet the infill requirements of your turf system to make it appear and perform great over the years. There are various options to explore for the infill.
You can either go for zeolite, acrylic-coated sand, crumb rubber, or silica sand. It would be better for you to go for a drop spreader for evenly dispersing the proper amount of infill to make it last for a long time to come.
Brushing the infill
After placing the infill, you can use the power broom or any other brush with stiff bristles for brushing the turf. It will assist those turf blades in standing right up for making the new synthetic lawn freshly mowed.
Repeat the princess until your infill is even and your seams disappear. Brushing up the blades will only be required after 3 to 4 months. But you will need proper sanitation outside, especially if you have pets.
Enjoying your new turf

You are done with all the installation procedure steps, and it’s time to enjoy your new artificial grass. Pat yourself on the back to achieve great results after all the hard work you have put in.
3 Inexpensive Ways to Install Artificial Turf
Going for professional installation will cost you a lot if you compare it with a do it yourself artificial turf installation. But you can save even more with the following three inexpensive ways to install your artificial turf.
Low-cost base
Like we have mentioned above, the base is where your natural grass used to be before you excavated it. Its purpose is to avoid the natural contraction and expansion of the yard soil from affecting the artificial turf. It means you won’t have to deal with any wrinkles popping up. In most cases, either decomposed granite, crushed miscellaneous base, or class 2 road base is used.
But you can use a small amount of granite here and fill the rest of the area with a crushed miscellaneous base or class-2 road base, which will significantly reduce your overall cost. But this strategy will not work well if you live in an area that experiences a lot of rainfall throughout the year.
Reduce material waste
If the first strategy doesn’t work, you can reduce material waste and significantly lessen the cost. It’s almost impossible to use all the artificial grass in your installation. So, you will have to do with cutting and seaming, resulting in some of the turf being discarded.
Figure out to make use of those 13-foot to 15-foot roll-outs and ignore the grain direction. If perfect-looking aesthetics are not important for you, you can save some money by reducing turf wastage and disregarding the grain direction altogether.
Seaming hack
Of course, you will have to seam and cut different pieces of your synthetic grass. And you can use seaming tape or glue or even nails or staples for that. It’s a secure method, but it also costs a lot. A cheaper way of doing things here is to use nails and a lot of them.
It might not be as secure as the glue or tape, but it will help you save a lot. If your area sees a lot of foot traffic, this might not be the best alternative as you will have to nail the area repeatedly.
Top 5 Mistakes to Avoid
Here are some crucial mistakes you need to avoid when installing your do it yourself artificial turf.
- Make sure to avoid any incorrect measurements. It seems obvious, but to reduce costs, it is of utmost importance that you keep the measurements tight and regularly check them.
- Avoid going for incorrect base material and only go for the recommended one to get the most out of it. In most cases, 0.25-inch to 0.75-inch crushed drain rock is a good option. Always go for coarser material to eradicate any drainage issues. And don’t go for many rounded rocks, or they will move around when trying to compact them.
- Also, avoid uneven base because your turf will look great when it lays on a smoother surface. There shouldn’t be any wrinkles or bumps, or your lawn will look less attractive.
- Don’t forget to install your weed blocker layer right underneath your artificial turf for discouraging weeds or other vegetation from growing in your lawn.
- And don’t just throw away your scraps when you are done with the installation. You can use them in your minor repairs later on or reference them in your future purchases.
What are the Problems with Do It Yourself Artificial Turf?
You might be asking, are there any other problems you need to think about over here? With all the benefits that artificial grass has to offer, there are some problems associated with it. The cost will be the most significant problem with such a type of grass, especially if you are not careful in your installation and there is a lot of wastage.
Another issue with artificial grass is, it’s not that soft, especially if you compare it with its natural counterparts. Moreover, artificial turf can hold a lot more heat than its natural counterpart. Plus, if you don’t go with the right kind of base, there will be drainage issues of epic proportions.
How Much Can A Professional Turf Installation Cost?
The costs can increase significantly based on the location, even if you are looking to install it in your lawn, backyard, downstairs or upstairs, or anywhere in your house.
There are various other issues associated with drainage or any excessive roots. The size of the area that you will cover is another matter of concern. Plus, some additional services are associated with turf deodorizers, mow-strips, or some additional labor costs.
In simple words, it can cost you around $8 to $12 per square foot, excluding commission which will be based on the experience of that professional and project proceedings.
FAQ for Do It Yourself Artificial Turf
What is the best base for artificial grass?
The best base for artificial grass is CMB or crushed miscellaneous base because it is an excellent choice for landscaping. You can mix it with decomposing granite or crushed rock to make it even more effective.
What sand do you put under artificial grass?
You should go for a 35mm layer of sharp sand (compacted) for the best results. You can also go for acrylic coated sand, zeolite or silica sand based on your budget.
How long will artificial grass last?
It can last up to 20 years comfortably, but it hugely depends on the foot traffic that the area will experience. It doesn’t flatten hair fade and is ultraviolet stabilized for color retention.
How deep do you dig for artificial grass?
You need to excavate at least 1.5-inch topsoil. So, dig around 4 inches for the best results to lay your base with infill material for proper drainage.
Conclusion
Installing your do it yourself artificial turf may require a lot of effort and input from you, but it will yield great results in the end as well. Not going for professional assistance will reduce your costs but make sure you take those measurements carefully to avoid any wastage of materials.
Lastly, you will see your artificial turf will last longer with much lower maintenance over the years. Of course, you are doing it yourself, and there is nothing that can beat that feeling when you get the results you were looking for.
