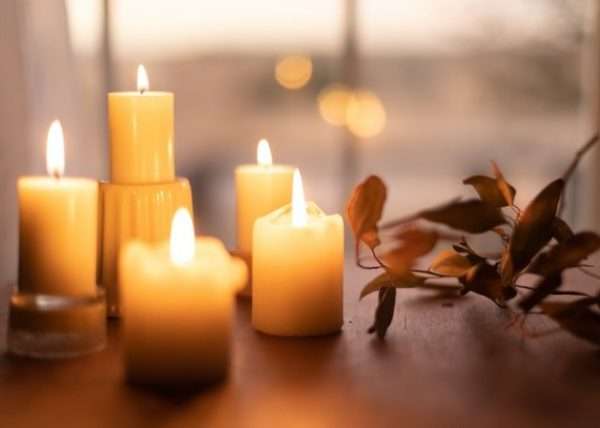
Making DIY scented candles at home can be so much fun. There is nothing more relaxing than scented candles’ soft glow and gentle perfume.
Stores are full of candles; however, I promise that creating your own DIY scented candles can be much better. You can make candles that suit your taste and preference at a meager cost and without much effort. All you need is your imagination and taste.
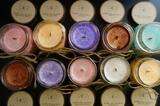
One of the most significant benefits of making your own DIY scented candles is choosing the shape, the smell, and the color. As a candle maker, you can personalize everything; no need to search for the best candle anymore; you can create it!
Can DIY scented candles become a business option?
Making DIY scented candles can also become one profitable business. Note that eighty percent of homes in the United States use candles. All you need is to make good quality products and promote them online. The candle’s production cost is low, and the intense labor is almost absent. Usually, it doesn’t matter if you use expensive or cheap material; the profit is always higher.
Think of creating an online brand with its personal e-shop! Showing yourself as a new luxury candle brand will persuade potential buyers about your production. Another good option is selling your DIY scented candles on platforms like Etsy, eBay, Amazon, etc. Selling on massive platforms is cheaper and requires less effort. There are thousands of potential buyers on all those selling platforms that can click on your product every day.
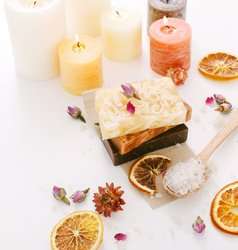
People always look for beautiful candles to decorate their houses and create a relaxing environment. Spread your business to as many places as you can, and success is almost inevitable.
Like any business so do DIY scented candles need to place some effort at the beginning. The road to becoming a professional candle maker requires patience and focus. But don’t feel stressed; we are here to help.
Below you will find the supplies you must have and the steps for creating excellent and high-quality DIY scented candles.
Supplies you need
Wax
Wax is the heart of the candle. It is apparent that you need to invest in a good quality wax in order to create luxury DIY scented candles that people will love. There are three types of wax suitable for candles in the candle-making business. Let’s take a quick look!
1. Paraffin wax
Paraffin wax is the most traditional wax. It is used for hundreds of years for candle production, and it is still one of the most popular waxes. It is pretty cheap and quickly absorbs the color, scents, and fragrance oils. Paraffin wax primarily comes as colorless or white, solid and soft wax. However, there is the concern that paraffin wax can be toxic, as it is made from saturated hydrocarbons. It is a petroleum-made product that from the name only takes a bad name. Maybe, it is better to look for a natural product if you want to create high-quality scented candles.
2. Soy Wax
We can say that soy wax is a newcomer in the candle-making industry and became more popular during the last decade. It is worth mentioning that soya wax was created after the 90’s “natural” movement. Generally, it is made from soybean oil, and sometimes it is blended with paraffin. You can even create your own soy wax. It is a bit more expensive but one hundred percent healthy. If you want to keep it natural, the best is to use it pure. Soy wax absorbs the colors, scents, and fragrance oils quickly and creates luxury candles.
3. Beeswax
Beeswax candles was actually created back in ancient Egypt, and it is the oldest candle making wax. As its name implies, beeswax is generated by the bees, and it is a byproduct of honey. It has a natural golden color and a sweet smell. It is one hundred percent natural, but it is hard to add extra scent, fragrance oils, and colors. Its natural scent can create problems with the artificial smells. However, beeswax is the most expensive of the waxes.
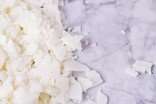
Most of the candles are coming in pellet form (round flakes), making it much quicker to melt it and easier to work with. It may sometimes come as a block, but you can easily cut it with a simple knife.
Wicks
It is absolutely essential to use the proper wick for your DIY scented candles. A wrong wick can destroy your product. The biggest concern is the size; you need to choose the appropriate size of wick for each candle you make. For more oversized candles, you need bigger or even two wicks. If you ever noticed, huge round candles have even three wicks in order to burn evenly.
Fragrance oils
If you want a pleasant aroma, you definitely need to add fragrance oils. There are multiple scents to choose from; you can even blend scents together and create your own aroma. Instead of fragrance oils, you can also use essential oils, but the results are not always great.
Some of the most well-known fragrance oils are:
- Coconut oil
- Vanilla oil
- Black Raspberry & Vanilla oil
- Pik Sands oil
- Lime Basil & Mandarin
- Coffee oil
- Buttered Rum oil
Double Boiler or any Pot
A double boiler is the ideal supply if you want to make DIY scented candles for your business. However, if you go for personal use, a simple pot is enough and can work great to melt your wax.
Containers
Here is the hard part; not every container is suitable for candles. You need to find materials that withstand the high temperature. You can choose glass, cement, ceramic, metal containers. But don’t forget and always go for something heat resistant as you’ll need to pour your melted wax directly inside. It is better to use containers with a lid because it will help with the delivery and make your candle seem more professional.
Other Supplies
- Thermometer
- Spoon or spatula to stir the wax and crack up larger chunks
- Heat Gun to smooth the candle’s surface (optional)
How to create your own DIY scented candles?
Step 1: Prepare your workspace.
Making candles is a messy job. When it melts, droplets can be spilled everywhere, and you won’t even notice it until it gets dry. If you don’t have a laboratory, it is better to spread newspapers or towels in your kitchen. Use this space to leave your tools, but be extra careful with your thermometer and your spatula. Fortunately, if you make a mistake, wax is not hard to be removed from surfaces. Moreover, have your wicks and containers ready because you need to act quickly when the wax is melted.
Step 2: Melt your wax.
It’s time for action. Use the double boiler or the pot to melt your wax flakes. Put a good amount of water in the bottom pan, and then fill your boiler half with wax flakes. Always stay active, and watch it while it melts. Stir it with your spatula in order to melt entirely and keep all your mixture at the same temperature. It usually takes 10 to 15 minutes for the wax to melt. The temperature of your liquid should always be around 160 and 170 degrees. If it gets higher, take it quickly away from the heat.
Step 3: Attach the wick to the container.
While your wax is still melting, you need to prepare your container. Adhere the wick on the bottom middle of your container. Some wicks have a small sticker on the bottom, but most of them don’t. One option is the super glue. However, we’ll tell you a small tip for when you become an experienced candle maker. As your wax is melting, pour the metal part of your wick in the heated mixture and then quickly adhere it to the bottom of your container. Be careful with the place; you need to stick it precisely in the middle of your container. It will take few minutes, and then the wax will dry, and your wick will be stuck on the container.
Step 4: Add your fragrance oils
When your wax is fully melted, add your desired fragrance oils and stir. Each wax requires a different amount of fragrance oils. However, if you want your candle’s smell to be more intense, add some more fragrance oil droplets. When you pour your oil into the melted wax, stir it for precisely 30 seconds, and ensure that it is fully distributed.
Step 5: Add the melted wax in the container
Let the mixture cool for a couple of minutes, and then pour it into your container. Remember that your mixture should be fully melted in the form of a hot liquid while you pour it. The ideal temperature of your mixture to pour into the container is around 130 to 140 degrees. It doesn’t take long to reach that temperature, so pay attention to the thermometer.
When the wax is at the optimal temperature, spill it on the container. While you do that, you need to keep your wick steady in the center. Don’t pull the wick too hard because the adhesion will be released. However, that problem can occur anyway. That’s why you need to cool the wax mixture for 5 minutes or so.
Remember to keep some wax on your boiler, as you will need it after the initial spilling. You’ll notice that your wax will take a few sinkholes in the center as it gets dry.
Step 7: Secure the wick.
You need to ensure that the wick stays steady and nice precisely in the center of the container. When your wax is dry, you will not be able to move it. If the wick is of-centered, your candle won’t burn evenly. In order to keep it steady, simply place a writing pen in the on top of the container tie the top of the wick. You don’t need to freak out; you just need to keep it still for a couple of hours.
Step 8: Let it cool and top off.
While it gets dry, you’ll notice a small sinkhole in the center, and the wax is also pulling away from the edges. When you see that, it is time to top off. Reheat the wax that is left on your double boiler, and then top off the candle. However, do not add too much as you may create new sinkholes. Add just a tiny touch, only to fill the hole.
Step 9: Cut the wick.
Your wick will definitely be a few centimeters longer than it should be. So you need to trim down just about 1/4″. A longer wick will burn more and hotter. If the flame is longer than an inch, you’ll need to trim it again.
Step 10: Clean up your candle.
How to clean the droplets from your candle? Probably you shouldn’t be able to clean every droplet. However, do the best that you can. The best way to clean it is to wipe away every droplet with a towel while still liquid. Any other disposable rag is also suitable. The same rule applies to all your tools. However, if the wax hardens before your clean it, don’t freak out; it will easily scrape off.
Lastly, give your candle 24 hours to harden up, and you are ready!

It is now time to enjoy your candle. Usually, a regular candle burns for about nine to ten hours. It is always cheaper to make your own candle; you may feel that the jars or the containers are expensive, but just think that you need to pay a minimum of $10 in order to buy one. Beeswax is pretty costly, but there isn’t much difference in the price between the soy and paraffin wax. The last two can often be bought from anywhere from $2 to $10 per pound.
Candles smell absolutely amazing, and it is easy to create something similar to your favorite luxury brand. Candles are an excellent way to decorate your house, and every household has at least one. Candles are also a proven way of earning some extra cash and maybe create a whole profitable business. Why don’t you try it?
If you enjoyed reading this article, why don’t you read the ”DIY Beauty Products” and try to expand your business in a new field?
