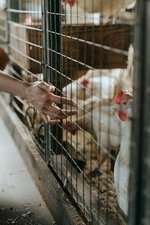
Keeping chickens may seem like a particularly old-fashioned pastime – but it’s actually becoming more and more common these days. People are realizing the benefits of having your own chicken coop. Not only are your “homegrown” eggs fresher and tastier, but they also save you a considerable chunk of change.
This means that eventually even the costs of buying both chickens and material to build a coop will be made back quickly. But where do you start?
Well, there are many ways to build a do-it-yourself chicken coop, and you’re about to realize that it’s easier than you think. We’re going to show you the basics of building, so you’ll have your own backyard chicken coop set up in no time!
Find The Location For Your Chicken Coop
The first step for building your do-it-yourself chicken coop is figuring out where to put it. This will take a few logistic steps to plan, but here are the most important aspects to consider.
First, consider how many chickens you have. Each chicken will need at minimum 2 feet of space inside the coop, and 4 feet of space outside. If you can afford to, consider allowing for more than that to maximize the happiness of your chickens.
Once you’ve calculated how much square footage you need, find a space that will fit your coop.
Next, you need to look at the positioning of your coop. Chickens need warmth and sunlight just like humans do, so take this into account. Will your coop have enough shade in the summer so your chickens won’t be overheated? But will there be enough sun in the winter months?
It can be a tricky balance to find, but you won’t have a thriving chicken coop if you don’t take these precautions.
Finding the right location for your chicken coop is all about keeping your chickens safe and happy, and making sure you can build properly in the space. Always keep these things in mind while you’re planning and building.
Get A Chicken Coop Plan
That’s right, you can buy a set of plans that teach you how to build a chicken coop with exact measurements, supplies, and specifications. While it may be tempting to try and design one yourself, this is going to be tricky if you have little to no prior building experience. So we recommend purchasing one of the many chicken coop plans you can find on the internet.
This will allow you to build your chicken coop quickly, safely, and without many of the mistakes, a beginner might make on their own. Plus many chicken coop plans you find online are free, so it’s ten times easier and it doesn’t have to cost you!
Gather Your Tools And Supplies
The tools and materials you need will depend on what kind of coop you want to build. If you want to build a specific and customized model then you may need some extra items. You can borrow, rent or consider buying these tools if you don’t have them already. If you followed step two and have acquired plans for your chicken coop build, you should already know exactly what you need.
Here is what you will need to build a basic do-it-yourself chicken coop.
- Safety gear: Safety should always come first! Don’t build until you’ve taken precautions first. Appropriate safety gear includes gloves, goggles, and ear protection if you’re going to be using power tools.
- Hammer: Choose the easiest hammer for you to wield. If you’re going to use screws only, you will still need a hammer to knock your boards together.
- Drill: You’ll be using this a fair amount, so make sure you have an extension cord or fully charged batteries if your drill is cordless.
- Tape Measure: Make sure your tape measure is at least ten feet long.
- Circular Saw: A portable circular saw is a must-have for your chicken coop build. You can also use a table saw, jigsaw, or handsaw alongside your circular saw.
- Level: Used to establish even horizontal and vertical lines on your project. You may want to have two or three levels of different sizes (small, medium, and large).
- Tin snips: Used to cut your wire mesh.
- Speed Square: a handy measurement tool used to mark straight lines, check angles, and cut straight lines with your saw.
Supplies
- Lumber
- Plywood
- Screws
- Nails (if applicable)
- Wire mesh
Get To Building!
This is the bulk of the process, and if you have your plans you should know what to do already. If this is your first time building anything considering roping in a friend, partner, or family member to help out. This is particularly useful when you’re operating your circular saw.
Below is a basic checklist of steps you need to undertake during the build. Check these off even if you’re using your plan, as it’s possible some online plans don’t include all of these steps.
- Use your lumber and circular saw to cut the floor frame, legs, supports, rafters, and roof slats.
- Prepare your plywood and cut panels for the front, rear, and sides of the coop.
- Then cut the remaining plywood for your ramp and nesting box dividers
- Take your prepared lumber and build the frame of your coop. This is always the first step of the build.
- Attach the legs and support braces to the bottom of the frame, to elevate and reinforce the coop.
- Now it’s time to attach the rafters and install the floor panel. The center of your floor panel should line up with the centerboard of your floor frame.
- Attach the front, side, and back panels to your coop frame.
- Install your nesting box. Remember that it’s important to consider the comfort of your chickens when deciding on the size of your nesting boxes!
- Add holes to the side panels for ventilation. Chickens need airflow to nest comfortably.
- Build a chicken ramp. This lets your chicken enter and exit the coop easily. Don’t forget to screw or nail strips onto the ramp panel in 3 or 4-inch increments. These act as steps for your chickens to walk on.
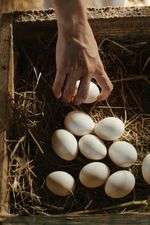
- Cut and attach hinged doors and flaps for collecting eggs, as well as feeding, cleaning, and changing the water in the coop. Add a chicken door for your chickens to come and go during the day.
- Install roof slats using weather-resistant wood.
- Cover any open-air runs you might have with chicken mesh. This is essential! Every gap or space needs to be covered with wire mesh to prevent any potential predators from entering the coop.
- It’s time to paint! This is the fun part of the process, so make sure to take your time and enjoy it.
5. Extras To Consider
But this isn’t all. If you want the ultimate do-it-yourself chicken coop then there are a few other steps to consider.
Chicken Run
A chicken run is an outside area contained within your coop. Think of it as a backyard for your chickens; it gives them space to get fresher air and move around more freely. Adding a chicken run will make for happier chickens, and happier chickens are healthier chickens – and they produce better eggs too!
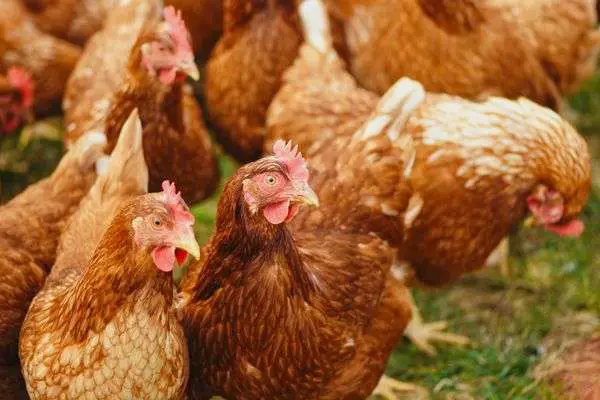
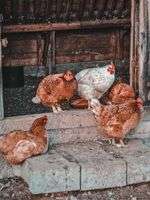
How Many Chickens Do You Need?
We mentioned this at the beginning of the article, but you need to figure out how many chickens you are going to have. Try to keep this number reasonable – you may want as many chickens as you can handle, but do you need all of them?
The typical hen produces around one egg a day, so keep this in mind when you’re purchasing your chickens. Between 3 and 6 chickens is considered a good range, as it keeps your coop manageable and allows your chickens to socialize thoroughly.
Dropping Pans
Consider installing dropping pans in your coop, made out of a simple panel of corrugated polycarbonate roofing. They are then inserted beneath the roosting bars of your coop. Dropping pans are helpful for several reasons.
Firstly, they capture the waste rather than letting it fall to the floor of the coop. This saves you from having to replace the coop floor bedding as often. Dropping pans are also super easy to clean: just slide the panel out, hose off, let dry and return it to the coop.
But they can also be helpful when it comes to keeping your chicken healthy. Because the dropping pans need to be cleaned properly, you can inspect the chicken droppings to check for potential illness. Some internal illnesses can be identified in their droppings, meaning you can target and treat some illnesses earlier.
Final Thoughts
So there you go! Building a do-it-yourself chicken coop doesn’t have to be complicated. It can be straightforward and affordable, you just need to put in the work to get it done. And once it’s finished, you’ll be enjoying fresh, organic eggs with every breakfast. Bon Appetit!
