When you’re a dedicated home-owner, the outward appearance of your home matters. After all, people tend to judge a book by its cover. And what could look worse than bare, brown patches on your otherwise pristine front lawn or backyard?
Thankfully hydroseeding is a simple and easy way to take care of that. And though you can have it done professionally, do-it-yourself hydroseeding is pretty simple too! Below we’re going to show you how you can use this tried and true gardening method to regrow your lawn, fix bare grass patches and even fix soil erosion on your property.
What Is Hydroseeding?

Hydroseeding (or, hydraulic mulch seeding) is a gardening method that originated in the 1940s. It was originally invented to plant seeds in areas that were hard to reach, but today is more commonly used for fixing or beautifying lawns and yards.
The typical hydroseed process is a combination of seed, water, mulch, and fertilizer that is made into a “slurry” (a mix of solids and liquids). This slurry is then applied to the area where you want growth and voila – in a matter of weeks, you’ll have a healthy lawn, or crop seedlings depending on your seed. Hydroseeding can also be used to plant things like wildflower and oats.
You can do this both professionally or at-home. A professional service will likely do the job more quickly and to a higher quality, but will also be more expensive. Doing a DIY job may have imperfections, but as long as you do it properly and in the right conditions you shouldn’t have any problems.
Uses For Hydroseeding
Hydroseeding isn’t simply used for laying lawns or planting crops. Originally, it was used to prevent erosion in many areas. Because the resultant slurry made for hydroseeding holds in moisture, it reduces overall soil erosion.
It’s also used to:
- Reduce dust pollution
- Prevent weeds and overgrowth
- Maintain leveled fields at sports and recreational areas
Hydroseeding Equipment
Do-it-yourself hydroseeding does take some preparation and equipment to get you started. But we really believe that it’s worth it! Below is a thorough list of what you’ll need to get your lawn or garden started
- Seeds – the most important part of the process. If you are planting grass you can even choose a mix of seeds depending on the color and texture of the lawn you want.
- Fertilizer – basic lawn or garden fertilizer is a good option. However, make sure that the fertilizer you choose will support your seeds through every phase of growth.
- Mulches – the most common kinds of mulch to use for do-it-yourself hydroseeding are fiber, wood, and paper. Consider using green-dyed mulch to “disguise” the bare ground while the seedlings are growing.
- Spray Container/Tank – This will be used to mix and eventually spray your hydroseed mix.
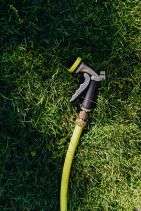
- Hose – Used to spray the mixture. This should come with your spray container.
- Agitator – a mechanical agitator is a part of professional hydroseeding machines. It isn’t always necessary for do-it-yourself operations, but it does make the job easier and more effective. An agitator keeps the slurry combined properly. Consider a manual agitator (a wooden or plastic stirrer can work) to mix it yourself.
- Water – water is needed throughout the process. This is both to make the slurry thin enough to spray, and for watering while the seeds grow.
Keep in mind that you don’t need to buy each item individually. There are plenty of hydroseeding kits that you can buy online, that will suit your particular needs. Some businesses will even rent out professional hydroseeding equipment.
Step-By-Step Guide For DIY Hydroseeding
Step 1
Take a measuring tape and measure the area you want to plant your lawns or crops on. This will show you how much seed and fertilizer you will need.
Step 2
Make sure the area is clear by removing any stones or potential obstacles to your seedlings. Remember to rake and loosen the topsoil and any extra components to the soil that you deem necessary. This could include compost, lime, or sand to facilitate soil drainage.
Step 3
Purchase necessary equipment, or buy/rent a hydroseed tank and hose if available. When buying any kind of seed, make sure it is well suited to the climate you will be growing it in. If you are buying grass seed, choose the kind of grass that matches your desired appearance. You may also want to consider the maintenance required for the grass, so it matches your lifestyle. If you’re ever unsure, workers at your local garden store should be able to help.
Step 4
Now to create your hydroseeding mix. First, take a look at the square footage specified by your seed packaging. Then combine the equivalent amount of seed, mulch, and fertilizer to match the amount.
Step 5
Add water. A hydroseeding tank will have a fill line that tells you how much water you need and will begin mixing with its automatic agitator. If you don’t have a tank, simply add water to your container until the mixture is effectively diluted and can be drawn up through the hose. Use your manual agitator to combine the mixture into a slurry.
Step 6
Attach the hose, and begin spraying manually or start your hydroseeding machine. Spray half of your mixture across the desired area in smooth and even movements from left to right. Once finished, spray the remaining half from right to left to ensure complete coverage.
Step 7
Keep the area moist and watered regularly (but lightly) until seeds begin to sprout. In some cases, you may have to water the area two or three times a day until shoots appear.
Hydroseeding Speed and Growth
Hydroseeding promotes faster seed generation overall, one of the many reasons people choose it for their lawns and gardens. You should be seeing sprouting within the first week and consistent growth after the first 10 days. Expect full coverage within a month of planting.
Despite this relatively fast growth, it can take as long as six months to see the same full-growth as a sod lawn. However, the difference will be minimal for the first 1-3 months.
Advantages
Do-it-yourself hydroseeding has a raft of advantages as a lawn and garden method. Take a look at the net benefits of using this technique:
- Hydroseeding provides lush, uniform, and even plots of grass. You don’t need to worry that hydroseeding grass will grow unevenly, or in different colors.
- A hydroseed lawn means a healthier lawn. When laying sod you can only use one type of grass seed. This leads to a monoculture, meaning that your grass is more susceptible to disease than it would be with a mixture of grass species. With hydroseeding, you can plant a mix of different seeds to avoid this.
- A mixture of seeds also means you can better choose the grass that matches your overall preferences such as the color and texture of the lawn.
- As a lawn-growing method, it’s relatively inexpensive, especially when compared to laying sod.
- It works fantastically overall for larger areas. The bigger your target space is, the cheaper hydroseeding will be.
- It’s less time-consuming than most methods, particularly if you want to cover a larger area.
- It’s also a faster and easier process than tilling the ground and planting seeds manually. A hand-sewn lawn could take half the day to cover. But hydroseeding the same area might take only an hour or two to prepare the mixture and cover the same area.
- Hydroseed mixtures tend to be weed-resistant, making them easier to maintain as well as limiting the negative environmental effects of weed overgrowth.
Drawbacks
Not everything is perfect. It’s important that you know the potential downsides of the hydroseeding process, so you are informed enough to decide if it works for you.
- If the target area you want to grow on is quite small, you may not want to hydroseed. It’s certainly effective for filling in patchy areas of lawn, but the lengthy and time-consuming preparation may not be worth it for smaller areas.
- Hydroseeding needs a lot of hydration during the germination phase. Planting during particularly dry seasons or in dry climates is difficult and will take extra irrigation.
- It can use an excessive amount of water, both during the hydroseeding process and during maintenance while you wait for grass or crop to grow.

All in all, hydroseeding can be both a great at-home and professional method for laying a new lawn and large-scale gardening. Plus it’s relatively easy to do it yourself without breaking the bank!
Regardless of which method you choose, make sure you are keeping your grass and plants hydrated, fertilized, and well-manicured throughout the year. Despite all of the pros (and cons) of do-it-yourself hydroseeding, keeping your backyard healthy is the most important thing