Looking for some information on building your own do it yourself Murphy bed? This guide will provide you with everything you need to know to make it from scratch.
Murphy beds are convenient to use because they are great at saving space. You can fold them up right next to your wall when you need to use the area and fold them back down when you need to use the bed. These beds are great for small rooms, and you can use them in your kids’ room or guest rooms.
Let’s find out how you can build your own do it yourself Murphy bed by following the simple steps.
Why Is It Called a Murphy Bed?
It’s named after William Lawrence Murphy, an Irish immigrant who lived in a small apartment in New York and wanted to utilize the space available creatively. He filed for his first patents around the 1900s. But there were fold-up beds available before that time. But since the patents, these beds have become famously known as the Murphy beds.
How to Build a Do it yourself Murphy Bed – A Step by Step Guide
Murphy beds will act as your extra bed whenever you need it the most. It works like a showpiece when you don’t have too much room available. The best part is, there are different types of Murphy beds.
Some of them can be deluxe versions, while others can be as simple as a box.
This brief but comprehensive step-by-step guide will show you how to make your own do it yourself Murphy bed.
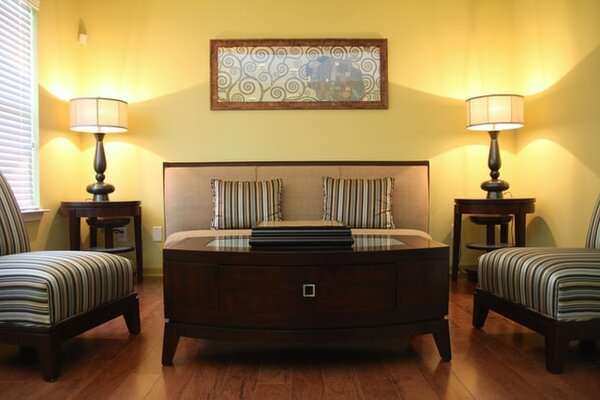
A Murphy Bed for Pampering Your Guests

This guide will highlight the steps for making a deluxe category bed pamper for your guests. It will include some storage spaces and other features to entertain your guests with a quality bed that they can use conveniently.
There will be cabinets and display lights, and you can use them as night lights as well. With a touch knob mounted on the headboard, you can turn the lights on/off without leaving your bed. This will be a beneficial feature for the guests unfamiliar with the room and light switches.
But you need to keep in mind that don’t start working on the project until you have access to all the hardware inclined to make this bed. You might end up going for a different design based on the available hardware.
Most of the materials you will need to make are available at different home centers. For the ¼-inch thick oak and the Murphy bed hardware, you need to order them online from different resources or need to resaw the broader boards that are already available to you.
Step 1 – Building inner frame
You will need a large-sized assembly table for this project. You can always work on the floor as well. Begin the work by assembling the GGG struts from the stock. If they are too long, trim and join them right into the frame sides using screws.
Step 2 – Assembling the side rails
Now you will need the oak plywood to make the rest of the bed frame. Make sure to give the bed rails with 1.5-inch edging right on the end and 0.75-inch edging on the top. The side rails are strips of plywoods that are edged using solid wood. For this, you will need a long clamp for attaching to the block edging end. For extending the pipe clamp’s reach, you only need to add another pipe length using a coupler.
Step 3 – Making a template for side rails
You need to go with the paper template. This also serves to be a drilling guide for you and a routing pattern. You can use this template to position the hardware and mark your curves. Just rough cut all the curves using a jigsaw and smooth them by sanding or running your pattern router bit right along with your template.
Step 4 – Drilling hardware holes
After that, you need to dig a few hardware holes but make sure they are perfect. You can use a stop block to ensure the right depth. Just rough cut your curve and finish using a router and a pattern but right along with the template.
Step 5 – Assembling bed frame
Now attach your head, foot, and side rails to your inner bed frame. Cut a couple of pieces of plywood for the face panel of your bed. You need to trim aside along with the top edge for each of your panels with 0.25-inch edging.
You need to lay the face panel down on the bench or the floor and put the pieces together, making the hardwood edges on the outside. Now lay your assembled bed frame right on top of those panels and attach them with the help of screws. After that, you need to flip the entire bed frame over for covering the face panels with your false drawers and doors.
Step 6 – Adding false drawers and doors
You will need some help here as you will have to turn the frame over carefully, making it up facing. Now rip the stock for the drawers and panels with ⅛-inch spacers for creating gaps between the drawers and door. Attach them with bad glue or pins. Make sure to spare with the glue so you don’t end up squeezing the glue out. Now mount your pulls as well as the knobs but keep the inner frame structure safe. Remove all the hardware, and in the end, you need to cut and fit right in those mattress supports but don’t screw them into the pale before your final assembly.
Step 7 – Building shelf units
You need to build the shelves, and you must cut the cabinet plywood components and glue and clamp the 0.75-inch hardwood edging of the cabinet vertices. You must add a 0.25-inch edge right on top and the bottom of your hardboard. After that, you need to drill and layout the hardware.
If you are looking to add light fixtures and then cut 2.875-inch holes within your panel, you will need to glue and screw those mounting cleats right to the end of your hardboard. Add your header front and back by following the instructions. Bookcases on both sides will be assembled with a similar cleat and screw system you used for the bed cabinet.
Step 8 – Building fascia boxes
Cut the components for the cabinet top and fascia assemblies, and assemble your fascia boxes using glue and screw. You can make the cuts using a miter saw and attach the trim board right to the bottom of the boxes. You can drill ventilation holes within the cabinet for those lights.
Step 9 – Assembling the cabinets
You will have to assemble all the cut pieces and components for your cabinets. And make sure you lay your bed frame down facing downwards, and make sure to place a pad on the floor to keep the fittings and the surface free from any scratches. Now carefully attach all the cabinets on either side of the bed as soon as you attach the headboard to the bed frame.
Step 10 – Screwing Cabinet to the wall
The last step is to screw your cabinet directly into the wall and make sure it is firmly attached to the wall. You will have to make sure the leg support is properly folded before lifting your cabinet. You will only have to attach the bed assembly directly to the wall. Have someone hold the bed in the place right next to the wall until you have fixed it to the wall entirely.
Top 5 Murphy Bed Ideas and Designs
We are listing down our top 5 highly recommended designs and ideas to get you started for your convenience.
1. Pine Murphy Tucked Away in a Bookshelf
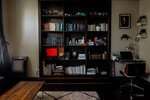
This design is straightforward and clean, and it will work like a charm in your kids’ room as well as a goat room. Your kids or guests can use it as a bookshelf and can fold it out to have some rest. It has a functional design that will fit right in.
2. Rustic bed dresser combo
Another way to go about it is by giving it a dresser design. This way, you will keep the decor theme going within your room and utilize the available space more productively. This bed will work very well for families with small children.
3. Tall cabinet Murphy bed
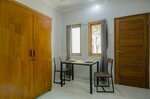
This bed style will go well in a guestroom or even a gym room, office, or studio. This design has a narrow width and fits snugly against any wall. But make sure your room is tall and has the right dimensions for it.
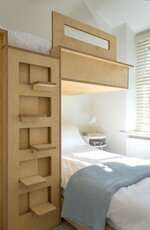
4. Twin bunk Murphy beds
This idea has two for one Murphy bed. The horizontally mounted Murphy bunks will only take about the same size as if you were doing a single vertical. But they can still cater to two slippers at a time.
5. Mantle Murphy bed
This is another adorable way to hide your bed away. The best part is you can customize the paint colors and wood as well. It also comes with some storage spaces, and you can place your belongings with ease.
Do Murphy beds use regular mattresses?
Most of these Murphy beds don’t need a particular mattress. But they are not going to house an 11- inch thick mattress and a pillow-top mattress. It would be better to go with those traditional mattresses with these beds.
You can either go with a memory foam mattress if it is less than 11- inch thick. And that’s the only criteria you need to keep in mind when looking for the right kind of mattress for your Murphy bed.
Do all Murphy beds have to be attached to the wall?
Most of these Murphy beds need to be attached to the walls to be secure for the users. Therefore, most of the designs make you anchor the bed to the wall. But some models are free-standing as well, and they function as a pullout bed and are not lowered or raised in the same way that Murphy bed does.
FAQ
Can Murphy beds kill you?
It’s more of a myth than a reality that a Murphy bed can kill you. The odds are the same as if you are likely to die by walking under a falling piano.
Are Murphy beds hard to install?
Murphy beds require precision and accuracy. Therefore, if you don’t have any skills or expertise in carpentry, this might be difficult for an experienced person. You only need to follow the instructions closely, and you will be all good.
Can a Murphy bed be used every day?
You can use it every day, but you will have to keep in mind the hardware and mechanism if this bed gets worn out within just 5 to 7 years, whether pistons or spring-based. Otherwise, Murphy beds can easily last more than 15 years.
Are Murphy beds comfortable to sleep on?
Yes, these beds are as comfortable as any other bed on the market. You can equip it with a similar type of mattress that you have on your regular bed.
How do you keep a Murphy bed down?
These Murphy beds have spring-based mechanisms that will hold the bed in place with the tension creating a strong pull on the bed. You can easily lower it down, and it will fit its place comfortably.
Conclusion
Building your do it yourself murphy bed is simple, but you need to have some do it yourself experience. Just follow the instructions given and make the cuts precisely. It’s all about precision and accuracy if you want your bed to function properly.
You can try out different designs and install these beds in any room where you think you don’t have much space available. However, these beds are ideally suitable for kids’ rooms as well as guest rooms. You can always add cabinets and lights to make it more convenient for you.
