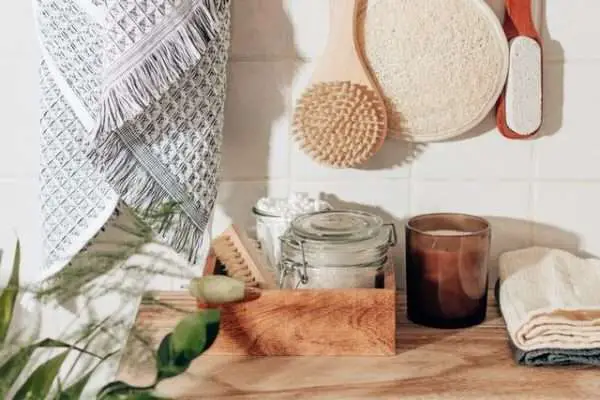
DIY bath products are one of the most valuable and relaxing DIY crafts. Who doesn’t love to take a relaxing bath after a long day at work? It is a matter of the fact that a warm bath can take away all the anxiety and stress. Can you imagine how much better it would be if your favorite DIY bath products accompanied your night bath? Pampering ourselves must be a habit, and handmade products can help with that!
Of course, you could buy some bath products at a store, but have you ever thought of how many toxic and unhealthy ingredients include? Natural products are essential for the skin. There are people with multiple allergies and skin conditions that can not tolerate industrial products. Let alone that creating your own DIY bath products is also fun and creative!
So, read below, and you will find some of the most innovative recipes to create your own natural DIY bath natural products.
DIY Coconut Oil Sugar Scrub
A coconut oil sugar scrub is a fantastic bath product for exfoliating and moisturizing the skin, remove the dirt and the makeup, and reduce wrinkles. Sugar has some of the most gentle properties for the skins and, combined with coconut oil, can give an extra shine and tone on both the face and body.
Coconut oil sugar scrubs definitely improve the health of the skin as it works as a natural softener. Of course, you can make a bigger mixture and spread the gentle sense to the whole body if you want.
Ingredients you need
- 1/4 cup of granulated sugar
- 1/2 cup of softened coconut oil
- essential oils of your choice (like orange or lemon)
- citrus zest (from orange, grapefruit, lime, or lemon)
Guide to follow
The process of making this DIY bath product is simple and quick. Blend the granulated sugar and the coconut oil at room temperature until it gets the form of a gritty paste. If you decide to add more sugar, you will create a scrub with a more harsh feel. This rugged feel will help to exfoliate and cleanse the skin better. However, if you have sensitive skin, it is better to go with the exact proportion; otherwise, you may injure your skin.
If you want to spice up your sugar coconut oil scrub, you can add the essential oils of your choice. I would go for orange or lemon essential oils because they are a lot more efficacious than any other. However, don’t be greedy and add only half a teaspoon of essential oils, or else you will destroy the scrub’s texture and quality. That teaspoon of essential oils will increase the mixture’s healthy action and provide a pleasant smell.
It worths mentioning that the more ingredients you add, the less life you scrub will have.
How to use your new handmade product?
Simply massage the scrub into your face and body with smooth circular moves. Leave it on your skin for a minute until you feel that oily sense. Then rinse it with warm water and pad this area. The oil helps to avoid the grainy feeling.
Tip: You can even use the sugar coconut oil scrub on your hairs too.
Handmade Soap
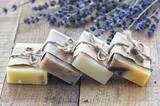
If you are a DIYer who loves to make bath products making handmade soaps will let your creativity run loose and probably your pockets heavy.
There are plenty of processes for making DIY soaps, but here you will find a simple one that does not take a large amount of money and needs few ingredients. Once you learn to make soaps and do some experiments, you will understand that you have acquired a great skill.
There are two basic processes for making soap, the hot and the cold process.
Basic soap making supplies
- Stainless steel or glass container
- Digital kitchen scale
- Slow cooker
- Blender
- Thermometer
- Silicon mold
- Soap cutter or precision knife
- Silicone spatula
Tip: Do not use anything aluminum as it can be proved unsafe.
Ingredients
- 20 oz. coconut oil
- 10 oz. olive oil
- 9 oz. distilled water
- 4.78 oz. 100 percent pure lye
- essential oils
- colorants (optional)
- dried herbs or flowers (optional)
Guide to make DIY soap
Step 1: Add the coconut oil to the slow cooker. While the coconut oil melts, slowly add the pure lye to the water. Stir the mixture with the spatula while you add the lye to the water.
Step 2: Let the lye mixture dry for 15 to 20 minutes. When the coconut oil is fully melted, add the olive oil and stir well.
Step 3: Once the oils have reached 49 to 54°C, pour the lye and stir slowly. Then set the mixture to the blender and stir the mixture with circular moves.
Step 4 Continue stirring for 10 to 15 minutes. Then low down the fire and cook at low temperature for 50 minutes. If you see any bubbles, gently blend the mixture with the spatula.
Step 5: Let the mixture cool down in less than 82°C and add the colorants and the essential oils.
Step 6: When it is thoroughly mixed, add the mixture to the soap mold, smooth the top with the spatula and tap the whole mold to remove the bubbles. Now, It’s time to add the dried herbs on the top.
Step 7: Let the mixture dry in the mold for 24 hours and then remove the soap from the mold.
Tip: Before you use the handmade soap, let it dry for one week.
This hot process gives the handmade soap the best appearance. Making soap at home is cheap and fun. However, the best part is that you can add smells and ingredients based on your preference.
DIY Milk bath
One of the best ways to care for your skin while bathing is to use a milk bath. A milk bath works as the best moisturizer. The ancient princess Cleopatra was bathing in donkey’s milk to keep her skin moisturized and shiny. However, today there are plenty of milk options to go for. Some of the most popular are coconut milk, oat milk, almond milk, buttermilk, or even goat milk.
Ingredients you need
- 2 cups of milk of your choice
- Epsom salts
- Half cup of baking soda
- 1 teaspoon of jojoba oil
- 5 drops of any essential oil suitable for the skin
- 5 drops of another different essential oil of your choice
Now simply combine all the ingredients in a glass bowl.
How to milk bath your body
Step 1: Fill your bathtub with warm water as it offers relaxation.
Step 2: Add your milk mixture to the water by pouring it right inside or using powdered milk. Depending on the water you have in the bathtub, add one or two cups of milk.
Step 3: If you want to add extra essential oils to your bath, now it is the time.
A milk bath has many benefits! It hydrates and exfoliates the skin, removes the wrinkles, eases any kind of mild sunburn, eases the tension, and relieves the stress, and it’s the beginning of restful sleep.
DIY Bath Salts
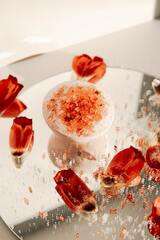
One of the most unique products to add to your chilling bath playlist is definitely the bath salts. People are using bath salts as the greatest mean of relaxation. Bath salts help you get peace with the idea of doing nothing and pampering yourself; it’s not a coincidence that they are used in every luxury spa resort.
Supplies you need
- Epsom salt
- Grain salt, like sea salt
- 1 spoon of baking soda
- Dried lavender or flower petals
- 5-10 drops of essential oil of your preference
Guide to create your own Bath Salts
Take a bowl and mix inside all the above ingredients. Then store them in a suitable container. Try to avoid plastic and aluminum containers as they tend to be more unhealthy than any other material. You can go for a glass container, but remember that you need to seal the jar tightly with a lid.
When you want to use your personalized salts, simply add 1/4 cup-1/2 cup of the jar into the warm water. Now it’s time to get in the bathtub and enjoy a relaxing bath!
It worths mentioning that bath salts relieve stress, offer relaxation, reduce skin inflammations, purify the skin and release muscle tension in the body.
DIY bath products are unique for relaxation and provide a pleasant night’s sleep. If you are one of the people who love to take long baths, you will enjoy learning the art of making DIY bath products. Why don’t you give it a try?
If you love reading this article and you are ready for more self/skincare, why don’t you also read “DIY Beauty Products’‘?
