
You might need a work table where you can do all your gardening and outdoor chores. If you don’t want to buy, you can make a do it yourself potting bench easily.
In this guide, we will explain how you can make this do it yourself potting bench. Plus, we will also share some ideas with you on how to dress it all up to make it look pretty and a type of garden furniture that you will be proud of.
So, let’s dive right in, shall we!
What is A Potting Bench Used for?
What is this potting bench, and how can you use it? Well, it’s a pretty valuable piece of garden furniture you can use for various gardening and outdoor chores.
Potting benches are also known as gardening tables. They are workbenches that you can use to carry out all kinds of small tasks associated with gardening, like transplanting seedlings and likewise.
Some of these potting benches are small and portable. Others can be fixed right next to a greenhouse. Some designs have a dry sink also included, and you can use it for soil storage.
Some potting benches also come with a drain or water hookup or even a cold frame. So, you can use them for filling your plant pots or transferring your plants from one pot to another.
How to Make a Do it yourself Potting Bench – Step-by-Step
Making a do it yourself potting bench is not that difficult at all. You will only need some woodwork and carpentry experience under your belt, and you will get through this project pretty easily.
List of cuts
- Four 1×4 front & back cedar rails – 4 feet 5 inches
- Three 1×4 cross cedar rails for the bottom frame – 1 foot 3 inches
- Three 1×4 cross cedar rails for the top frame – 1 foot 9 inches
- Four 4×4 cedar posts – 35.25 inches
- Four 1×4 cedar support – 1 foot 0.25 inches to the short side of the miters
- Two 1×4 cedar support – 11 inches
- Five 1×4 cedar shelf slats on the bottom – 5 feet
- Five 1×4 cedar counter slats – 5 feet 2 inches
- One 1×6 cedar counter rear slat – 5 feet 2 inches
- Two 4×4 cedar post rear supports along with chamfer – 3 feet
- Two 4x 2.25 x 3 inches cedar block spacer
- One 4×4 cedar post for center shelf – 18 inches
- Two 4×4 cedar rear support for the lower shelf – 8.25 inches
- One 1×6 cedar middle shelf – 5 feet 2 inches
- Three 4×4 cedar corbel
- Two 1×4 cedar slats for top-shelf – 5 feet 2 inches
- Four 2×2 cedar diagonal bars for decoration (from the 4×4 scraps)
- Two angled glove and boot supports (from the 4×4 scraps)
- Four 1-inch dowel – 15 inches
- Four 1-inch dowel – 6 inches (different cuts if desired)
- One 1×4 rail for side mount – 1 foot 4-1/2 inches
Here are some important steps you need to follow to make a do it yourself potting bench.
Step 1 – Making the bottom frame
You can begin working on your do it yourself potting bench by cutting out your pieces 1, 2, and 3 and creating that bottom frame using two of number 1 and three of number 2. Nail and glue them all correctly. Make sure you don’t use any access amount of glue because you are already nailing them.
Step 2 – Building top frame
The next step is to build that top frame or the countertop, and for that, you need to take the two pieces of number 1 and three pieces of number 3. Nail and glue them and be careful not to over glue because you are using the nails to keep them in place.
Step 3 – Adding sink support and legs
Next up is adding the support structures for your sink. Take four pieces of the number 5 and two pieces of the number 6. Nail and glue them with each other and ensure that the spacing between the number 5 is more than 15 inches for proper sink clearance. After that, you will have to cut four pieces of number 4 and make support legs from them.
Step 4 – Attaching the bottom frame
Now, you must attach the bottom frame directly to the four legs. But make sure there is a clearance of four inches from the ground. Also, make sure the legs tend to protrude out front of the frame at least 0.75 inches.
Step 5 – Attaching the countertop to the legs
Now, you need to attach the top frame assembly directly to the four legs and make it flush to the top of those legs. Again, you need to make sure the legs protrude out at least by 0.75 inches. The top frame needs to be properly aligned with the bottom frame.
Step 6 – Drilling pocket holes
With the help of a pocket hole jig begins the drilling work on the rails for fastening the shelf boards. You should counterbore all the number 7 and number 8 pieces. Using a nail gun here will work as well but use it from the top surface.
Step 7 – Laying slats on the bottom frame
Attach the face of the number 7s using pocket nails and screws and leave a 0.25-inch spacing between the boards. Now, cut the rear and back salts for fitting snugly right between the corner posts.
Step 8 – Checking the sink placement
Take a galvanized sink tub and place it within the space for reference. Now place five pieces of number 8 and a piece of number 9 right over the top to ensure that all the boards properly overlap over the edge of this galvanized sink tub from all the sides. Your slats need to be split for locating the edges of your sink.
Step 9 – Tracing the sink
Now, pull the sink tub out from underneath and palace it right on top of the boards. Make sure to center the tub right between those cross braces present below. Now trace the sink tub to the top of the boards.
Step 10 – Cutting the sinkhole
With the help of a jigsaw, you can cut within 0.25-inch of the traced line for the sink. Cutting this way within the circle ensures the sink edges and hold up when you drop it within the hole.
Step 11 – Cutting shelf posts
Now it’s time to cut the pieces number 10 and 11 and then screw and glue them with one another. You can counterbore those screws so they can stay right below the surface.
Step 12 – Cutting the notch within the tabletop
You must notch out the rear corners from those 1×6 boards to allow clearance for the number 10 and 11 pieces to ensure a snugly fitted assembly. Ensure they will sit right over the upper frame support and the leg support.
Step 13 – Attaching shelf posts
You need to counterbore the back supports and attach them directly to your table assembly with the help of cabinet screws and glue. Your 4×4 posts must stick directly above the countertop at least 18 inches.
Step 14 – Cutting and attaching the mid-shelf posts while channeling the plumbing
Next, you will have to cut pieces 12 and 13 and notch out a channel right in the center on one of the pieces from number 13. This is the clearance for the water supply. Now screw and glue a piece from number 12 and both the pieces from number 13 but keep them equally spaced right on the countertop but within the line of those outer posts.
Step 15 – Cutting the notch on the lower shelf
The next step is to cut and glue the pocket holes on piece number 14 to connect it to the vertical posts. If you want to use your nail gun instead of the glue, you can do that.
Step 16 – Cutting the corbels for the top shelf
Take three pieces of number 15 and attach them right to the top of the posts with the help of nails and glue. However, you can always use a band saw or even a reciprocating saw for cutting this profile.
Step 17 – Attaching the top shelf pieces
The next step is to attach the top shelf pieces, and for that, you will have to cut the pieces number 16 and nail and glue them on the top shelf support. But keep a gas of 0.25 inches right between the boards.
Step 18 – Adding decorative supports (optional)
This step is entirely optional, and you can skip it if you want to. Just cut the pieces number 17 and nail them right into the backsplash. It would be better for you to field measure and trace, and cut according to your build.
Step 19 – Making dowel supports
You can proceed with this step by cutting your piece number 18 from the 4×4 and use a table saw to make the cutting job easier. After that, drill 1-inch diameter, four holes, and they should be one inch deep as well.
Step 20 – Attaching the dowels and supports
You need to cut and glue the pieces number 19 and 20 right into those pierced number 18. Screw and glue them on the right side of your table, and you can choose the height according to your preference.
Step 21 – Attaching the horizontal side pieces
Now cut and glue piece number 20 right on the opposite side of these dowels, and their height can be according to your preferences. Instead of wood, you can use a metal rake as well.
Step 22 – Adding the faucet, sink, tool storage, and finishing
In the end, you need to add the faucet on riser support that is hallowed and attach it directly to the countertop. Then you need to install the drainage sink and drill holes in it using a 0.24-inch drill bit. Always use silicone for adherence. You can add tool storage, but that is strictly optional, and paint and finish the job in the end.
Top 5 Do it yourself Potting Bench Ideas
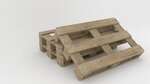
Do it yourself potting bench from pallets
Using wood pallets for potting bench is a good idea. Wood pallets are available in most households, but you can’t find much to do about them most of the time. A fun thing to bring them into use is a do it yourself potting bench.
Do it yourself potting bench from old door
You can also use an old door and cut out some pieces from it for the legs and the countertop and join them according to the steps elaborated above and voila. Of course, you will have to paint it for finishing as well.
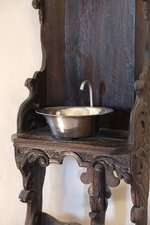
Do it yourself potting bench with sink
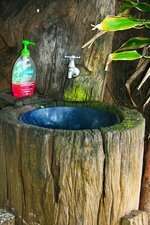
If you need a sink in your potting bench, which we think is a must-have for gardening and other outdoor chores, you will need an additional galvanized sink to fit in and attach a faucet we have mentioned above.
Do it yourself potting bench with garbage can
To keep things clean in your garden and outdoor space, you can have a do it yourself potting bench with a garbage can enclosure. You can place the can inside a cabinet or put it on one of the shelves. The choice is yours.
Do it yourself potting bench with decorative roof
Another option for you is to add a decorative roof to your do it yourself potting bench and make it look stylish and well-aligned with your garden. You can even place a birdhouse on top of it if you want.
How Do You Dress Up a Potting Bench?
There are various ways of dressing up your do it yourself potting bench. First, you can add a sink, as we did in our elaboration above. You can also install a separate toolbox on your bench for easy access whenever you need it.
Adding a roof on top of the bench will give its statement and make sure it blends well with the surroundings and outdoors. Also, make sure you do a print job that looks nice, and later on, add some of those lights to your potting bench to brighten things up. You can also place some flowering plant pots on your bench as well.
FAQ
Why do potting benches have a sink?
It can collect debris and soil, and you can do some pot cleaning jobs pretty effectively if there is a sink in your potting bench.
What kind of wood should I use for a potting bench?
Cedarwood is the best option to go for though you can pine wood as well. But if you are looking for durability and usefulness, then go for redwood because it is soft.
How much is a potting bench?
Based on the features that come with it, these potting benches can cost you around $50 and up to $300. Some are pretty expensive as well if you are looking for more features.
How big should a potting bench be?
The common height for a potting bench needs to be around 36 inches, just like your kitchen counters. But you can also go for potting benches with different heights.
Can you keep a potting bench outside?
You can keep a potting bench outside, but it would be better for you to keep it under the shade.
Conclusion
So, what’s your idea for your next do it yourself potting bench? Are you going for a sink, or do you prefer to have one with a roof? No matter what your preferences are, a potting bench is a useful piece of furniture that you can use for your garden work as well as outdoor chores.
How big should it be? Well, that depends upon how you are planning to use it. But no matter what you do, these potting benches are pretty handy, and the good thing is that you can make them conveniently on your own.
