Different types of do it yourself shed kits are available on the market, and finding the right one is critical. Here we’ll guide you on choosing the best shed kit that caters to your needs and how to assemble it.
We will also discuss some finishing touches that you can go for, and you will love your do it yourself shed kit.
Building a Shed Using A Kit – Step by Step
Building a shed using a kit is not easy, especially if this is your first project of its kind. You always need some do it yourself skills under your belt. But first, you need to make some choices aligned with your shed purpose.
Finding the right kit
You can go for a small shed for your garden tools or a large shed for your mower or any of your balcony or outdoor furniture that you don’t use very much. Maybe you are looking for an industrial shed that is of workshop size. For the people who have some do it yourself experience, such a type of shed works the best.
Make your choice based on size and available space, and type. You might want a huge concrete shed in your backyard. But if the land is uneven, this is not the ideal type to choose. Therefore, you must have a plan in mind to lay a proper foundation before you order something.
Planning permission is another essential point to consider before ordering your kit. Your local council has a set of rules and regulations to follow when doing any construction.
If you don’t want to get a permit, you must follow the instructions and keep the size under check. Most regions allow sheds smaller than 10 square meters without any permits.
Some tips to keep everything under control
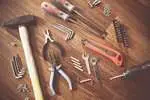
There are a few things to keep in mind to have total control over your do it yourself shed building project. First of all, you need to have all the tools at your disposal.
- Safety knife
- Safety goggles and gloves
- Tape measure
- Power drill (with a Phillips driver bit #2)
- Level
- Pliers
- Step ladder
- Chalk or pencil for marking
Most do it yourself shed kits allow you to assemble your shed on your own. But for fastening the roof panels and going through the entire process smoothly, you will need some help. Having a good work area will also help in faster assembly times.
Joining the shed panels on a large work table is a lot easier. Also, keep in mind not to do any assembly on a windy day because these high winds damage your panels and lead to a personal injury.
When your do it yourself shed kit arrives, you need to familiarize yourself with all its components. It would be better if all these components come with labeling, and there is a checklist in the kit for all the components to make sure that nothing is missing.
Step 1 – Assembling the back panel
You will make a back panel assembly with sheets and a couple of U channels. For assembling this, you must overlap these sheets and fasten them. After that, you need to affix these U channels with the higher side inside the shed.
These U channels need to be flushed with one another at the end of the panel to give you a rectangular back panel.
Step 2 – Assembling the side walls
In case you have bought a skillion roof or a gable-roof shed kit. The side panels will be of sheets with varying angles.
It will allow you to make a pitched roof that will look a bit different, which will be slightly different from a flat roof. You should assemble each of these side panels one at a time by overlapping those sheets and securely fastening them.
There will be three U channels if you have a gable roof kit, and you will have to affix them to the bottom and top of your panel. A gusset also needs to be fixed between the two U channels that are there on top. Do the same with your other side panel as well.
Step 4 – Attaching ridge beam with the roof panel
You will have to attach the ridge beam with the roof panel if you have a gable roof shed kit. For doing this, you need to flip the panel over so it’s inside faces up.
The beam will slide over the U channel and overlap with L flashings. After your beam is aligned, you need to fasten it to that U channel and ensure the screw tip is present within the roof panel’s hollow rib.
Step 5 – Assembling the door
This is mainly a tricky step because you have to be sure when you hang your doors, they need to be aligned appropriately or not function adequately.
Your kit might have one or two-door panels as well, and each of them has a sheet, a vertical U channel, a couple of horizontal U channels, a hunger U channel, a door lock, and jambs.
When you fasten the U channel with the jamb, make sure that they are both adequately aligned with the door sheet and its vertical rib lines. Fastened the door lock on one side halfway up the door.
Step 6 – Assembling front panel and attaching the door
The front panel will have a door on it, so you need to be careful during the alignment. Some kits come with a design where the door sits right in the middle of the two sheets. Others come with a single sheet. Pay attention to your shed kit instructions and confirm the placement of the U channels.
When attaching the door, check to see it fits well, and the opening needs to be the same from top to bottom. It’s time to flip the panel and fasten those door hinges.
There are a couple of internal locks that you can fasten to the U channels having an overhang of 50mm. Fasten the door braces to the inside of the door.
Step 7 – Installing walls
Now all your panels are fully assembled, and it’s time to install and fasten them. You need to execute this step if there is no wind around.
Layout all the walls with the exterior facing down and begin with the adjacent panels so they can rest in the cutout sections of the rear and front U channels.
Fasten them and do the same with the other two adjacent walls. Make sure the base is even by taking the diagonal measurements.
Step 8 – Installing roof
The final step is to install the roof, and you will need a step ladder. Make sure not to climb on the roof because it might damage the panel or cause personal injury. Slide the roof panel into the ridge beam and its position.
The beam needs to be directly aligned right over the center of the sidewalls. Fasten it with a couple of screws in the L flashings, place the second panel, and attach it to the ridge beam.
Recheck your diagonal measurements right at the base, and if they are equal, you need to fasten the corner and the center of your roof panels with the rear and front walls.
Now, fasten the roof with the walls from the outside through the sheet directly to the U channels of walls. In the end, you will have to fasten the shed to your base.
Benefits of Using a Do It Yourself Shed Kit
There are various benefits of using do it yourself shed kits. You not only get to live another day as a DIY handyman, but you can also show off your work to others for admiration. But there is more on offer here when you are using a do it yourself shed kit.
- It allows you to save a lot of time building your shed because all the angels are precise, and you will get all the hardware in the kit.
- Nothing is needed from the outside except the tools for installation.
- These kits can be delivered right to your doorstep, and you won’t have to deal with carrying or transporting them to your home from the warehouse.
- These kits come with a warranty as well, and they can last for many years to come.
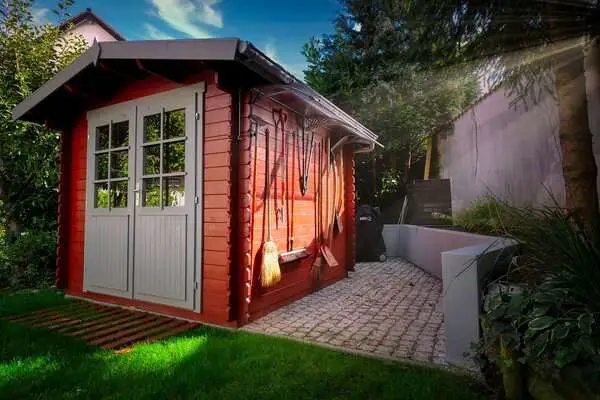
- There are various colors available, and you can match them with the color of your home if you want.
- The kit is complete and includes everything from panelized roofs to wall sections. The doors are fully functional and pinned, and you will also get the hardware and fasteners.
- You won’t have to do any drilling or cutting at all.
- These kits come with all the instructional papers to eradicate any mistakes or confusion.
- You don’t need to have any handyman expertise to install, and you can build instantly with a little bit if you do it yourself skill set.
- Such a kit allows you to save a lot on installation costs.
- You can utilize your shed as a storage house, workshop, man cave, playhouse, mini gym, barn, she shed, pet house, mini bar, entertainment room, home spa, and so much more.
FAQ
How difficult is it to assemble your do it yourself shed kit?
It’s not difficult because the kit comes with all the instructions you need to assemble it. The components are precisely cut, and all the hardware is there to use. Just make sure you follow the instructions carefully to avoid any inconveniences.
How long does it usually take to assemble a do it yourself shed kit?
It entirely depends upon the overall size of the shed. Usually, it will take about one day to assemble a full 10×10 feet shed kit.
You will need a team of two, and if you both have some do it yourself experience under your belt, you can erect your shed in less than eight hours. You will need some extra time to build the foundation if you are looking to paint your shed.
Are these do you shed kits durable?
These do it yourself shed kits resemble a Lincoln Log design which is very popular to build homes in Scandinavia and Northern Europe for many centuries.
These shed kits come with a floating cantilever construction type similar to the technique used by Frank Lloyd Wright when building the Imperial Hotel of Tokyo to handle earthquakes.
Therefore, these sheds can handle earthquakes and do well in a hurricane.
Is a permit required to build a shed?
Different countries have different requirements for permits, and it may vary from town to town as well. You need to contact your local building department to build your shed.
What is there in a do it yourself shed kit?
These kits include roof and wall components, doors, windows, all hardware with additional sheets, floor sheets, and various other pre-cut parts. You will have to acquire materials separately for the foundation, and these include anchors, materials for the walls and roofs.
Conclusion
There you have it. Do it yourself shed kits are useful to build or assemble your shed in no time. These kits include special instructions and 3D drawings to help you.
These kits utilize your space productively, and you can significantly increase your property’s overall value.
Furthermore, you don’t need much experience to tackle such a project, but you will need an additional pair of hands when erecting the walls and placing the roof panels. You can conveniently complete your entire project within a day and customize it according to your preferences.
