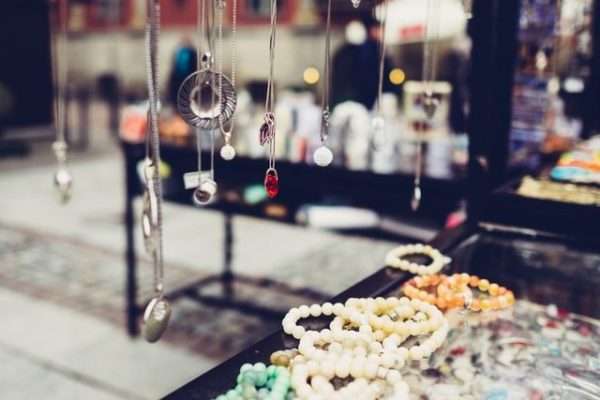
A DIY jewelry hanger is the best way to keep your jewelry organized in one place. If you have ever tried to untie a massive pile of entangled chains, you know how hard it is. That’s the reason why a DIY jewelry hanger is super essential.
We may say that women are freaks of the organization, but that is a myth. Women can organize things only when there is a space for each of their staff. A DIY jewelry hanger is needed in order to create a space for each specific piece of jewelry. However, it is not only that; a DIY jewelry hanger can also be used as decoration. Imagine a wooden wall hanging with all the colorful summer necklaces; it is like a piece of art just by organizing your space.
It’s worth mentioning that not many places on the market sell jewelry hangers; it usually slips the mind. However, we could say that it is almost necessary to keep the jewelry protected and untangled. A DIY jewelry hanger craft will sell like crazy if you promote it right and sell it on the right websites. It will seem like an innovative organizational craft that everyone wants to have at home.
So, keep your jewelry organized and make some extra cash just by following those brilliant DIY jewelry hanger below.
Each of those DIY projects can be personalized and customized in various ways, so don’t suppress your creativity.
Small Toy Jewelry Hanger
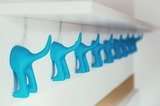
If you have some small toys that your kids don’t play with anymore, it is a great start for your DIY jewelry hanger. Gather some small plastic animals or plastic baby toys from your kids and start building your crafts.
Supplies you need
- wooden plank
- some plastic toys (as many as you want)
- spray paint of your choice
- glue
- pencil
- ruler
Guide to follow
Step 1
Draw a straight line in the middle of the wooden plank with the pencil to create the guiding line for where to screw the plastic toys.
Step 2
Cut the plastic toys in the middle; you can even do that by using scissors.
Step 3
Follow the straight line you drew before and stick the pieces of the plastic toys with the glue. It’s up to you how many parts you want to use. A good tip is first to count the jewelry you want to hang and then create the craft. Add the glue, press the toys firmly to stick, and then let them dry out for one hour.
Step 4
Now it is the fun part. Grab your color spray and spray your craft until it is fully painted.
Step 5
If you want to hang it on the wall, turn the wooden plank around and add some D-rings on the back… and your DIY jewelry hanger is ready to use it.
A small toy jewelry hanger is an easy and quick craft; it only takes a maximum of one hour to be completed. It is the best craft if you want to create something innovative and funny, from things you already have at home.
Except for that, the small toy jewelry hanger is a craft that women would love to buy, as it is not only a piece of wood but can also give a different look to the whole room. Before placing an order, let the customer personalize its hanger, ask what kind of plastic toys they want or what shapes. Go with the personalized and customized style, and you can earn a lot more.
Wooden Wall Hanger
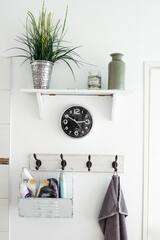
Before creating this craft, you’ll never realize how much jewelry you have. When you are ready to hang all your jewelry, you will see how many pieces you have forgotten and how much easier it is to use them all now. If you want to organize your jewelry in the best way, a big wooden wall DIY jewelry hanger is the best option.
Supplies you need
- four pine boards (good to go for 1.2 inches thick and 3 inches wide)
- nails
- masonite
- wallpaper or even paper bags with shapes
- small wooden/paper boxes
- wood sewing spools
- hooks
- two cabinet door knobs
Guide to follow
Step 1
Cut four pieces of the pine boards on the desired size, and then nail those four pieces together. A rectangular shape is always easier to use and fits all types of your jewelry. Color it on the desired color with a spray suitable for wood.
Step 2
Now it’s time to create the back of your craft, which will hold all the jewelry. Go for a piece of masonite, as it is light and perfect for the job. Fit the masonite piece within the wooden frame.
Step 3
You can add some small boxes to the bottom of your frame to create some space for your rings. Color the boxes to make them shiny and glue or nail them on the bottom of the frame.
Step 4
It’s time to add fun to your craft. Attach the personalized wallpaper on the back of the craft, and make it a colorful wall. To make it more creative, add some color and shapes to the small boxes. You can create some paper lines or even attach the same piece of wallpaper.
Step 5
Place the wood sewing spools, the hooks, and the cabinet door knobs around the box. Arrange them in a way that there is plenty of space for the long necklaces to hang. Make a small cut on the thin wallpaper and glue your knobs and spools directly on the masonite.
Tip: Make sure you make a careful and tidy cut, as you need to make it as professional as possible.
Step 6
Attach some D-ring on the back. If you created a big craft, screw more than two D-rings to ensure it stays steady on the wall.
It’s time to hang it and organize your jewelry. You’ll be surprised with the extraordinary result and the decoration that it adds to the room.
If you created a giant wooden wall jewelry hanging, you could sell it for a lot more than you think. Craft with love and professionalism and sell it for more than 60 dollars. It is a craft that can cover an entire wall. Before you sell your DIY jewelry hanger, you can ask the client what color and wallpaper wants or even ask about the dimensions.
It is about an easily made and cute addition to a room that you wish you had made earlier.
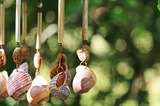
Driftwood Jewelry Hanger
If you want to create an eye-catching craft to hang your necklaces, bracelets, and earrings, the driftwood hanger is the best craft. Apart from the eye-catching part, it is one of the easiest hangers you can create, as you only need few standard supplies.
Supplies you need
- driftwood
- acrylic craft paint
- screw eye hooks
- cotton twine
- paintbrush
- painter’s tape
- sandpaper
Guide to follow
Step 1
Take the driftwood and smoothen it up with sandpaper. You can find driftwood at any craft shop or woodshop. This part is essential to protect your jewelry from minor accidents and scratches.
Step 2
Use the painter’s tape to create the colorful stripes on the wood. You can measure the distances between the strips or even go for a random free shape to make it more natural.
Step 3
Start painting! Go for any color you like. I personally tried some gold colors to make it look luxurious and natural. However, you can totally customize the colors and match them with the personality and taste.
Step 4
Remove the tapes, and you’ll be left with some extra stripes. If you like drawing, add some random lines or shapes (triangles, stars, etc.). Some pink and white drawings can seem perfect on the driftwood.
Step 5
Screw the hooks in the driftwood by your hand. You need to apply plenty of strength in order to make it steady. Measure specific distances between the hooks if you want to make it perfect.
Step 6
Simple add a string looped around both ends of the stick and hand it from a nail in the wall.
The driftwood jewelry hanger is a great rustic DIY jewelry hanger to make and decorate your space. Place it on the wall and hang all your long and short jewelry. It is a craft that can give you a 100% aspect of your jewelry. Never again forget what you have in your drawers.
If you find larger driftwood and hooks, you can use them for your scarves or belts.
Create an online shop and add all your hanger crafts. Give your customers personalized and customized options, and you’ll notice that your business will go up. Jewelry hangers are missing from the market because no one thinks that they are necessary. However, if you create beautiful DIY jewelry hangers, you’ll see that people will love them, and they will always ask for more.
DIY jewelry hangers are also an easy craft to start your DIY hobby, they don’t need much time or supplies, and you can correct any mistake easily. Why don’t you try it?
If you love reading this article, try to read our previous article, “DIY Jewelry Tips and Ideas,” and learn about more jewelry crafts that you can add to your business.