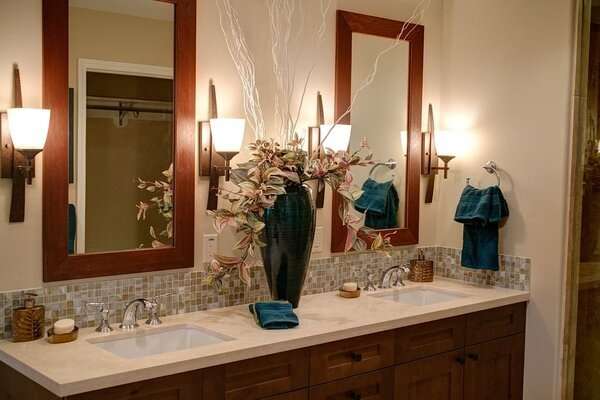
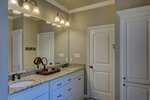
Vanity is a handy piece of bathroom furniture. Not only does it hold the sink, but it also gives you storage space for all your bathroom essentials. Not to mention, it also helps hide the plumbing and adds a stylish touch to your bathroom. So, if your vanity is outdated, you can give your bathroom a fresher look with your own do it yourself bathroom vanity makeover.
Since bathroom renovations can be pretty expensive sometimes, we bring you easy do it yourself bathroom vanity makeover ideas in this article to help you save money.
Paint the Vanity Cabinets
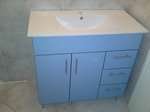
Painting your vanity cabinets is one of the best do it yourself bathroom vanity makeover ideas. You’ll be surprised by how much change it can bring to your bathroom.
What you’ll need:
- Screwdriver
- Trisodium phosphate (TSP)
- Protective goggles
- Rubber gloves
- Wood filler
- 200-220 grit sandpaper
- Paintbrush
- Paint roller
- Primer
- Paint
- Painters tape
Step 1:
Start with uninstalling the cabinets. Also, remember to remove the handles and hinges because painting them can affect the functionality of the cabinets. You can use a screwdriver to uninstall the hardware.
Step 2:
Take a sponge and clean the cabinet boxes and the doors with trisodium phosphate (TSP) to remove any dirt or grease. It’s important to wear protective goggles and gloves while handling trisodium phosphate. Now, rinse the doors with water and fill any scratches with wood filler.
Step 3:
Sand the doors with 200 to 220 grit sandpaper. This will help smooth the wood and remove the gloss. Sanding the wood also gives a better finish.
Step 4:
Now, prime the cabinets and the frame using a brush and roller. Usually, paints already have a primer, but it’s better to use a dedicated primer to ensure a smooth finish. If your cabinets have a shiny surface, it’s best to use a shellac-based primer to prevent the paint from peeling off. Once you’ve applied a coat of primer, let it dry completely, and then sand it. Next, clean the surface and apply the second coat.
Step 5:
Now, paint the cabinets and the cabinet frame with your desired color. It’s always best to paint the back of the cabinet doors first to test how the paint would look. Before you start painting, remember to cover the walls and vanity top with painters tape. Also, cover the floor with a cloth to avoid any mess.
To paint the vanity, apply a coat of paint with a paint roller and let it dry completely. Next, apply two more coats to ensure a smooth finish. Remember to allow the paint to dry overnight.
Step 6:
Finally, reattach the handles and reinstall the door to the frame by screwing the hinges. You can also spray-paint the handles before reattaching them for an even better look.
Replace the Cabinet Doors
Although this do it yourself bathroom vanity makeover idea requires time, it is a great way to update your bathroom. Here’s how you can make your own cabinet door:
What you’ll need:
- Lumber (2 stiles, 2 rails, 1 panel)
- Table saw
- Miter gauges
- Tape measure
- Wood glue
- Clamps
- Pencil
- Screwdriver
Step 1:
Before you start making your cabinet doors, you have to pick the right hardwood. Poplar is a great option as it is budget-friendly and long-lasting. For panels, you can use plywood.
Once you’ve bought lumber, measure the desired length of the stiles and rails. The length of your stiles should be equal to the height of the door plus 1/8 inch. To determine the length of the rails, measure the total width of two stiles by placing them side by side and subtract this number from the door’s desired width.
Step 2:
Take two miter gauges and create a stop block system. This will help in making identical cuts. Now cut the stiles and rails, with the table saw, to the length you’ve measured in the first step.
Step 3:
Put the stiles and rails together and mark the pieces with a pencil using the cabinet marker triangle system. This way, you can keep track of the parts.
If you don’t know what a cabinet marker triangle is, you will find this video helpful:
Step 4:
The next step is to create mortise and tenon joints for joining the stiles and rails. First, cut the grooves. Next, cut the tenons.
Learn how to cut mortise and tenon joints by hands with this video:
Step 5:
Next, cut the panel. To figure out the size of the panel, measure the distance between two tenons by putting together three sides of the door.
Step 6:
Glue the stiles, rails, and the panel together using wood glue. Remember to put the glue in the grooves of each part of the frame.
Step 7:
Now, clamp the door to make sure the joints are tight. It’s best to leave the clamp for at least one hour.
Step 8:
Next, uninstall the old cabinet doors by removing the hinges using a screwdriver. Lastly, install hinges on the new door. You can also use the hinges of your old door.
Change the Faucet
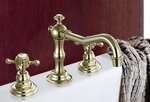
With this simple do it yourself bathroom vanity makeover idea, you can modernize your bathroom vanity. Installing a faucet may seem like a difficult task that requires many tools, but that isn’t the case. You can complete this project in just about an hour or so.
Learn how to replace your old faucets with this easy DIY faucet replacement tutorial:
What you’ll need:
- Basin Wrench
- Silicone caulk
- Supply lines
- Bathroom faucet
Before you begin, it’s important to choose the right type of faucet. Check the number of holes your sink has for the faucet and pick the new one accordingly. Also, when choosing a faucet, it’s best to pick a color that compliments your vanity hardware.
Step 1:
First, you have to uninstall the old faucet. To do so, turn off the water supply through the valves located under the sink. Then turn on the faucet to ensure there isn’t any water remaining in the pipes.
Step 2:
Disconnect the old faucet’s supply lines and lift rod. Next, uninstall the faucet by removing the nuts.
Step 3:
You would have to change the drain as well if your old faucet came with a matching one. To do so, start with removing the P-trap. Remember to keep a bucket near you to collect the water while disconnecting the drain. Next, remove the drain from the sink and clean the area. You can clean old silicone sealants with mineral spirits.
Step 4:
Now, it’s time to install the new faucet. The installation depends on the type of faucet you have. For a Centerset faucet, start with inserting the gasket. Next, set the faucet in place and tighten the nuts.
Step 5:
Now, install the rubber washer and drain unit from the top of the sink. Remember to use silicone caulk between the rubber washer and the sink. Next, put the ball rod in the drain unit and the lift rod in the faucet. Before attaching the ball rod and lift rod strap, ensure that the ball rod is downward.
Step 6:
Next, connect water valves and supply lines. To check if the new faucet is installed properly, uninstall the aerator and turn on the faucet. Now look for any leaks and tighten the connections accordingly.
Replace the Sink
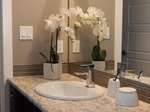
This do it yourself bathroom vanity makeover idea is another great way to give your outdated vanity a contemporary touch. When you don’t have enough budget to replace the whole vanity unit, you can give it a new look by replacing the sink.
If you’re looking to install a countertop sink using your existing plumbing, follow the tutorial below:
What you’ll need:
- Adjustable wrench
- Plumber’s putty or silicone caulk
- Tape measure
- Knife
- Screwdriver
- Pliers
- Drill machine
Step 1:
First, take the measurements (length, width, and depth) of your old sink. Next, measure your countertop’s width. You’ll have to buy a sink that has the same measurements as your old sink. Also, if you intend to use your old faucet, remember to check if the holes in the new sink match your faucet.
Step 2:
Once you’ve bought the sink, start with turning off the water supply. You will find the valves under the sink. Next, drain the remaining water by turning on the faucet.
Step 3:
Now, remove the faucet by disconnecting the supply line and line rod using an adjustable wrench. Next, disconnect the drain connection by removing P-trap and tailpipe using pliers.
Step 4:
Remove the clips that hold the sink, and then remove the sealant using a utility knife. Now, remove the sink.
Step 5:
Next, install the new sink. If your faucet connections are independent of the sink, it’s better to install the faucet first. To install the sink, start with drilling four holes in your countertop. These holes are required for clip screws.
Step 6:
Now, apply silicone caulk to your sink’s edges and set it in place on the countertop. Next, secure the sink with clips. Once you’ve installed the sink, install the faucet on the holes in the sink. You can follow the tutorial above to learn how to install a bathroom faucet.
Frame the Bathroom Mirror

With this easy and simple do it yourself bathroom vanity makeover idea, you can quickly add a touch of style to your bathroom.
What you’ll need:
- Wood beams
- Table saw
- Chisel
- Hammer
- Paint
- Paintbrush or paint roller
- Wood glue
- Painters tape
Step 1:
First, measure the size of your bathroom mirror. Then cut the wood you’ve selected for the frame accordingly. Keep the size of the frame about an inch more than the size of your mirror. You can use a table saw for cutting the wood. For a more perfect look, cut the sides of the frame at 45° using a miter saw.
Step 2:
Next, you have to cut around mirror clips. To do so, place the pieces of the frame around the mirror and mark the wood where the mirror rings would align. Now, make a gap in the wood where you drew the lines for clips. You can use a hammer and chisel for this purpose.
Step 3:
Now, paint all the parts of the frame before attaching them to the mirror. To do so, start by sanding the wood. Then clean it properly and apply a coat of paint using a paintbrush or paint roller. Allow the frame to dry then apply another coat and let it dry.
Step 4:
Next, attach the frame to the mirror using wood glue. Dribble the glue on the back of each piece of the frame and on the corners. You can use painters tape to hold the frame in place until the glue dries. Finally, remove the painters tape.
Use an old frame
You can also upcycle an old frame from a wall hanging or mirror that you don’t use anymore. This idea will work if the frame is bigger than your bathroom mirror, as you can cut it according to the size of the mirror.
Update the Vanity Lights
There are so many ways to update the vanity lights, and doing so can make a big difference, more than you think!
Replace the whole fixture
When it comes to replacing the light fixture, you have so many options, such as scones, mirror lights, track lights, etc.
Here’s how you can replace your bathroom light fixture:
1. Start by removing the old bulbs. Then take off the base by removing all the screws that hold the fixture to the wall.
2. Once you’ve removed the old light fixture, check if there is a junction box. If there isn’t one, it’s better to install a junction box for structural and safety purposes.
3. Next, attach a light base plate to the junction box. Remember to set the position (vertical or horizontal) of the plate according to the style of your light. Next, fill up any holes that aren’t required.
4. Now, connect the copper wires from the wall and the light to the base plate. Then connect the white wires together. Do the same for the black ones. If you’re not sure about wiring, it’s best to call an electrician.
5. Next, mount the new fixture on the wall using screws. Now, install the bulbs.
Add new bulbs
If you’re looking for a more affordable option, you can change the bulbs only. If you have old-style bulbs, you can replace them with halogen bulbs to give the light fixture a more modern look.
Paint the base of the light fixture
If the base of your fixture is made of wood or any other material that can be painted, you can instantly give it a new look with a different color. Remember to remove the bulbs before you paint the base.
Split a single light unit into two
If you have a single light fixture with too many bulbs, you can split it into two separate fixtures. For example, if your light fixture has six bulbs, you can turn it into two units with three bulbs each. You can follow this easy tutorial to learn how to convert a single light fixture into two.
Add Hollywood style vanity lights
Another budget-friendly option is to add Hollywood-style LED vanity lights to the bathroom mirror. This do it yourself bathroom vanity makeover idea will brighten up your bathroom and also add style to your vanity.
Replace the Vanity Top
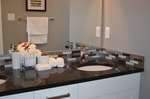
When you want to bring a major change to your bathroom vanity, replacing the top is a good option.
Bathroom vanity top options
Although many vanity top options are available, these are the most popular ones:
- Granite: Granite is among the most popular bathroom vanity tops because of its elegance and resistance to humidity and heat. Granite tops are available in a lot of different colors and designs. These tops are a great option when you want to give your vanity a more modern touch.
- Marble: Marble tops are desired for their beauty and are known to add a luxurious look to the bathroom. However, these tops are a bit expensive.
- Quartz: Quartz is known for its durability and waterproof nature.And its resistance to stains makes it a perfect option for vanity tops. Quartz tops can instantly add a contemporary touch to your bathroom.
- Concrete: Concrete may not be a fancy option like granite or marble, but it is an affordable way to update your vanity. Also, concrete tops are available in several different textures.
- Tile: Tile vanity tops are a unique way to update your existing vanity. You can choose from ceramic, porcelain, ceramic, etc. You can create a customized look from different patterns and colors of tiles.
Steps for replacing the vanity top
What you’ll need:
- Tape measure
- Adjustable wrench
- Silicone caulk
- Utility knife
- Pipe wrench
- Screwdriver
Step 1:
Start by measuring the base of your vanity using a tape measure and purchase your new vanity top accordingly. If you want to use your old sink, you can buy a top with an opening cut out, or you can also opt for a top with a built-in sink.
Step 2:
Now, turn off the water supply and then disconnect the drain. You can use a pipe wrench to disconnect the drain pipe. Next, disconnect the supply lines. Then remove the faucet. You can follow the DIY faucet replacement tutorial in this article to learn how to uninstall and install a faucet.
Step 3:
Next, remove the clips that hold the vanity top using a screwdriver. You can reach the clips from the inside of the vanity base. Now, remove the top from the vanity base.
Step 4:
Before you start installing the new top, it’s better to check the supply lines and drain pipes and change them if they are damaged.
Step 5:
Now, install your new vanity top by placing it on the vanity base and securing it with clips. Next, install the faucet.
Step 6:
Next, apply caulk at the edges of your vanity top. You can use a caulking gun for this purpose. Remember to apply the caulk around the edges of the sink as well if it’s not already attached to the vanity top. Finally, turn on the water supply and then the faucet to check for any leaks in the drain pipes or supply lines.
Add New Hardware
This is a quick way to update your vanity. You can change your outdated cabinet handles, add a contemporary flower vase, and add elegant candle holders that match the other hardware. You can also add contemporary wall hangings.
FAQs
What is a vanity light?
The light fixture mounted above the vanity unit is called a vanity light. Vanity lights provide task lighting and allow you to see your face clearly in the bathroom mirror. The vanity unit essentially consists of a sink, the storage or cabinet built around it, and the mirror.
Should I paint or stain my vanity cabinets?
Painting the cabinets provides a more neat, smooth, and beautiful look. And it also hides the grain of the wood. If you’re looking for a natural and traditional look, staining the cabinets is a good option. You can also mix painted and stained cabinets.
What can I do with my old vanity?
You can sell your old bathroom vanity online on platforms such as the Facebook marketplace, or you can donate it to an NPO (non-profit organization) such as Habitat for Humanity. Upcycling the vanity is another great option.
Can I add drawers to the bathroom vanity?
Adding extra drawers to the vanity is a smart way to increase your storage space for extra bathroom essentials such as soaps, cotton swabs, etc. Hidden drawers can be built into existing bathroom cabinet drawers.
Final Words
Updating your bathroom vanity can bring a big change to your bathroom. From painting the cabinets to replacing the faucets, there are many do it yourself bathroom vanity makeover ideas that you can use to give your outdated vanity a modern touch.
If you’re looking to update your kitchen as well, check out our article on “Do It Yourself Backsplash: Amazing Kitchen Ideas.“
